The computer is not updated windows 10. Creating backups
The version consists in the fact that update packages constantly released by Microsoft, even when automatic search and installation is enabled, are not always installed. At the same time, the system displays a message stating that the Windows 10 update package could not be installed. Why this happens, and how to fix such failures, read on. There are not so many ways, but in most cases they turn out to be quite effective and eliminate the problems that arise.
Why updates fail to install Possible causes
As for the manifestation of such failures, there can be quite a lot of situations: from the banal impact of viruses to the errors of the system itself.
Sometimes the system may report that it was not possible to install some Windows 10 updates or configure them also due to the lack of free space in the system partition, clogged with incorrectly downloaded cache update files, firewall blocking the Internet connection, etc. But this is rare.
Windows 10 update fails to install: what to do first?
However, let's see what can be done in such a situation. If the user sees a message stating that the Windows 10 update cannot be installed, the failure may be due to the incorrect functioning of the service itself, which is responsible for the operation of the Update Center.

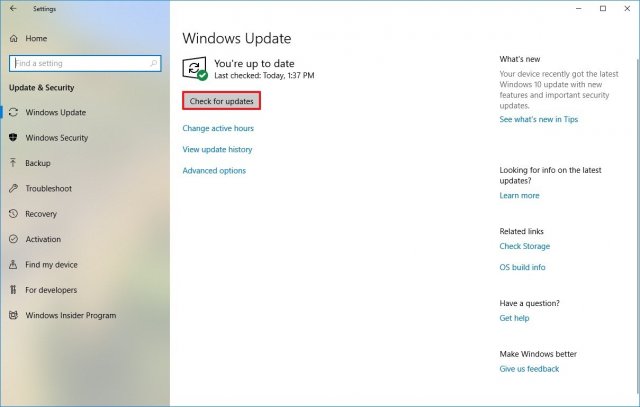
First of all, you can try to set the search for available updates in manual mode. To do this, use the settings section, called directly from the main Start menu, where the update and security menu is selected, after which the button for checking for updates is pressed in the Update Center. Everything that is found, at the end of the search, will need to be integrated into the system or select only what needs to be installed.
Along the way, in the same section, use the advanced options and make sure that the recommended automatic mode is used to check and install updates.
Troubleshooting system tools
Another method for fixing the situation when the system fails to install the Windows 10 update is to use the built-in troubleshooting tool, which is called from the classic Control Panel (control command in the Run console), where the search bar is selected in the system and security section and problem fixes.

Next, the use of the "Update Center" is selected, the "Advanced" button is pressed in the new window, after which the run as administrator is applied (you can also check the box on the line for automatically applying fixes).

Next, the troubleshooting process is activated. The results will most likely indicate database corruption of the Update Center itself, after which you need to use the patch application string. After that, a report on the resolved failures will be displayed.
Fix crashes with a utility from Microsoft
Let's consider another tool. Let's assume that after applying the described tools, the updates could not be installed (the Windows 10 update log may contain information about errors).
In this case, you can go to the official Microsoft website and download a small utility from it to prevent this kind of errors from appearing. It's called Windows Update Diagnostic.

After running the utility, you just need to follow the instructions, after which the report will show the problems that were resolved or not. If there is an entry regarding the Service registration component, you will have to check the integrity of the Windows system files (sfc / scannow on the command line, launched with administrator rights).
Activation of the "Update Center" service
However, it is possible that the system is unable to install Windows 10 updates just because the service itself is in a deactivated state.

You can check this in the corresponding section, which is called by the services.msc command in the Run console. Here you need to find the "Update Center" service, double-click to go to editing the parameters and check it. If the service start button is active in the window, then it is really turned off. We press the start button, and at the same time we check the startup type (it must be set to manual, as it was by default).
Actions with the system registry
Rarely, of course, but sometimes you can encounter update errors related to duplicating user profiles. This problem can only be fixed in the Registry Editor (regedit in the Run menu).

In the HKLM branch, you need to go down the directory tree and find the ProfileList directory there, as shown in the image above. In each directory, check for the presence of the ProfileImagePath parameter. If several sections contain a link to the directory of the same user, the extra lines must be removed. You can easily identify them. Only those lines for which the value of the RefCount parameter is set to zero, or those lines in the name of which there is “.bak” at the end, will be superfluous
SoftwareDistribution Catalog
Finally, very often problems with installing updates are associated with the SoftwareDistribution folder and its contents, which is located in the main directory of the system. To fix the problem, this directory must be renamed by adding, for example, “Old” at the end of the name and first disabling the “Update Center” service, as shown above, but with the system booting in safe mode.

You can also do this from a command prompt starting with administrator rights (or from removable bootable media), where you enter the command ren c:\windows\SoftwareDistribution SoftwareDistribution.old. After that, the system is restarted in normal mode. Next, you can check for updates. If the installation goes without problems (a new folder with the initial name will be created automatically), you can delete the renamed directory and re-enable the update service.
Read how to fix windows update error. What to do if an update has downloaded to your computer but is not installed automatically. Although many users do not consider it necessary to update the operating system of their computer, disabling the ability to download and install them, nevertheless, Windows Update keeps the computer up to date protection and its performance.
In the latest versions of Windows, Microsoft has done everything to ensure that updating the operating system depends on the user as little as possible and does not affect the operation of the operating system. But still, with a huge variety of hardware and software, there is always a chance for errors in the operation of the system, and Windows Update is no exception.
When Windows has downloaded the updates, you need to restart your computer to install them. Therefore, when shutting down or restarting the computer, the shutdown menu prompts the user to either "Update and Reload" computer.
Let's look at the situation when updates are not installed (or are not installed completely) and items do not leave the computer shutdown menu "Refresh and Shut Down" or "Update and Reload".
Content:Verify that the update is really not happening
In case of problems with Windows updates, download the program from the official Microsoft website and run it.

Click on Windows Update and click Further. Causes can be discovered when troubleshooting with administrator rights, so in the next window, select and in the window that appears, click again Further.

The tool will detect and fix problems with Windows Update. After that, go to Windows Update, click the button "Check for Updates", download and install them. Updates will be installed after you restart your computer.
Start Windows in Safe Mode
Safe Mode is a way to troubleshoot Windows that starts the system in a limited state: only essential files and drivers. Safe Mode is used to solve problems with programs or drivers that do not work correctly or prevent the system from starting correctly.
To start it, press and hold the Shift button, then select Restart from the Start menu. In the window that appears after restarting the computer, select Troubleshooting / / Download Options / Reload, after which the computer will boot into Safe Mode. Start the computer update process and after it is completed, restart the computer again.

Delete Windows Update Cache Files
Method I
If the Troubleshooter Windows Update found no problems, then the user can do the same manually: stop Windows Update, delete the temporary files it created, and run it again Windows Update. It will take more time, but the process is not complicated at all.
To do this, start the system in safe mode (as indicated above) and enable the command line (right-click on the Start menu and select Command Prompt (Admin)).
At the Command Prompt, enter the following commands:
net stop wuauserver
net stop bits

Method II
Go to the C:\ Windows\ SoftwareDistribution folder and delete its contents. Don't worry, these are just temporary files created by Windows Update and will be created again if necessary.
After that, go to the Command Prompt window and run the commands described above:
net stop wuauserver
net stop bits
The methods described above will surely solve the problem with operating system updates. Of course, the easiest and most effective way is to use the Troubleshooter Windows Update. But the other methods described will be no less effective, although some of them are more suitable for advanced PC users.
Have you upgraded to the next version of Windows 10 1809 and are having trouble using it? If so, this guide will help you solve them.
Like the previous version, Windows 10 October 2018 Update 1809 is a major update. It brings with it new functionality and improvements to personal computers, laptops and tablets. However, each such update carries the risk of introducing new problems.
Typically, major Windows 10 updates contain major changes to the code, which can lead to compatibility issues, driver issues, unexpected bugs, and other issues that can affect performance and usability.
In addition to unknown bugs, other problems that are not caused by changes in the system may appear. Sometimes an update fails to install due to incompatible software, outdated drivers, unusual hardware configurations.
Below we will consider possible problems and options for their solution.
Fixing Issues in Windows 10 October 2018 Update
There are two types of problems when upgrading to a new version of Windows 10. There may be errors during the installation process, which in themselves are not problems with the new version. And there may be issues related to system design, compatibility, etc.This guide will solve both problems during the installation process and after.
Fix download errors for installation files
If you receive error 0x800F0922, the device is most likely not connected to the Microsoft update servers, or the System Reserved partition is not large enough. Try doing the following:Turn off VPN
Then try installing the update again.Enlarge the System Reserved section

Sometimes third-party applications, such as antiviruses, can save their data in this section. In this case, there will not be enough space on it to install the system update. Use third party tools to increase partition size. You need at least 500 MB.
You can also perform a clean install of Windows 10 when a partition of the correct size is automatically created.
Update with Media Creation Tool
When trying to download the installation files, error 0x80246007 may occur. It shows that the file could not be downloaded.In this case, you can use the Media Creation Tool to install a clean version of Windows 10 when the partition is automatically created.
Troubleshoot installation errors

It is recommended to install updates through the update center. However, there may be errors in the work. To solve them, you can use the built-in error fix tool in Windows 10.

To do this, do the following: open the application Settings > Update and security > Troubleshooting > Windows Update > Run the troubleshooter. Click on the "Apply this fix" button, if available. Follow the instructions on the screen.
After that, restart your computer and try to update again by opening Windows Update.
Fixing unexpected installation errors

If there is a problem when trying to download the installation files, you may receive an error number 0x80190001. In this case, use the cleanup tool in the Settings app to remove temporary files. Do the following:

Open the Settings app > System > Device storage > Storage Sense > Free up space now. Select the "Delete temporary Windows installation files" option.
Then try installing the update again. If problems persist, use the Media Creation Tool to install.
How to fix problems with USB media
If the Media Creation Tool is not downloading updates

In some cases, downloading cumulative updates may freeze. If the Media Creation Tool cannot download the update, please restart the application. When the installation files have downloaded, disconnect the network cable or wireless connection. When the application times out, the installation of version 1809 will begin.
After completing the installation and initial system setup, reconnect the network to complete the installation process.
Fix installation issues via Media Creation Tool
Usually restarting the Media Creation Tool solves most errors, but if there are problems with dynamic updates, the application will continue to hang every time it tries to download the installation files.In this case, you should start the process manually:
1. Open File Explorer.
2. Navigate to C:\$Windows.~BT\Sources.
3. Double-click the Setupprep.exe file.

After that, the installation process should begin. If this does not happen, you can use the Update Assistant tool.
Fixing errors when creating a bootable flash drive
If you are using a bootable USB flash drive created with the Media Creation Tool, the installation process may fail. One or more files on the flash drive may be corrupted. It is impossible to fix them, so you should create the installation USB flash drive again. To do this, do the following:1. Download Media Creation Tool from Microsoft server.
2. Double-click the MediaCreationToolxxxx.exe file.
3. Click the "Accept" button.
4. Select "Create Installation Media" (USB flash drive, DVD, or ISO) for another computer.

5. Click the "Next" button.
6. Select the language, architecture, and revision version.

7. Click the "Next" button.
8. Select the USB flash drive option.

9. Click the "Next" button.
10. Select "Removable Disk" from the list.

11. Click the "Next" button.
12. Click the "Finish" button.
After completing these steps, you will receive a new installation flash drive with no corrupted files. It can install the latest version of Windows 10.
Fixing "The update is not compatible with your device" issue
Although the process of downloading and installing Windows 10 updates occurs automatically, if the device has not been connected to the Internet for a long time or you turned off Windows Update, when using the installation flash drive, an error may appear stating that the update is not applicable to your computer.
To solve the problem, make sure that the computer is connected to the Internet. Go to the update center and check for updates. You can also download and install the update manually.
How to fix Update Assistant issues with October update installation
Troubleshooting "Something Went Wrong"
If you use the Update Assistant to update, you may encounter error 0x8007042B and the message "Something went wrong." After that, the update installation process will be terminated. It is not clear from this message what exactly went wrong. You can try the troubleshooting steps.Try to remove unnecessary programs and antiviruses, disable unnecessary peripherals. Then run Update Assistant again.
If the error persists, use another update option. Try a clean install of Windows 10 or use the Media Creation Tool to create a bootable flash drive.
Troubleshooting an update download issue via Assistant Update
Although Microsoft created Update Assistant to install updates when Windows Update fails, sometimes the tool itself has problems. For example, problems with downloading installation files.Usually in this case, Internet access problems are to blame:
Disconnect and reconnect the network cable. Try unplugging the router and plugging it back in after a few minutes. Restart Update Assistant.
Restart your computer, run Update Assistant.
Try using Media Creation Tool instead of Update Assistant
How to Fix ISO Issues
When you try to update, you may receive error 0x8007025D - 0x2000C, which may indicate that one or more ISO image files are corrupted. To resolve this issue, use the Media Creation Tool to create a new image:1. Download Media Creation from the Microsoft website.
2. Double-click the MediaCreationToolxxxx.exe file to launch the utility.
3. Click the "Accept" button.
4. Select the "Create installation media (USB disk, DVD or ISO) for another PC" option.

5. Select a language, architecture, and edition.

6. Click the "Next" button.
7. Select the "ISO file" option.

8. Click the "Next" button.
After completing these steps, the Media Creation Tool will create a new ISO image that should allow you to update your computer or virtual machine.
If the error persists, you can try creating the image on another computer.
How to fix storage issues
Storage issues during installation
The system requirements say you need to have at least 20 GB of disk space when upgrading from the 64-bit version of Windows 10 and 16 GB when upgrading from the 32-bit version. If there is not enough free space on the hard drive, one of the following errors may appear:0x80070070 - 0x50011
0x80070070 - 0x50012
0x80070070 - 0x60000
0x80070008
0xC190020e

Open the Settings app > System Device storage > Storage sense > Free up space now.
You can select the following files to delete:
Previous Windows installations
Windows Error Reporting Files Generated by the System
Windows Defender Antivirus
Windows update log files
Downloads
Sketches
Previous Windows installations
Temporary files
Basket
Temporary internet files
Delivery Optimization Files
DirectX Texture Builder Cache
Important: Do not select temporary Windows installation files or Windows ESD installation files, as these files are required for the upgrade.

Click on the "Delete Files" button. After following these steps, you should be able to install Windows 1809 without issue.
If you can't free up enough space, plug in a flash drive or removable hard drive. You need at least 16 GB of free space so that Windows 10 can use it as temporary storage to perform an update.
Fixing missing or corrupted files during installation
If you get errors 0x80073712 and 0x80245006, they mean that one or more installation files are missing or corrupted. The solution to this problem is to open Memory Sense and delete temporary files.
Go to Settings > System > Device storage > Storage sense > Free up space now. Highlight "Previous Windows Installations" or "Temporary Files", click the "Delete Files" button.

After that, check for updates in the update center. You can also use the Media Creation Tool after updating your computer to version 1809.
How to Fix October Update Hardware and Software Compatibility Issues
Fix hardware compatibility issues during installation
You don't need to have the most up-to-date components to run Windows 10, but despite this, you may encounter errors 0xC1900200 - 0x20008 and 0xC1900202 - 0x20008 if the computer does not meet the minimum system requirements.This usually happens when only very old computers are upgraded. The minimum system requirements for Windows 10 are as follows:
Processor: 1 GHz
RAM: 2 GB
Storage: 16 GB for 32-bit and 20 GB for 64-bit
Graphics: Direct X 9 or later with WDDM 1.0 driver
Monitor: resolution from 800 x 600 pixels

Usually, computers already running Windows 10 do not have problems with system requirements when upgrading. However, budget models periodically have difficulties. If you see errors 0xC1900200 - 0x20008 or 0xC1900202 - 0x20008, these are usually RAM problems. In this case, you should increase the amount of memory.
Fix application and driver compatibility issues during update installation
When trying to install the Windows 10 October Update, there is a chance to see error 0x800F0923. It indicates an application or driver compatibility issue.This is usually a graphics driver error, it may be outdated or conflict with an old program or antivirus.
To find the specific source of the problem, you need to use the update through the Media Creation Tool or Update Assistant. When you follow the on-screen instructions, these tools detect and report hardware incompatibilities.

If the device driver is at fault, go to the manufacturer's website and download the latest driver. If not, you can uninstall the driver, install the update, and then reinstall the driver.

To do this, do the following: on the desktop, right-click on the "This PC" icon, in the context menu, click on the "Properties" command. In the "System" window, select "Device Manager" from the menu on the left. Select the device you need, right-click on it, select the "Uninstall driver" command.
After that, try updating Windows 10.
Driver incompatibility
If you are getting error 0x80070490 - 0x20007, one or more device drivers are incompatible. Error 0x80070003 - 0x20007 means that the installation process failed at the driver installation stage.When you see errors 0x80070490 - 0x20007 or 0x80070003 - 0x20007 after you roll back Windows 10 to a previous version, follow the steps above to uninstall your drivers.
Software incompatibilities
When an app is at fault, open the manufacturer's page to download the latest version. You can also temporarily uninstall the app and try updating Windows 10.
Open Settings > Applications, select the desired application from the list and click on the "Uninstall" button. Try installing Windows 10 and then reinstalling the app.
Fix driver compatibility issues during installation
When upgrading to any version of Windows 10, you may encounter an error that starts with code 0xC1900101. This indicates a problem with the driver. The options are:0xC1900101 - 0x20004
0xC1900101 - 0x2000c
0xC1900101 - 0x20017
0xC1900101 - 0x30018
0xC1900101 - 0x3000D
0xC1900101 - 0x4000D
0xC1900101 - 0x40017
There is also an error 0x80090011, which refers to the driver during the data transfer process.
Solutions can be the following:
Disable unnecessary peripherals
To get rid of the driver error, disable peripherals with all drivers. After that, update and connect the devices again. You can disable all unnecessary devices such as removable drives, printers, cameras, leave the keyboard and mouse.Update device drivers

If you are getting errors 0xC1900101 or 0x80090011, you need to make sure you have the latest drivers installed. Open the "Task Manager", select the desired device and click on the command "Update driver" in the context menu. You can also temporarily remove your device before you update Windows 10.
Alternatively, you can download the driver from the manufacturer's website and install it manually. There may be separate instructions for installing video card drivers.
Free up disk space

Insufficient disk space can also be the cause of error 0xC1900101. You need to free up at least 20 GB on your hard drive. How to do this, we have already described above.
Restoring the current version of the system
Windows 10 includes the System File Checker (SFC) and Deployment Servicing and Management (DISM) command-line tools to repair your current installation and fix potential device driver issues. Try SFC commands first, then DISM if necessary.Hard drive repair

Windows 10 also includes the CHKDSK command to check and fix hard drive errors. Click on the start menu, type cmd, in the run window type chkdsk /f c: and hit enter. If necessary, type Y and press enter to schedule the scan.
After completing these steps, restart your computer to start checking hard drives.
Manual update
If all else fails, you can perform a clean install of Windows 10 using the Media Creation Tool.Fix app compatibility issues during installation

If you see error 0xC1900208 - 0x4000C, one or more applications are not compatible with the update. The easiest way is to temporarily remove these applications. Third-party antiviruses are usually to blame. How to uninstall applications is described above.
If you uninstall classic desktop applications, you may need to take additional steps. Follow the instructions on the screen.
How to fix issues during the October 2018 Update installation process
Windows 10 fixes before installing a new version
Usually, after running Windows 10 for a long time without necessary maintenance, performance starts to drop. Problems are piling up that may show up during the update installation process.To resolve these issues, use the SFC and DISM command line tools.
Fixes for problems at the beginning of the update process

You may receive error 0xC1900107 when you try to stop updating Windows 10. It means that you recently upgraded and need to uninstall the previous version.
Restart your computer and try installing the update again. If this is not possible, go to the "Storage Sense" section and free up space as described above. Then try installing the updates again.
Troubleshooting random reboots during update installation
When installing version 1809, you may see error 0x80200056 after an inadvertent reboot. You need to restart the update process and do not turn off the computer during installation.
Fixing bugs without admin rights
Error 0x80070522 means you are installing the update using a standard user account. For a successful installation, you must have administrator rights. If this is not a home computer, you must contact your system administrator to obtain these rights.Fixing problems with the completion of the update installation
When installing major or cumulative updates, two errors may occur:Error: Unable to complete installation of updates. Cancel changes. Don't turn off your computer.
Error: Unable to configure Windows updates. Cancel changes.

On Windows 10, there are known errors that occur when updates cannot be installed. We need to find the cause of the error.

The page on Windows Update has a section that tracks information about each update and their bugs. Open the Settings app > Update & Security > Windows Update > View update history. Look at the error code. Find a description of this code on the Internet. Possible solutions to the problem can also be described there.
How to fix problems after installing an update
Solving the October 2018 Update activation problem

If the device is not reactivated, you may receive error 0x803F7001 and the message "Windows is not activated" on the activation page in the Settings app.
You can use the Activation Troubleshooter. You can also wait a couple of days for Windows 10 to reactivate on its own.
Solving network problems
Sometimes, after successfully updating to the latest version of Windows 10, the device may lose internet access or the speed may be slow. The reasons can be varied, including software errors in the update, changing or resetting network settings during the installation of the update, or problems with the network adapter.
To troubleshoot, you need to open the Network Troubleshooter. Launch Settings app > Network & Internet > Status > Network troubleshooter. Follow the instructions on the screen.
Reset all network adapters

If the method above did not help, you can reset all network adapters. Go to Settings > Network & Internet > Status > Network reset > Reset now. All network adapters will be reset to their default settings.

Solving problems with a black screen after installing the update
Sometimes after installing an update, you may experience graphical problems in the form of a black screen. A Windows 10 update, a cumulative update, or a problem with your graphics card driver may be to blame. You can roll back to a previous version of Windows 10 until the issue is resolved.


Go to Settings > Update & Security > Recovery > Go back to a previous version of Windows 10. Click the "Get Started" button. Select the reason for the return, click "Next", refuse to check for updates, click the "Next" button twice, then the "Return to the previous build" button.
How to fix problems with the dark interface of File Explorer
One of the most notable changes in the October release of Windows 10 is the introduction of a dark File Explorer option. However, there are already reports of problems with this version of File Explorer. Because of these issues, the toolbar, background, and some other elements may appear white.You need to wait until the cumulative update is released, and in the meantime, there are a number of steps you can take.
Turn on and off

Go to Settings > Personalization > Colors > Default App Mode > Light. Then select Dark again.
Change the graphic theme

Go to Settings > Personalization > Themes > Windows.
Using a new account
If the problem persists, you can create a new account. If there is no problem with the color of the conductor, you can switch to work in this account.Fix screen brightness issue
After installing the October update, some users have reported problems with their brightness settings. For some, the brightness dropped to 50%, for others, the ability to adjust the brightness was completely lost. This may be related to the video card drivers. Install the latest drivers. You can download them from the manufacturer's website or update them through the "Task Manager".
If you already have the latest driver, you can delete the device in the Task Manager and reinstall the driver.
Microsoft removed the brightness button from the Battery section because it's in the notification center.
How to Fix Intel Audio Driver Issues
If you are trying to update using the Media Creation Tool and Update Assistant, you may receive an error saying "Your Attention Needed". Microsoft claims that Intel Display Audio device drivers have compatibility issues with this update. Because of this, the consumption of system resources and energy can be increased, which will reduce the duration of the work of laptops and tablets.If you see this message, it is recommended that you press the back button and cancel the update installation. Also, Microsoft itself is blocking the appearance of the update on such devices.
How to fix the problem with applications not accessing the Internet
Some users write that after updating the application from the Microsoft Store, they lost access to the Internet.Enable TCP/IPv6

In addition to TCP/IPv4, Microsoft Store apps and the Edge browser require TCP/IPv6 to be enabled. If you have applications that cannot access the Internet, make sure this protocol is enabled.

Open Control Panel > Network and Sharing Center. In the left panel, click Change adapter settings. Right-click on the desired adapter and select "Properties". Check the box next to "IP version 6 (TCP/IPv6)". Click OK.
Change network profile

If that doesn't work, you can change your network profile from private to public.

Open the Settings app > Network & Internet > Status > Edit connection properties. Select "Public".
Reset network settings


Go to Settings > Network & Internet > Status > Edit > Network reset > Reset now.
How to solve problems with the task manager
If the "Task Manager" has stopped correctly displaying the percentage of CPU usage, you are not the only one with this problem. There is no solution yet. Microsoft should release a software update.How to successfully upgrade to Windows 10 October 2018 Update
The process of installing updates on Windows 10 improves over time, but a large number of possible hardware configurations lead to errors. However, there are simple steps you can take to reduce the likelihood of these errors.Creating backups

Although the probability of errors is small, something can still go wrong. For such situations, Windows 10 has a rollback process, but it may not work. For this reason, it is always recommended to back up your system and user files.
A backup will help you go back to a previous version of Windows if you don't have access to the rollback feature in the Settings app.
If the installation fails, you will not be able to boot your computer. If there are problems after installation, you can use a full copy of the system to restore your computer.
Delete unimportant apps

Application incompatibility is one of the main reasons why you can't update. If you don't know which application is at fault, start with classic desktop programs and antiviruses. Apps are uninstalled in Settings > Apps > Apps & features. Select the desired programs and click on the "Uninstall" button.
In addition to incompatible applications, uninstall third-party antivirus and other security software. Naturally, it is not recommended to work for a long time without such protection. You can also disable Windows Defender Antivirus.
To do this, go to Settings > Update & Security > Windows Security > Open Windows Security > Virus & Threat Protection > Virus & threat protection settings > Manage settings. Uncheck the "Real-time protection" switch. After installing the Windows 10 update, the antivirus will turn on automatically.
If you remove a third-party antivirus, after installing the update, return it back.
Disabling the firewall

Sometimes built-in or third-party firewalls can cause issues during the upgrade process. If you are using Windows Firewall or other firewall software, disable them before attempting to install Windows 10 updates.

To disable the built-in firewall, in the same Windows Security window, go to the Firewall and Network Security section and click on the section that is marked as Active. Turn off the "Windows Defender Firewall" toggle.
Unblock updates

There is a possibility that you have made changes to the settings that may prevent the update from downloading automatically. In particular, in the advanced settings of the update center, there may be a ban on installing major updates. Open Settings > Update & Security > Windows Update > Advanced options. Under Choose when to install updates, Semi-Annual Channel (Targeted) and 0 days should be selected. The Pause Updates toggle should be disabled.
Disabling metered connections
If your connection is marked as metered, the Windows 10 update may not download automatically. You need to disable this restriction.If you have limited traffic, you need up to 5 GB to download updates. To disable a metered connection, go to Settings > Network & Internet > Status > Change connection properties. Turn off the switch in the "Metered connection" section.
Disabling unimportant peripherals

To avoid driver compatibility issues, disconnect all unnecessary peripherals from your computer. It is enough to leave the monitor, mouse and keyboard. After installing the update, everything can be connected back.
Clean install
If installing updates does not work, you can perform a clean install. This will erase all data on the primary hard drive partition. Before installation, transfer the files you need to another partition or drive. Using the Media Creation Tool, you can create an installation USB flash drive or disk.Conclusion
The major Windows 10 update, which comes out every six months, is available for installation by all interested users. It is recommended to wait for the automatic installation, which will mean that your computer is compatible with the new version. You can also take your time and wait a few weeks to make sure that there are no problems with this update.One of the common problems of Windows 10 users is the message “We were unable to set up Windows updates. Reverting changes in progress" or "We were unable to complete the updates. Cancel changes. Do not turn off the computer" after restarting the computer to complete the installation of updates.
This manual details how to fix the error and install updates in this situation in various ways. If you have already tried a lot, for example, methods related to cleaning the SoftwareDistribution folder or diagnosing problems with Windows 10 Update, below in the guide you can find additional, few described solutions to the problem.
Note: If you see the message "We were unable to complete the updates. Cancel changes. Do not turn off the computer" and observe it at the present time, while the computer restarts and shows the same error again and do not know what to do - do not panic, but wait: perhaps this is a normal cancellation of updates, which can occur with several reboots and even several hours, especially on laptops with slow hdd. You will most likely end up in Windows 10 with the changes undone.

Clearing the SoftwareDistribution folder (Windows 10 update cache)
All Windows 10 updates are downloaded to a folder C:\Windows\SoftwareDistribution\Download and in most cases clearing this folder or renaming the folder Software Distribution(so that the OS creates a new one and downloads updates) allows you to fix the error in question.
Two scenarios are possible: after reverting the changes, the system boots normally, or the computer restarts endlessly, and you keep seeing a message that Windows 10 updates could not be configured or completed.
In the first case, the steps to solve the problem will be as follows:
In the second case, when the computer or laptop constantly restarts and the undo changes are not completed, you can do the following:
After that, you can go to Settings - Update & Security and check if the updates download and install without errors. If Windows 10 updates without reporting that updates could not be configured or completed, go to the folder C:\Windows and delete the folder SoftwareDistribution.old from there.
Troubleshooting Windows 10 Update
Windows 10 has built-in diagnostic tools to fix update problems. Just like in the previous case, two situations can occur: the system boots or Windows 10 constantly reboots, all the time reporting that the update setup could not be completed.
In the first case, follow these steps:
The second situation is more difficult:
- Follow steps 1-3 from the section on clearing the update cache (get to the command line in the recovery environment launched from a bootable flash drive or disk).
- bcdedit /set (default) safeboot minimal
- Reboot your computer from your hard drive. Safe Mode should open.
- In safe mode, at the command prompt, enter the following commands in order (each of them will run the troubleshooter, go through one first, then the second).
- msdt /id BitsDiagnostic
- msdt /id WindowsUpdateDiagnostic
- Disable safe mode with the command: bcdedit /deletevalue (default) safeboot
- Restart your computer.
Perhaps this will work. But, if the second scenario (cyclic reboot) has not been able to fix the problem by now, then you will probably have to use a Windows 10 reset (this can be done with saving data by booting from a bootable flash drive or disk).
Failed to complete Windows 10 updates due to duplicate user profiles
Another, little described cause of the problem “Failed to complete updates. Cancel changes. Do not turn off the computer" in Windows 10 - problems with user profiles. How to fix it (important: what is below is under your own responsibility, you can potentially spoil something):
After the procedure is complete, restart your computer and try installing Windows 10 updates again.
Additional ways to fix the error
If all the suggested solutions to the problem of reverting changes due to the fact that it was not possible to configure or complete Windows 10 updates were not successful, there are not many options left:
- Run an integrity check on Windows 10 system files.
- Try to clean boot Windows 10, remove content SoftwareDistribution\Download, download the updates again and start installing them.
- Remove third-party antivirus, restart the computer (necessary for the removal to complete), install updates.
- Try a long way to restore the original state of Windows Update components, described on the official Microsoft website
And finally, in the event that nothing helps, perhaps the best option is to perform an automatic reinstallation of Windows 10 (reset) with data saved.
10.08.2016 Frank 0 comments
Windows 10 update may be different 10041, 9860, 1511, 10586 - more likely to appear in the future.
At the same time, the windows 10 update itself can be considered from two positions - updating from old versions (seven or eight) and receiving directly new versions of the dozen itself.
Problems for some owners of computers or laptops occur in both cases.
After the appearance of version 10586, it was available to everyone, the version did not become available. Why?
Partly there is also Microsoft's fault, although it is rather not fault, but they wanted to. They have removed the free download link from their site, followed by manual installation of update 10586 as an ISO image.
Now he is being sent out in "waves", in other words, not all at once - "happiness" will have to wait. If you are standing in line, then you have to wait.
The first reason why windows 10 update 10586 is not coming
If you have the "Updates from multiple locations" option enabled, then you need to turn it off - it will not allow you to get a new version (as decided by Microsoft).
To do this, open "update and security", select the "Advanced options" section and disable this feature in the update center. You can then start searching for available windows 10 updates.
Upgrade to Windows 10 version 1511 or 10586 manually if it doesn't work automatically
If the automatic options do not pass, then you can download version 1511 yourself. There are 2 ways to do this trick.
The first is to use the Media Creation Tool (you can download it for free from the Microsoft website), run it and click on the "Update Now" button.
The second is to download the Windows 10 ISO file and create a bootable USB flash drive or disk.
Then you can perform a clean installation through the BIOS or overlay on the old version without leaving the system by clicking on the setup.exe file
The third reason why there is no upgrade to Windows 10 from the seven
If you currently have a current operating system of seven, then Service Pack 1 must be installed in it, otherwise the update will not come.
Also, the seven or eight must be completely legal and activated
One more moment. Users using the Home edition can only upgrade to Windows 10 Home, while those with Pro can upgrade to the Pro tens.
The fourth reason why there is no upgrade to Windows 10 - changes in Microsoft
Microsoft has changed its mind about how the latest version of Windows 10 10586 can be installed.
If some time ago users were advised to download an ISO image and update manually, now, all those who have not yet updated to ten will have to perform a clean installation of the first version of RTM and after they have done this using Windows Update, install all updates released from July until now.
This strange decision will certainly prevent migration to Windows 10, but sooner or later, a dozen will reach all compatible computers and laptops, free or for a fee - Microsoft's operating system has more advantages than those offered by OS X or GNU / Linux .
Moreover, interest in Windows 10 is increasing. By the way, if you don't upgrade for free, you'll have to shell out $120 for the basic version of Home or $200 for the professional version.
Free update is available only in new versions, starting from the seven. Therefore, if you are still using whist, then you will not succeed. Good luck.