Why a polarizing filter on the lens. How to use a polarizing filter
What is a CPL polarizing filter? This is a valuable accessory that any photographer should have in their bag. How does a polarizer affect an image? In order to develop an intuition about this point, it is often necessary to experiment for a long time. In this article, you will learn how to speed up this process, how and how this product can make the task easier (and sometimes harmful) in different situations.
Where is the CPL filter attached? It is always in front of the front. How does this device work? It filters direct reflections of sunlight at certain angles. This is useful, as other light is often richer in hue and more diffuse. Working with this device also requires increasing shutter speed (because some beams are deflected). The filtration angle is controlled by rotating the device. The strength of the effect depends on finding the line of view of the camera relative to the sun.
Filter rotation
When can a CPL filter be used for maximum effect? Only if the camera's line of sight is perpendicular to the sunlight. You can imagine this by pointing your index finger at the sun, while placing your thumb at a right angle to it. As you rotate your hand to point toward the sun, whatever course your thumb points to will determine the line of the polarizer's highest effect.
However, the fact that the CPL filter will provide the best result in these directions does not necessarily mean that it will be most noticeable in them. The limiting polarization will appear during its rotation, which will change the angle relative to the daylight. To get a feel for how the filter works, it's best to rotate it while looking at the camera's display or viewfinder.
An unsuitable result may be obtained during application, since the polarizing effect depends on the angle. One part of the picture can be placed at right angles to the sun, and the other - towards it. In this case, on one side of the photo, the polarization effect will not be noticeable, and on the other side, it can be seen.
Obviously, wide-angle lenses are not perfect. However, the turns of the "polar" can sometimes make the effect more vital. Very often, professionals place the most pronounced polarization action closer to the edge or corner of the image.
Description
Photographers use two types of filters to create high-quality images: linearly polarized and circular. These devices isolate and isolate areas rich in polarized reflected light. With their help, when shooting the bottom, you can weed out bright glare, or capture the landscape outside the window without your own reflection in the glass.
Linear filters perform one simple job - they transmit modified light in a single plane. Devices with circular polarization give access to rays modified in a circle. They turn any refraction of rays into a spherical one. In fact, the circular “polarizer” does not interfere with autofocus, allows you to accurately guess the exposure and can be installed on all cameras (including old ones).

In this case, excessive glare will be eliminated in the same way as in a device with linear polarization. CPL-filter gives a "pure" spherical refraction of light only at a specific wavelength. In a wave plate, the optical difference in its path between the simple and extraordinary rays is exactly a quarter of its length. For all other wavelengths, this device will show an elliptical effect.
Circular filters are more complex than others, so their cost is higher. On the outside of this device there is an ordinary linear device, and on the inside - a quarter-wave plate that turns linear polarization into spherical.
Photo
Polarizing filters for a camera are devices designed to eliminate unwanted effects (reflections, glare), reduce the brightness (with a parallel increase in saturation) of the sky and other objects, to achieve aesthetic goals. They look like ordinary filters, but have front and back parts of equal thickness that can rotate freely.
How is the CPL filter applied? What is this device for? Its back is screwed to the lens, and the desired effect is selected by turning the front half to any angle. The front segment can be equipped with an internal thread, with which an objective cap, threaded hood or other light filters are attached, which is an irrefutable plus.

Different segments of reflective objects can give a reflection with different polarization angles, which cannot be suppressed synchronously by a single filter. In addition, there may be a large number of casting objects in the frame. In such cases, several sequentially twisted polarizing filters are used, and all, except for the rear, must be linearly polarized. This is necessary because the optical compensator placed in the circular filter prevents other devices that may be placed behind it from achieving the effect.
What else is famous for a polarizing filter for a lens? Its usually located in the range of two to five. Color distortion may occur. In general, some devices have a drop of up to one stop in the purple-blue region, which causes the picture to turn out with a green tint. Cheap devices can disgustingly reproduce small details. The Polarik, along with the "protective" UV-blocking filter, is the most exploited device in photography.
Details
Usually a polarizing filter is produced in the form of two plates made of glass. Between them is placed a polaroid film with linear dichroism. This detail is a certain layer of acetylcellulose containing an impressive number of the smallest microlites of herapatite (the iodide compound of quinine sulfate).

Such polyvinyl-iodine films with polymer chains synchronously oriented are used. The orientation of the microlites is identical due to the electric field, and the polymer chains are guided by mechanical tension. The circular filter is also equipped with an optical compensator - a quarter-wave phase plate. With this part, you can determine the difference in the path of the two launches of the beams. It works in accordance with the phenomenon of double refraction of light in crystals.
Light transformation
The simple and exceptional beams have different speeds. Their optical path lengths are also not the same. Therefore, they acquire a travel difference, measured by the thickness of the crystal through which they pass. It is installed along the path of the traveling beam behind the polarizer and rotates during assembly until its oscillation axes coincide with the optical axes.
In this position, the quarter-wave plate converts linearly polarized beams into circularly polarized light (and vice versa), increasing the path difference to 90 degrees. With such features, all "polars" are made. The difference in both price and quality is due to additional layers: protective, anti-reflective, water-repellent.
Appearance
When was the polarizing filter for the lens developed? This product was born from the development of TTL camera automation elements, which, unlike photographic materials, became dependent on innovative exposure to light.
In general, linearly polarized radiation makes it difficult to measure exposure and, in SLR cameras, partially interferes with the operation of automatic phase focusing.

In astronomy, "polarists" are part of the devices with which they study the circular and linear changes in the light of objects in outer space.
Polarization surveillance is the basic method for obtaining information about the strength of the magnetic field in radiation generation regions, say, on white dwarfs.
Nikon CPL

The Nikon 52 mm CPL polarizing filter is a valuable item for landscape photographers and anyone who likes to get high quality shots. There are at least six reasons why you should buy this product:
- For photographing water (it becomes darker and more transparent).
- Shooting a landscape (the “saturation” of greenery and sky increases).
- For shooting at an angle through a window (to eliminate glare and reflections from the glass).
- Elimination of reflections on a sunny day (from water, glass, cars).
- Increase shutter speed by a couple of stops (when needed).
- Protection of the lens from mechanical impact.
Those who go to travel to warm countries need to buy this filter - this is an indispensable assistant in making colorful photos. In bright sunlight, this device improves image quality by increasing contrast and saturation while eliminating haze.
Restrictions
Those people who want to learn how to take good pictures take photography lessons from professionals. How to use a polarizing filter? The device of the desired diameter must be screwed onto the camera lens. By rotating the crystal in the filter, you need to select the desired one, which will allow you to eliminate glare from water or glass when shooting, as well as get more fluffy and white clouds, a saturated sky.

There are some restrictions on the use of such devices:
- When rotating the polarizing filter, it must be taken into account that the expected region of the limiting effect will be located approximately 90 degrees from the primary position. If the device is rotated 180 degrees, this maneuver will return the picture to its initial state.
- "Polars" soften the light flux entering the camera matrix through the lens, so professionals often increase the exposure balance by 1-2 steps.
Flaws
Photography lessons are necessary for beginner photographers to create high-quality pictures. We have found that polarizers are very useful. Unfortunately, they have the following disadvantages:
- Due to this device, the exposure may ask for 4-8 times more light (by 2-3 stops) than usual.
- They need a certain angle in relation to the sun to get the best result.
- With these filters, it is difficult to navigate the camera viewfinder.
- These are one of the most expensive devices.
- They require rotation, so they can increase the composition selection time.
- Usually they cannot be used for wide-angle and panoramic shots.
- If the filter is dirty, it may reduce the quality of the picture.
Moreover, sometimes reflections are needed in a photograph. The most striking examples here are rainbows and sunsets. It is worth applying a polarizer to any of them, colorful reflections can disappear completely or fade.
Camera filters are complex devices. But over time, you can learn to work with them. "Polarik" can sometimes be used when it is necessary to increase the exposure time. Since it can reduce the transmitted light by 4-8 times (2-3 stops), it can be used to shoot water and waterfalls.
If you put a polarizer on a wide-angle lens, it can create a bright darkening of the edges of the picture ("vignetting"). To avoid this, you will probably have to purchase a more “thin” expensive option.
Circular polarizers were designed to keep the camera's autofocus and metering systems working while the filter was in place. Linear "polars" are much cheaper, but they cannot be used with most digital SLR cameras (as they use phase detection autofocus and TTL - metering through the lens).
Hi all! Today we will talk about using a polarizing filter in still photography.
To my shame, I only tried a polarizer for the first time a year and a half ago. For some reason, this topic has eluded me before. Yes, I read articles about a magic filter that removes reflections from water, from glasses ... but for some reason it didn’t hook me, so I forgot about this filter for several years. And so, once I was at a master class with a very good photographer, who showed how a polarist works. So casually he said: "well, now we will remove the glare with the help of a polarizing filter ...". Wow! I said out loud, and quite loudly. And I thought to myself: it’s not otherwise black magic. But realizing that everyone was looking at me as if I had fallen from the moon, I fell silent. And he began to wait for the end of the master class in order to be in time for the store for a polarizer?
I don't think I'm the only one who's "dumbass". And for those who still don't know what a polarik is - this article (and there will be a video). If you are already in the know, you may not read it, there will be no revelations for you.
So, a polarizing filter helps to remove reflections, glare and increase color saturation. A polarizing filter looks like any other filter on the outside, but it's not exactly like that. It consists of 2 parts that rotate relative to each other.  And just by rotating the front lens, we change the resulting effect. It is wound, as you probably already guessed, on the lens, in front, where all other filters are.
  And here its first serious drawback opens up: for lenses with different thread diameters, you will have to buy your own polarizer. And they cost a lot. Just a word of caution: do not buy cheap filters for 1000-1500, especially if you have a good lens. The saying definitely works here: "The miser pays twice." Unfortunately, I checked it on my own experience (by the way, I was also warned?). The bottom line is that the quality of the glasses of these filters is so low that they spoil the frame, and a picture already spoiled by a cheap filter passes through your expensive lens with good glasses. The image becomes cloudy, the sharpness drops sharply. In short, don't.
Let's move on to practice.
Here is a common problem: we are filming some kind of garbage, but for some reason we need to remove a sharp glare, for example, the customer does not like the glare (this is really not uncommon) - we use a polarizer and ... ..  I think it's awesome!
Ischo example:  The examples show how glare decreased and color saturation increased.
Unfortunately, things are not always so simple. Many factors affect the performance of a polarizing filter. (eg, angles of incidence of light) Therefore, it takes quite a lot of practice and experience to know what to expect from a polarizer. By the way, due to the influence of the angles of incidence of light on the effect produced by the polarizer, it is not recommended to use it at wide angles. Polarization can occur unevenly, for example, a picture will be saturated with color in the center, but not on the sides, and this can be very noticeable.
There are two types of polarizing filters for photography: circular polarized and linear. If you are too lazy to read a lot of text without pictures, then you need to take a filter with circular polarization. But if you can’t fall asleep without understanding why, then read on.
Let's start with a little theory.
Polarization is a characteristic of light. If light is represented as an electromagnetic wave, then the polarization determines the direction of the transverse oscillations. The light that hits your lens is mostly unpolarized, meaning it doesn't have a well-defined direction of lateral vibration.
Polarization cannot be seen with the naked eye, but it can be seen through a polarizing filter that is sensitive to these transverse vibrations.
The task of the filter is to skip some directions and block others. Reflecting from non-metallic surfaces, light is polarized in a very specific way, so the filter allows us to control such light, as already described in the story about the polarizing filter. This is why the effect of a polarizing filter cannot be replicated in Photoshop, it can only be roughly simulated.
Linear polarization. Linear filters perform one very simple function - they pass only light with polarization in one plane. The filter can be rotated to select the polarization plane in which the light will pass. That is, the output of a linear filter is always linearly polarized light:

These are very simple and inexpensive filters, but they are not suitable for modern SLR cameras. They are perfect for ancient non-autofocus cameras without automatic exposure metering, as well as for soap dishes.
The fact is that in SLR cameras there is a translucent surface that directs approximately 2/3 of the light directly into your right eye, and the remaining 1/3 passes through and hits the very thing (RGB-sensor) that is responsible for the autofocus zones. matrix exposure metering and takes into account the color and distance to the object (Canon still cannot do this, it sees only black and white). This allows the camera to see roughly what you see, which is why it knows so well what settings you need in auto mode. So there are only two sensors in the camera: one receives the picture, the other controls the settings. Here is such an RGB sensor, for example, in Nikon D7000:

Now, this translucent surface is polarization sensitive, which means that the amount of light hitting the RGB sensor will differ depending on the orientation of the filter, leading to errors in exposure estimation and sometimes incorrect autofocus performance.
In addition, there may be other elements that are sensitive to polarization, such as some lenses in a lens. Therefore, it is best to look in the instructions for which types of polarizing filters are suitable for your camera. To save you time, I will say that only a circular polarizing filter is suitable for all modern SLR cameras.
Circular polarization. There is a misconception that a circularly polarized filter only allows light that is circularly polarized to pass through. Only those who do not read our articles think so. However, our attentive readers (at the word “attentive” everyone immediately recalls the title picture) are aware that everything is quite the opposite. The meaning of a circular polarizing filter is that it makes a circular polarization out of any polarization. This means that such a filter is suitable for all cameras, including old ones, allows you to correctly determine the exposure and does not prevent autofocus from working.
A filter with circular polarization is more complicated than a linear one, therefore it is more expensive. On the outside there is an ordinary linear filter, and on the inside a quarter-wave plate is glued, which allows you to turn linear polarization into circular. We will not delve into physics any more, but if you are interested, then a quarter-wave plate is a special material with double refraction. A typical example of such a material is calcite, or more precisely, Icelandic spar. Well, we are already one step away from quantum mechanics, although the site is about photography.
Now let's move on to practice.
How to determine what polarization you have a filter? Even if there are no inscriptions on the filter, this is very easy to do. Approach the mirror, turn on the light, although it's better in reverse order, it's cheaper. Look through the filter like a monocle. The outer side of the eye, the inner side of the mirror. If the filter in the reflection is opaque, turned into a black circle, then it is a filter with circular polarization. If the filter in the reflection is transparent, then either you turned it the wrong way, or it is a linear filter.
How to understand if your camera needs a circular filter, or an old-fashioned linear filter will do, since you skipped the previous paragraphs? Turn on the camera, turn on some artificial light (a normal incandescent bulb will do), put the filter close to the lens, aim at something non-shiny, like a wall. Rotate the filter. If the exposure changes (increasing ISO, shutter speed or aperture), then the filter does not fit your camera. The filter with circular polarization can not be twisted, but if you are interested, then try it, nothing will change there. There is a nuance here, the camera must be able to feel the difference in exposure 1/3 or 1/2 stop. If the minimum step is 1 stop, then the difference may not be noticed. In Nikons, the minimum pitch is usually set in the Custom Settings Menu, namely b3 (at least on the D700).
Is it possible to use a filter with linear polarization, although you need a circular one? Can. Only you have to take into account that depending on the orientation of the filter, your metering will be in error. Check the result on the screen and don't be afraid of anything.
Which filter to buy, circular polarized or linear? You need to buy only with circular polarization, because such filters work perfectly on any cameras.
Which filter manufacturer is the best? Don't know. I tried different filters, they are all about the same. Personally, I have a German B + W filter.
By the way, the common Soviet polarizing filter PF-52 with linear polarization. A little inconvenient, but usable.
Tell us about your polarizing filter in the comments, it will help other readers make their choice.
02.08.2014 50451 reference Information 0
Beginning photographers ask a lot of questions when it comes to purchasing filters for a lens.
"Light filters of all photographic accessories are used most often, and most often used incorrectly".
R. Hayman (Rex Hayman), "Light filters".
Although this quote is many years old, today the situation has changed little - many of the photographers and amateur photographers use light filters quite often only as protective ones, practically ignoring the powerful possibilities of influencing the image provided by the filter system. From some point of view, they can be understood, because the correct and effective use of light filters is not an easy task. This article, I hope, will help you both before buying filters and during their application.
Light filters, by and large, can be made of any optically transparent material, and specific properties can be imparted to filters either by coloring (surface or in mass), or by applying special diffractive coatings, or by a special shape of the surface. In practice, the manufacture of filters used for photography is not so simple, because such filters are placed in front of the lens, which means that they form a common optical system with it. Therefore, the requirements for light filters have to be as strict as for photographic lenses.
For the manufacture of light filters, the same materials are mainly used as for the manufacture of lenses - high-quality optical glass or special optical plastics. Part of special-purpose light filters (produced in small quantities) is made on the basis of gelatin films.
Manufacturers who value their reputation and produce a wide range of light filters for various purposes use in the manufacture of one or another type of light filter the technology and materials that provide the best light filter parameters.
The filters used in photography are mostly either round or rectangular in shape.

To mount rectangular filters on a camera lens, as a rule, special mounting systems are used, including a special holder ("compedium"), in which up to three filters can be installed simultaneously, adapter rings for mounting a compedium with filters on different lenses, as well as - special composite (modular) hoods, protective covers and so on. According to this principle, the most famous system of effective Cokin filters is built.
Round light filters are mounted in a metal frame equipped with a thread (or bayonet mount) for installation on a camera lens. The size of the connecting thread for attaching filters and other attachments to lenses, as a rule, is selected by lens manufacturers from the standard range. The most common thread diameters are 46, 49, 52, 55, 58, 62, 67, 72 and 77 mm (metric thread with 0.75 mm pitch). Light filters of larger and smaller diameters are also produced and used, but since there are quite a few lenses using such threads, they are not easy to find on a wide sale.
Production and manufacturers of light filters
The production of light filters (both glass and light filters made of other materials) is a rather complex and high-tech production, because most of the quality requirements for light filters are at the level of requirements for the production of objective lenses. Both surfaces of the filter must be absolutely flat and strictly parallel to each other, the color of the filter must be uniform, the properties of the filters must not change from batch to batch, the filter frame must be mechanically strong, ensure good fixation of the filter on the lens, and so on. Failure to comply with such strict quality parameters in the manufacture of filters can lead to a significant drop in image sharpness.
At the same time, despite the highest quality requirements, light filters should not be unnecessarily expensive. Such a combination of high quality and not too high a price can only be obtained with large-scale production.
Therefore, international cooperation in the production of light filters is highly developed - there are much fewer real manufacturers of light filters than the brands under which these filters are sold. For example, HOYA, being one of the most powerful manufacturers of optical glass, produces complete filters not only under its own HOYA brand, but also under the brands of some well-known manufacturers of photographic equipment and photographic accessories.

Light filters offered under their brand by well-known manufacturers of photographic equipment (Canon, Minolta, Nikon, Olympus, Pentax, Mamiya, Hasselblad and others) are filters with guaranteed high quality, regardless of whether they are made in their own optical production, or produced "at side", that is, as a result of international cooperation. Buying a filter recommended by the optics manufacturer is a guaranteed reliable option. However, such light filters are quite expensive, and their range, as a rule, includes only the most common and necessary types of filters.
Therefore, the eyes of buyers quite often, as in the case of interchangeable lenses, turn to "independent" manufacturers. Filters from such manufacturers are cheaper and have a much larger assortment. However, when buying a light filter from an "independent" manufacturer, you need to be careful - it is almost impossible to distinguish a high-quality light filter from a filter of mediocre quality in appearance. The maximum that can be determined by an external examination is the absence of gross damage to the filter, and to determine the quality of enlightenment, the quality of the color of the filter, the flatness and parallelism of its faces, the absence of curl and other glass defects, our eyesight is, alas, weak. Therefore, when buying a light filter, we entrust the quality control of the light filter to its manufacturer.
The range of brands under which light filters are sold is very large. Therefore, the right choice in these conditions is not an easy task. This process can be somewhat facilitated by conditionally dividing the companies that sell light filters under their own trademarks into the following groups:
1. trademarks that you see for the first time. The degree of risk of obtaining a light filter under this name that is not of high quality is most likely a figure very close to 100%. Such a purchase, in our opinion, is obviously a waste of money (if the goal is to buy a light filter of sufficient optical quality), and we would like to remind you of this once again;
2. trademarks representing the widest range of various products for amateur photographers - from photo albums, rubber hoods and lens caps to filters, flashes, cameras and lenses. As a rule, these trademarks do not hide their own production of light filters, and the filters are made under international cooperation (OEM). Examples of such products include B + W filters that are quite common in our country (the German concern Schneider-Kreuznach, which produces lenses), HOYA filters (the Japanese concern THK, which manufactures Tokina lenses and Kenko teleconverters), Cokin effect filters (manufacturer and owner of the trademark - Cromofilters S.A. Paris, made, as a rule, from optical grades of plastics, with high optical quality and an unusually wide range, they also have a very unusual shape - square or rectangular), Marumi (a Japanese company specializing in optical filters for photo, video cameras and photographic accessories) and others;
3. trademarks of well-known manufacturers, famous primarily for the production of high-quality filters - such as Tiffen. There is not much to add here.
Multiplicity of light filters
Most filters block some of the light that passes through them. Therefore, in order for the exposure to remain normal when using a filter, it is necessary to increase it. The coefficient of the necessary increase in exposure when using a filter is called the filter factor, and is one of the main characteristics of the filter.
The multiplicity is not constant for all filters. For color filters, the magnification may be dependent on the characteristics of the light in which the picture is taken. For example, the multiplicity of yellow, orange and red filters used in black and white photography in daylight will be greater than with incandescent lamps. Therefore, the filter ratio indicated in the tables (or on the filter frame) is usually defined as the degree of attenuation of white light (or for the light in which this filter should be used - for example, for an 80V filter, the ratio is indicated in relation to the light of halogen incandescent lamps).
The exposure metering systems of modern cameras operating on the TTL system accurately take into account the attenuation of light as a result of the action of light filters, therefore it is usually not necessary to introduce a correction into the exposure metering system - it is registered automatically. An exception to this rule is red filters, which require (especially when shooting in the daytime) an increase in exposure by 1/2 - 1 stop compared to that measured using the TTL system due to the increased sensitivity of most exposure metering systems to the rays of the red part of the spectrum. Also, the TTL exposure meter of some devices may give incorrect readings when using a linear polarizing filter. More on this later.
Filter marking
To systematize and standardize filters, they are marked. There is no single standard for labeling filters yet, many manufacturers even create their own systems for labeling filters.
Currently, the two most widely used standards for marking filters are marking according to the Kodak Wratten scale, and marking according to the effect produced by the filter (color temperature shift). Cokin and HOYA filters are usually marked according to the Kodak Wratten scale, other manufacturers use markings based on the color shift characteristic of the color filter, sometimes duplicating its name on the Kodak Wratten scale on the filter frame (as, for example, it is done on B + filters W).
Regular filters
The filter, in any case, is cheaper and replacing it, rather than the lens, is much easier. In addition, scratches, dust, dirt, moisture and fingerprints of curious or sloppy fingers cannot harm either the lens itself or the quality of the image obtained with it.
There are many supporters and opponents of the use of protective filters for constant wear, and each point of view is justified in its own way, so there is no unequivocal opinion on this issue. Of course, any optical detail (in this case, a light filter), which was not taken into account when calculating the optical scheme of the lens, can only worsen the quality of the image given by the lens. However, the deterioration in image quality that occurs as a result of damage to the surface of the front lens of the lens is often not only noticeably much greater, but is also irreversible - the front lens, unlike a protective filter, cannot be removed or replaced. So in this case, you have to choose the lesser of two evils.

To the group protective(or they are also called - ordinary) filters include any that do not introduce radical changes in the pattern and exposure parameters of the shooting. First of all, these are ultraviolet UV filters (they are also UV1x, Haze, Protect or N - Normal). The last two names are often used to mark simplified protective filters, with worse (but sufficient) enlightenment, more resistant to scratches, and with thicker glass. The longest length of ultraviolet radiation absorbed by the filter is sometimes indicated in the marking - filters marked "L35", "L37", "L39" or "L41" do not allow ultraviolet radiation with a wavelength of 350, 370, 390 and 410 nm to pass to the matrix, respectively.
Sky filters- the same ultraviolet attenuating optical glass, but with a more (Sky1b) or less (Sky1a) saturated pinkish tint. Additional glass shading allows not only to reduce the level of ultraviolet, but also to reduce the effect of dark violet tones of the visible light spectrum on the image. The result is an effective fight against haze, increased contrast and color saturation of green tones (leaves) and more accurate color reproduction of the skin tones of the person being portrayed. Not many manufacturers are able to make the Sky1b filter exposure neutral, in most cases exposure compensation is required, and the Sky1a effect is often not pronounced enough.
A "protect" or "neutral/clear" protective filter does not actually change the spectral composition, intensity, or other characteristics of the light passing through it. Manufacturers, on the contrary, make every effort to ensure that the protective filter makes as few of these changes as possible. The main purpose of such a filter is to protect the front lens of the lens from adverse environmental influences - for example, dust, moisture drops, and also from greasy fingerprints and objects that can damage the delicate surface of the antireflection coating (and sometimes even glass) of the front lens of the lens.
Of great importance is such a filter parameter as the light transmission coefficient. For an uncoated light filter, the light reflection coefficient at the "glass - air" border is about 5%, respectively, for a UV or Skylight filter having two "glass - air" surfaces, the light transmission coefficient will be slightly more than 90%. This does not seem to be scary, however, about 1/3 of the remaining 10% of the light still hits the matrix, but already scattered from multiple reflections in the gap between both filter surfaces and the front lens of the objective, reducing the contrast of the resulting image and leading to loss of detail in the shadows of an image. The drop in contrast from light scattering on the filter is especially noticeable when shooting contrasting scenes, not to mention shooting against the light.
To reduce this unpleasant effect, special antireflection coatings are deposited on the filter surface in a vacuum. The principle of operation of an antireflection coating is based on the interference effects of incident and reflected light in a thin (1/4 wavelength) transparent film deposited at the interface. Already a single-layer coating reduces the reflection coefficient from 5% to 1-2%, and multi-layer coating (depending on the number of layers) reduces the reflection to 0.5-0.2%, which allows you to bring the transmittance of the filter surface to record numbers - from 97% to 99.7 %. There are 4 types of antireflection coatings used on Marumi filters: MC is an abbreviation for a multilayer antireflection coating that prevents reflection of the light flux from the surface of the filter and improves the overall light transmission of the optical system. Less than 5% of transmitted light is reflected from a lens protected by multilayer coating; Enlightenment Dynamic allows you to skip about 99% of the light flux, but the ultraviolet does not pass at all. Transmission threshold - 370 or 400nm depending on the filter model. Additionally, such a coating has greater mechanical strength; WPC (water proof coat) is wettable, so a drop of moisture instantly drains, simultaneously forming a static charge on the glass opposite to the dust charge - and the surface is self-cleaning and a specialized DHG (digital high grade) coating - "digital high level", specialized for digital photographic equipment with expensive specialized optics, especially interchangeable ones. Protecting the lens from UV, scratches, dust, moisture and dirt, DHG filters reduce the transmission of infrared radiation that is harmful to the sensor. In addition, the matrix can be seriously damaged by internal reflections - re-reflections. Therefore, the edges of the glasses in such filters are additionally blackened.
ND filters
Neutral gray filters (marking on the frame "ND" and an indication of the filter ratio or its optical density). Neutral density filters do not affect the spectral composition of the light passing through them, weakening only the power of the light flux. In the practice of a photographer, situations often arise when there is a lot of light, and only the use of neutral filters allows you to achieve the desired artistic effect. For example, shooting flowing water at short shutter speeds gives a very unpleasant effect - water "frozen" at a short shutter speed looks more like glass than water. Shutter speeds are a little longer than 1/30s, when the water already becomes like water. Well, shutter speeds of the order of 1 - 2 seconds and longer, at which the flowing water becomes like an iridescent fog, cannot be achieved without a neutral filter - even in the forest in the morning there is already a lot of light for such pictures.
Another example of using ND filters is shooting a portrait in daylight. In such shootings, in order to better highlight the subject (in order to better "tear" it from the background), fast lenses are used, which practically do not stop when shooting (using apertures of the order f / 1.4 - f / 2.8), which is often difficult without the use of neutral filters. Most often, for these purposes, neutral light filters are used, which reduce the luminous flux by 2, 4 and 8 times.
Polarizing filter
Usage polarizing filter allows you to remove "soft" reflections, flare, non-metallic reflections from the surface of the object being photographed and enhance its color contrast. In color photographs, the color of the object becomes bright and saturated - for example, a whitish-blue sky becomes saturated blue. Such a filter is a must-have for every photographer.

The propagation of light is a wave process, similar to waves on the surface of a pond from a stone thrown into the water. Only usually oscillations of a wave of light occur in all directions (perpendicular to the direction of propagation of the wave). However, it is possible to artificially make these oscillations occur in one plane. In this case, such light will be called linearly polarized, and will have some properties that are different from natural (non-polarized) light.
The multiplicity of the polarizing filter is on average 3 - 4, that is, the use of a polarizing filter requires an increase in exposure by 1.5 - 2 steps (3 - 4 times) compared to exposure without a filter. Despite the effect introduced by the rotation of the filter, the filter factor, as a rule, does not depend much on the orientation of the polarization plane of the filter - after all, a polarizing filter is used to reduce bright glare, the dimensions of which are most often small. Of course, full confidence in the accuracy of exposure with a filter can be obtained by using TTL light metering. However, many cameras that have a TTL light metering system use optical elements to separate the light flux, which themselves polarize the light. For example, in autofocus cameras, such an element is often translucent areas on the mirror, which are necessary for the operation of the sensors of the autofocus system (located under the mirror). In this case, it turns out that the light that has passed through the polarizing filter, being already almost 100% polarized, on its way to the exposure metering sensor passes through another polarizer, which, if the polarization planes do not coincide, further weakens the luminous flux, and therefore introduces into the exposure metering system of the device unwanted "correction", leading to an underestimation of the exposure meter and overexposure. You can get around this trouble by using a specially modified polarizing filter, called a "circular" (in contrast to the usual - "linear" - polarizer). The design of the circular polarizing filter, in addition to protective glass plates and a polaroid plate, also includes a "1/4 wavelength" plate, which converts linearly polarized light into circularly polarized light, which is no longer attenuated upon further passage through the optical elements of the camera, which have the properties of a linear polarizer.
How many types of polarizing filter are there?
- only for MF cameras (with manual focus), linear polarization, PL;
- for cameras with any type of focus - both MF and AF, with circular / circular polarization: C - PL, MC - CPL, Wide C - PL, WaterProof Coat C-PL, DHG C - PL.
And a few more words about polarizing filters.
In some situations they are ineffective... When shooting "in the field" the effect of polarization is maximum if the sun is on the side of the photographer (90 degrees to the lens axis). If the sun is overhead, the effect will only appear when shooting in a horizontal direction. At sunset and sunrise - when shooting in the vertical axis: up or down. If you want to remove reflections on the surface of water or glass, then it is most effective to shoot at an angle of 30 - 40 degrees to the glare surface. If light falls on a reflective surface from the side, at 90 degrees to the axis of the lens, then the polarization effect may not appear.
Polarizing films and film coatings are afraid of exposure to heat and ultraviolet radiation, because they contain iodine. Even though the films are between two layers of glass, and the coatings are applied to the inner surfaces, put the filter back into the package immediately after shooting. In your case, the polarizing filter will be protected from heat and light and will serve you for a long time.
It is impossible to say exactly how many years a polarizing filter will last - it greatly depends on the conditions of storage and use. The "Polarizer" is not a neutral gray and is subject to discolouration over time. After 5 - 6 years, the polarizing filter must be changed.
Other filters
In addition to the above light filters, there are quite a large number of others, but due to their narrow focus and low applicability, we will consider them briefly.
Colored (colored) light filters. Basically, the principle of operation of most colored filters can be described by the following rule of thumb - objects that have a color close to the color of the filter will be highlighted in a monochrome image, and objects painted in colors complementary to the color of the filter will be depicted in darker tones. A blue sky, for example, behind a yellow filter will be much darker than without a filter, and if you use a red filter, the sky will come out almost black. In accordance with this rule, the use of light filters becomes not shamanism, but a conscious exercise, with a fairly understandable and predictable effect. The only exception to this rule is green foliage, which, despite being green, reflects light rays not only in the green part of the spectrum, but also in the infrared range. Therefore, when using a red light filter, green foliage not only does not turn black, but on the contrary, it brightens.

Correct tone filters. Despite the achievements of modern technology, it has not yet been possible to create a black-and-white image using traditional technology, which, in terms of the perception of color brightness, corresponds to the characteristics of human vision. To approach the perception of the eye, it is necessary to increase the sensitivity of the matrix in the yellow-green region and reduce (when necessary) excessive sensitivity to the blue part of the spectrum. All this can be done by using a green or yellow-green filter, which belongs to the category of "correct tones filters".

Contrast Control Filters. In addition to correct tone filters, black and white photography often uses another group of filters called "contrast control filters". As you can understand from the name of this group of filters, they are designed to change the contrast between individual objects of different colors present in the frame. From some point of view, their action seems to be the opposite of the correct tone transmission filters - contrast filters change the tonal transmission, making it "wrong". However, when applied appropriately, these filters not only enhance the expressiveness of the photograph, but also avoid the main trouble that occurs due to the lack of color information - when objects of contrasting colors (for example, orange and green) that are close to brightness in a black and white image practically merge , transmitted in the same gray tones.
The work is based on the use of so-called "raster grids" "star" filters- cross screen, star-six, star-eight, variocross. Mounted on the lens, these filters complement any bright point source of light that enters the frame with long lines that, like rays, pass through its center. To achieve this effect, fine intersecting lines are etched into the surface of filters of this type, running parallel across its entire surface at a distance of several millimeters from each other. Depending on the structure etched on the surface of the filter, the latter can give a different number of rays.

Two groups of parallel lines located at right angles to each other give the effect of four cross-shaped rays coming from each point light source in the frame (cross screen filter). There are already three groups of parallel lines etched into the surface of the Star Six filter, oriented at an angle of 120 degrees relative to each other. Accordingly, when using this filter, each luminous point in the photo will have six rays. Using a similar technology, but with four groups of lines, the "eight-beam" star eight filter is also made, giving the effect of star flares with eight rays.
Another filter from this series, variocross, has a somewhat different effect. It is a construction of two glasses, on which parallel lines are etched. Each of these glasses is fixed in its frame, which can be rotated relative to the threaded frame independently of each other to an arbitrary angle. Accordingly, in the picture, each point light source receives four rays, but unlike the cross screen filter, the angle between the rays can be changed.
Filters that use the effect of diffraction decomposition of light into spectral components are similar in design to "star" filters. However, unlike "star" (raster) filters, the lines deposited on the surface of the diffraction grating are much thinner, and are located so often that it is almost impossible to see them with the naked eye - diffraction filter looks like slightly hazy glass. An example of a filter that uses the effect of diffraction decomposition of light into spectral components is the RAINBOW-SPOT filter. This filter decomposes into spectral components the light coming from bright point sources, complementing each light source with a rainbow line. The RAINBOW-SPOT attachment can also be successfully used in portrait photography. In this case, due to the absence of bright point light sources, a different kind of effect is obtained - the RAINBOW-SPOT filter makes the image softer, smoothing out contrast transitions at the border of light and shadow, giving the illuminated areas a kind of luminous halos.
On a surface "foggy" filter Fog Filter is a random arrangement of a large number of tiny white translucent dots that partially scatter the light falling on them. The use of a "foggy" filter allows you to achieve an effect reminiscent of an early morning fog - the impression of a whitish haze, the absence of details in both dark and bright parts of the picture.

With the right scene, using Fog Filter, you can even achieve a completely unusual effect, getting a close-to-silhouette image. The effect of the "foggy filter" practically does not depend either on the focal length of the lens used, or on the degree of its aperture. Due to its very specific effect, Fog Filter is rarely used in portrait photography, but often finds use in landscape photographers.
Among effect filters used in portrait photography, there are a lot of attachments that have a plane-parallel unpainted area or hole in the center. Such nozzles leave the central zone of the image practically unchanged, but the rest (peripheral) part of the frame is changed beyond recognition. These nozzles include center-spot, soft-spot, color-spot and misty-spot. The effect when using such attachments largely depends on the focal length of the lens, the installed aperture and the distance from the lens to the surface of the attachment. Very convenient are similar rectangular nozzles designed for use in compedium (slot) filter systems - for example, in the Cokin system. In this case, the effect can be changed by moving the filter both along the lens axis (by inserting it into different compedium cells) and across the axis (by moving the filter along the slot).
The center-spot attachment is a lens similar to that used in macro photography, with a plane-parallel platform or a through hole in the center. By making the center of the frame sharp, it takes the edges out of sharpness.
soft-spot - filters similar to Fog Filter (sand screen) and Diffuser (soft screen), but with a hole in the center of the filter. The effect of the sand screen and soft screen attachments is similar to the effect of the Fog Filter and Diffuser attachments, respectively, but with a sharply depicted central area of the frame.

color-spot - color filters with a hole in the middle. Color the periphery of the frame, leaving the central area of the frame painted in natural color.
misty-spot - colorless optical attachments that give a sharp image of the central part of the frame, and a kind of blurry and deformed image along the periphery of the frame. HOYA produces filters in this series under the names "Gradual", "Breeze", "Halo" and "Windmill". Each of these filters has its own special optical effect - for example, "Gradual" gives the effect of changing the focal length of the lens during exposure, and "Windmill" - as if twisting the space surrounding the subject in a spiral.
Special Purpose Filters. The CENTER ND filter has different optical density - in the center it is larger (2x), further from the center the color is less dense, and at the edge the filter is already transparent. Such a specific effect becomes necessary, for example, when using wide-angle lenses on professional format cameras. The CENTER ND filter is manufactured using a rather complex technology - it consists of a plano-convex lens made of colored glass glued with spherical surfaces to each other and a plano-concave lens made of colorless glass.
In dual-color filters, each of the two halves of the filter is colored in its own color. The most common colors are red and blue (R/B), orange and green (O/G), yellow and magenta (Y/P). To improve the optical quality (eliminate the unevenness of the refractive index and eliminate glare at the interface), such filters are made not from two halves of glass filters colored in the mass, but in the form of a "sandwich" of two thin plates of high-quality optical glass, between which colored in different colors are sandwiched gelatin folic filters.
Three-color light filters (TRICOLOR) are made using the same technology as two-color (dual-color), but gelatin folios dyed in different colors are arranged either in three sectors (TRI - triangle) or in three parallel lines (PARA - parallel). As a rule, the combination of primary (green-red-blue) or secondary (cyan-yellow-magenta) colors gives the most interesting effect.

When mounting effective TRICOLOR or dual-color filters in round threaded frames, the latter are made to rotate for free control of the effect. Such filters are mainly used in color photography to obtain special artistic effects.
Semi-filters (HALF COLOR) can be similar in design to dual-color filters, but have only one half of the filter colored, while the other remains transparent. Glass semi-filters are usually produced in a round shape, and mounted (similar to dual-color filters) in a rotating threaded frame. Semi-filters are produced in a fairly wide range of colors, which make it possible to widely use filters of this type not only for special effects when shooting, but also to use them to obtain a more correct tonal reproduction in both black and white and color photography. For example, semi-filters of yellow, orange, and red can be used to correct the tonal reproduction of the sky in black and white photographs, while semi-filters gray color(usually produced in several gradations of density). Also, specifically for use in landscape photography in order to darken the sky, a similar HALF NDx4 neutral semi-filter is produced, which reduces the exposure of one half of the frame by 2 steps (4 times), without making changes to the exposure of the rest of the frame.
HALF COLOR, HALF NDx4, dual-color and TRICOLOR filters have a common feature - the effect obtained with their help varies greatly depending on the focal length and lens design, as well as the aperture at which the picture is taken. The shorter the focal length of the lens, the farther from the lens (more precisely, from the front focal plane of the lens) the light filter is located, and the more the lens is apertured, the sharper and clearer the boundaries of the transition between colors appear in the picture. Accordingly, the reverse actions - the use of longer-focus optics and the opening of the diaphragm lead to a greater blurring of this boundary. To adjust this effect within a fairly wide range, you can use the aperture of the lens. The resulting effect is clearly visible in the viewfinder of the camera when the aperture is closed to the working state, so it is quite easy to control it using the DOF-preview (depth of field preview) function, which some cameras have.
At gradient (gradual color) filters, like half-color filters, only half of the filter surface is colored, however, the boundary between the colored and uncolored parts of the filter is not sharp, like in half color, but smooth - the color density over 1/3 - 1/4 of the filter diameter changes from completely transparent to maximum density.

Filters of this type are available in both gray (gradual gray) and painted in other colors - for example, yellow (yellow), blue (blue), tobacco (tobacco), pink (pink) and so on. These filters are used to colorize (color filters) or darken (gray filters) one part of an image without affecting the rest of the image. For ease of use round gradual color filters are installed in rotating frames with threaded fastening. Even more possibilities are provided by the use of light filters with a gradient color, made in the form of rectangular plates for use in a compedium (for example, the Cokin filter system) - in this case, the light filter can not only be rotated to any angle, but also shift the interface between the colored and uncolored parts of the filter in certain limits.
Half lens (split-field) is a rotating frame in which half of the lens is fixed, similar to that used in macro photography. This nozzle allows you to achieve several rather unusual effects by controlling the sharpness of the foreground and background at the same time, for example, sharpening flowers in the foreground and a beautiful mansion in the background at the same time.

The use of a half lens may require choosing the focal length and changing the lens aperture to select the best effect - when you change both the aperture and the focal length of the lens, the ratio of the focusing distance (separately for the foreground and background), the depth of field (respectively - for each plan) change significantly ) and the sharpness of the line separating the foreground (shot through a lens) from the background shot without a lens.
Filter Care
Light filters should be handled with the same care and precision as with lenses - after all, the quality of the resulting image ultimately depends on their condition. You can take filters only by the frame (filters with threaded or bayonet fastening), or by the edges (gelatin and rectangular plastic filters). When installing filters into a compedium or screwing them into the lens thread, do not use excessive force to avoid possible distortion of the frame and, as a result, the occurrence of internal stresses in the filter material.

It is also advisable to keep filters clean - fingerprints, dust and other contaminants not only increase light scattering (and, as a result, lead to a drop in image contrast), but can also damage the filter surface. But even minor damage to the surface of the filter worsens its properties. To clean the surface of glass filters, the same means and methods are used as for cleaning other optical surfaces - blowing off dust and other dry contaminants with a pear air jet (or, better, using a special can of compressed air). Larger "garbage" can be "swept away" with a soft (for example, squirrel hair) dry, clean brush. If the filter surface is contaminated with grease stains, dried drops of sea water and saliva, it will have to be wiped using special kits for cleaning photographic optics produced by many manufacturers.
Cleaning plastic filters should be approached even more carefully - the surface of plastic filters is much more delicate than that of glass ones, respectively - it is easier to damage it. In addition, plastic filters become electrified from frequent wiping, which causes more intense dust attraction. And the sensitivity to solvents of plastic filters is much greater than that of glass ones.
Filter storage
It is best to store filters in the plastic cases in which they are sold. Although it is not always convenient (more than half a dozen filter cases already occupy a significant volume), but only this method of storage and transportation guarantees the protection of the filter surface. With intensive use of a large number of light filters, it is sometimes possible to use special "purses"-classifiers for light filters, after making sure that this procedure is safe for the surface of the filters. Such "purses" for filters must be kept in perfect cleanliness - even the smallest dust particles can cause significant damage to the surface of the filters.

Conclusion
We tried to cover most of the main types of light filters produced (although we do not claim to cover the entire market of lens attachments). In any case, the total number of types of light filters presented in the review turned out to be quite significant. And, of course, the reader will most likely have a completely reasonable question: is it necessary to buy them all at once?
Of course, all at once is not necessary. Moreover, the costs of these purchases result in a round sum of money. Therefore, we decided to take the liberty of recommending that you start buying filters with several items that you will probably need.
Permanent wear filters for each lens. In this capacity, the most versatile option is an ultraviolet (UV) filter. On telephoto lenses, you can also use the SKYLIGHT filter in this capacity - in addition to protecting the lens, it also corrects color reproduction when shooting portraits in the sun, practically not affecting color reproduction in other cases.
Of the universal filters used in both black and white and color photography, the polarizing filter is also the most commonly used, and we recommend buying a circular polarizer with multicoated both surfaces.
Well, it makes sense to make further purchases of filters taking into account individual needs, depending on the shooting style and the lenses and lighting used. We hope that our review has given you the information you need for this.
All you photographic!
It mentioned polarizing filters, but I did not describe them, promising to return to them later.
It's summer, which means it's time to talk about these interesting devices.
Despite the fact that there is a lot of information about polarizing filters, when I look around at people taking pictures, I rarely notice how a polarizing filter is used.
Meanwhile, the competent use of a polarizing filter in many cases will improve photographs, add raisins to them.
Pictures for commercial use are often, if not most, taken by professionals through polarizing filters.
A bit of theory.
You don't need to understand the theory. For example, I know her very superficially. If you just need a result, then you can skip the theory and replace it with practice, guided by a few tips that I give below.
But still, a little theory.
Polarization of light is the separation of rays from natural light with a certain orientation of the wave oscillation plane.
The light of the sun has no polarization, i.e. light waves oscillate in all planes at once. However, sunlight, being reflected from some surfaces, acquires polarization, i.e. the wave of reflected light oscillates in only one plane.
Reflected light is light glare on various smooth surfaces, reflection on water, on glass, etc.
The scattered light of the sky and air haze are also, in many respects, a consequence of the multiple reflection of the sun's rays from water or other dust in the air.
So, sunlight is not polarized, and its reflections are often polarized.
How does a polarizing filter work?
The human eye cannot distinguish between polarized and unpolarized light. Light and light.
 The polarizing filter has a unique property - the ability to transmit light only polarized in one specific plane. The picture shows this effect.
Light passing through such a filter becomes polarized.
With the help of a polarizing filter, it is possible to pass light into the lens with fluctuations only in one or another specific plane.
In practice in photography, this ability of the filter is used just to cut off some waves, not to let them into the lens.
Reflections are polarized light, and therefore they can be cut off by turning the filter to a certain angle, which blocks exactly the plane in which the reflection light oscillates.
At the same time, sunlight will still pass through the filter, because. Again, sunlight is not polarized in any one plane.
Of course, not all sunlight will pass through the filter. That part of it, which oscillates in the same plane as the cut-off light, will also not overcome the filter.
Therefore, a polarizing filter always works simultaneously as a neutral filter, darkening the image by 2-3 steps.
Finished with theory.
In photography, a polarizing filter, in particular, allows you to:
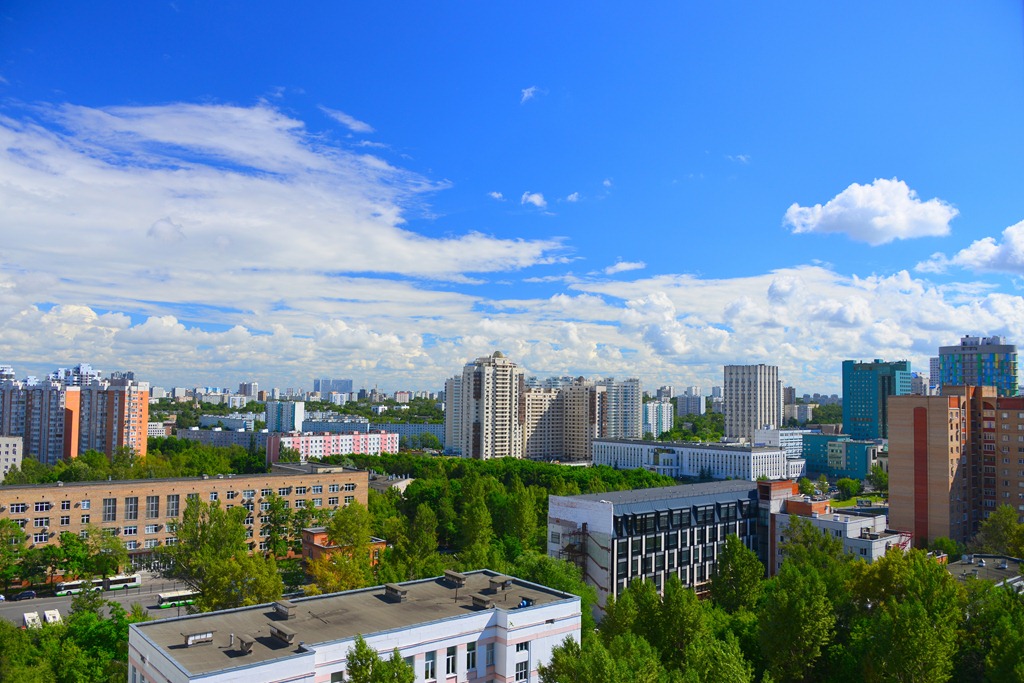
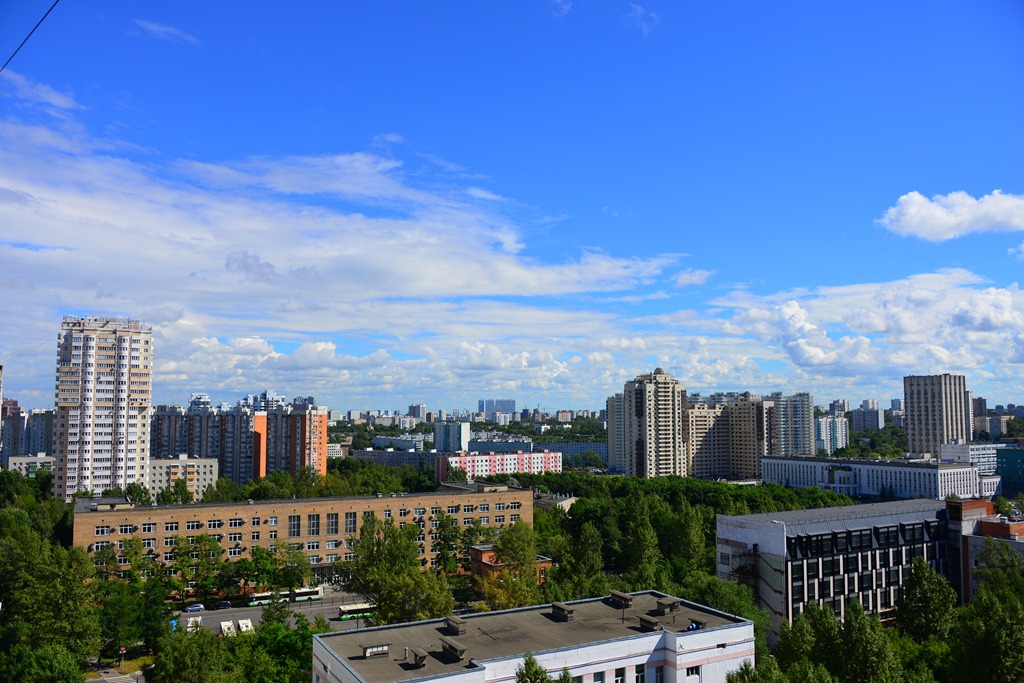
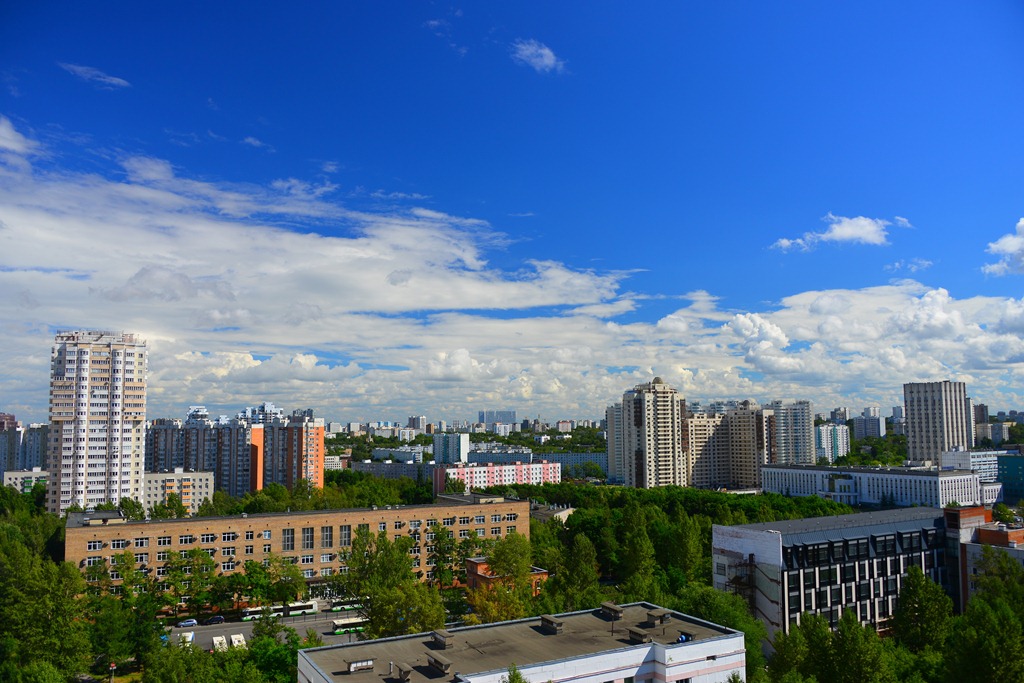
1. Remove the whitish haze from the sky and show the sky in a rich dark blue color. At the same time, the clouds remain bright white, contrasting and expressive. Very beautiful.
2. Remove air haze from the landscape and show the landscape with brighter rich colors. Visually, the contrast increases and there is a feeling of increased sharpness and clarity.
3. Remove reflections from the surface of the water (window glass) and show what is under the water (behind the glass).
A polarizing filter is visually similar to a neutral density filter. It is screwed onto the front of the camera lens. But there is a difference.
 The filter frame consists of 2 interlocking rings that can be rotated relative to each other around the optical axis.
After the filter is screwed to the lens, it is possible to arbitrarily rotate the filter glass itself around the optical axis. So, in fact, the filter is tuned to cut off a specific plane of oscillation of light waves.
The performance of a polarizing filter depends on two factors:
1) the correct orientation of the camera in relation to the surrounding reality;
2) the angle of rotation of the filter in the frame.
We look at the subject through the viewfinder from different directions and turn the filter frame. The effect of the filter on the picture is clearly visible visually. All the main patterns will immediately become clear.
There are a few things to keep in mind when using a polarizing filter:
1. There are two types of polarizing filters: Linear and circular (circular).
Linear ones appeared much earlier and for the purposes of the photo they are most likely not being produced anymore.
 Polarizing filters were also produced in the USSR. For example, in the photo PF-49. PF, is, of course, the "Polarizing Filter", and the number 49 is the diameter of the thread. All Soviet polarizing filters are linear.
Linear filters are not very convenient to use with modern cameras. With t.z. eliminate glare, reflections, haze, etc. - the filter will work as it should. But in a modern device, most likely, metering and autofocus will lie.
The linear filter polarizes the light, and the device's sensors are sensitive to polarization.
The natural conclusion is that if you use manual lenses on a modern device and know how to enter exposure compensation into the device, you can safely use a linear filter, for example, a Soviet one on a digital SLR. Everything will turn out as it should.
On a Soviet lens, a Soviet polarizing filter would look quite appropriate.
 The range of these filters is shown in the figure. For example, the most common lens of the Helios-44X-X series has a M52 × 0.75 filter thread.
Circular filters are more modern. They are released just to ensure that metering and autofocus work correctly on modern devices.
 The circular filter has 2 layers. The first layer is an ordinary linear filter. It cuts off all but the selected waves and polarizes the light.
The second layer allows linear polarization to be turned into circular. Those. as if no longer polarized light reaches the automation of the apparatus.
In terms of the final effect on the image, circular filters do not differ from linear ones.
To be sure to distinguish a linear filter from a circular filter, there is a very clear and simple test that I found on the About Photo resource.
Even if there are no inscriptions on the filter, this is very easy to do. Approach the mirror, turn on the light, although it's better in reverse order, it's cheaper. Look through the filter like a monocle. The outer side of the eye, the inner side of the mirror. If the filter in the reflection is opaque, turned into a black circle, then it is a filter with circular polarization. If the filter in the reflection is transparent, then either you turned it the wrong way, or it is a linear filter.
Even if you know for sure that your filter is circular, try to do as it is written. It's mesmerizing.
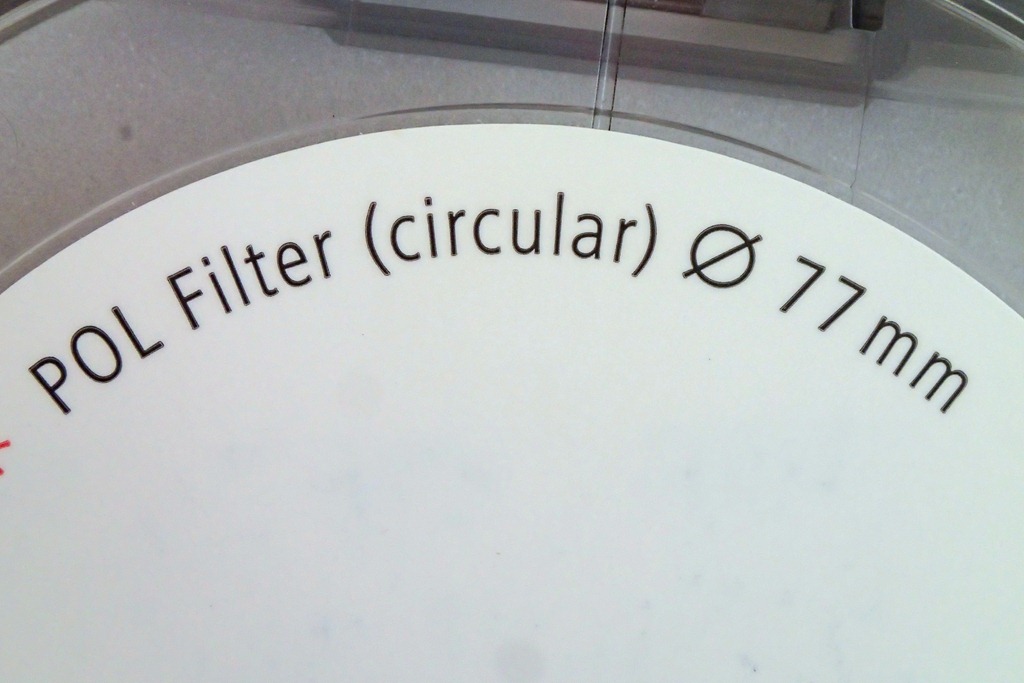 If you buy a new filter, then its type can be understood by the marking.
Circular polarizers have the words CIRCULAR, CIR or simply the letter C in the marking (for example, CIR-PL or C-PL).
You can visually see the operation of the filter, any, both linear and circular, in a very simple way. The light from computer monitors is polarized. If you look through the filter at the monitor image and rotate the filter around the optical axis, you can choose an angle at which the monitor image is completely invisible. The filter appears to be opaque.


So you can roughly check the quality of the film in the filter (and in polarized sunglasses, by the way). A bad film will not give a uniform full blackout, but spots of light and dark areas.


Here I have some funny shots where the filter completely darkens the image from the monitor, but through it you can see different objects, or my hand.
2. If you are going to photograph blue skies, then consider the following:
When the sun is near the horizon (at sunrise and sunset), the most polarized areas of the blue sky are overhead (at the zenith) and perpendicular to the direction of the sun's rays. In this case, the optical axis of the lens should be located along the north-south line.
At noon, when the sun is at its zenith, the sky is polarized in all directions at an angle of 45° to the horizon. Sky polarization decreases upwards.
The most polarized are those parts of the sky that fall into the image field when the object is illuminated by side sunlight, i.e. when the direction of the sun's rays and the direction of shooting (the optical axis of the lens) form a right angle.
In this case, the filter darkens the sky to the greatest extent. The polarization of parts of the sky decreases as you get closer to the sun.
The areas of the sky lying in the directions to the sun, above and below the sun, and also in the opposite direction from the sun, are not polarized or almost not polarized. These areas are included in the image field when shooting against the sun (backlighting) or when the sun is behind the camera (front lighting).
In cloudy weather, a polarizing filter will not work with the sky in any way.
The left (the first of the pair) shots were taken without a filter, the right (the second of the pair) were taken with a filter. The unevenness of the color is made intentionally for an example ..

3. If you are going to shoot clear water:
To eliminate the reflection on the water, you need to turn the filter to a different angle than the one that darkens the sky. This means that it is impossible to achieve the effect of transparency of water and blue sky at the same time.
I do not consider the option of using several polarizing filters at a time as completely exotic.
There should not be large waves on the water, because. waves reflect light at different angles, which means that it will not be possible to eliminate all reflections at one filter position.
Personally, I like the effect of water transparency the most.
4. If you are using a wide angle lens:
The paragraph about the sky has recommendations for shooting directions depending on the position of the sun. When shooting water, there is also a similar dependence on the angle of the lens to the surface of the water to maximize the effect. Everything is less critical there, so I won’t dwell on it in detail.
And I say all this here because when you shoot with a wide-angle lens, a very large area of \u200b\u200bspace gets into the frame.
And if the center of this area even 100% complies with the recommendations for the angle of the optical axis to the sun's rays when shooting the sky or at the corners to the surface of the water, the peripheral area will receive light from a completely different part of space.
And in this area the angles will not be optimal.
Therefore, your sky may darken unevenly. One side is stronger than the other. Or there will be a darker area of the sky in the center of the frame.
In my photo of the houses you can see that the left side of the sky is darker than the right side. In order for the sky to be painted evenly, it was necessary to shift the frame to the left. But it's an ugly house. Here, choose.
Likewise with water. The reflection will disappear in the central area, and gradually appear towards the edges.
All this can be seen in the viewfinder and you just need to pay attention to this feature. In some cases, you can zoom in the direction of increasing the RF. In some - turn the filter a little and reduce the strength of the effect.
Well, or write this feature into the plot.
More about wide-angle lenses.
For a wide-angle lens, you need a filter with a narrow frame. Otherwise, the frame will enter the frame and cause vignetting.
This is kind of obvious, but the design of the filter involves two movable rings and making them completely thin is not very simple.
Suitable filters are labeled "slim" and cost a little more.
5. The polarizing filter works like a neutral filter with such a solid multiplicity.
On bright days, this provides a number of advantages, but if shooting in the shade, then it can be difficult.
The filter reduces the amount of light entering the lens by 2-3 stops. I previously shot with the wide-angle Tokina 17-35 f/4. The lens is not very fast, but quite affordable.
So, with such aperture, and with a polarizing filter on, the camera simply did not want to focus automatically in some situations of shaded scenes. Manual focus helped out, and wide-angle is loyal to focus misses, but still, keep in mind.
These filters are not expensive. Don't chase after the coolest and most expensive brand. The difference in the end result is imperceptible.
Don't bother with theory. Just try. Masterpieces are not guaranteed. Not always and not everything can be removed with the maximum and ideal effect. But interesting photos are guaranteed.
Happy pictures!


Dear readers!
Pages – business cards – have been created in social networks for the USSR Phototechnics website.
If you are interested in my resource, I invite you to support the project and become a member of any of the communities. Share your experience, express your thoughts, ask questions, participate in discussions! Comments on the site do not require registration. Just leave the fields blank.
I pay special attention to the new page in Instagram.


