Siberia 3 can't fill cart with coal. Siberia (Syberia) - a complete walkthrough of the game on Android, iPhone and computer with pictures
Siberia 3 (Syberia 3)- continuation of the legendary series of quests, included in the golden fund of the gaming industry. American lawyer Kate Walker (now Kate Walker) continues her journey through snowy Siberia in an alternate reality.
The game begins with the Yukol tribe, having found a half-frozen girl, taking her to a local hospital. Someone calls the manager and orders to detain Kate as long as possible. Waking up, Kate finds in the ward Kurk, one of the yukols, who was also admitted for treatment. Talk to him. We need to find a doctor and report that Kate is healthy and wants to leave the hospital, but the door to the ward is locked.
- Examine the box with the red button to the right of the door.
- Examine the table, take the knife.
- Unscrew the screw on the box with a knife
- Reinstall the green wire and plug in the battery.
- Close the box and press the red button.
Leave the room, look around the hall, pay special attention to the cage with mechanical birds and two chess players playing in the winter garden. Enter the doctor's office, after a conversation with him and a humiliating interrogation procedure, you will receive the key to the exit in the form of a squid. Use the key on the lock in the lattice door from the elevator. It is necessary to rotate the "tentacles" so that they coincide with the holes. Despite the correct key position, the door will not open.
Talk to the doctor, examine the key in inventory: it is missing a part. While the doctor is walking down the corridor, go into his office and open the desk drawer. Your target is a hospital brochure with a red cover at the very bottom of the drawer. Examine it and apply the key to the page with his image, Kate will understand what the missing part looks like.

Go to your room, talk to Kurk and show him the brochure. He will report that a blacksmith from his tribe can easily and quickly make such a detail. You can send the pamphlet with a messenger owl, with which Kurk sends messages to the tribe. In the ward, go out to the balcony and call the owl sitting on the spire of one of the buildings in the distance. The owl pays no attention to Kate. Talk to Kurk again, it turns out that the owl is old, and you need to find a way to call her.
Go out into the hall and return to the chess players. One of them fell asleep on a bench, search him and take the key. Use the key on the cage with mechanical birds and take one of them with you. Returning to your room, put the bird on the balcony. When the owl arrives, give it the brochure.
In the ward, Kate sees Kurk receiving a dose of medication. You will have a difficult conversation with unpleasant consequences with the head of Olga Efimova. When you wake up, take the key from the owl on the balcony and leave the department.
Chat with the receptionist, from whom Kate learns that the hospital has a closed mode. Go to the manager and part-time chief physician, Dr. Zamyatin, and tell us what Olga Efimova is doing. Zamyatin Kate will not believe it, but will treat her kindly and advise her to return to the ward.
Go to Efimova's office and overhear an interesting conversation with a certain colonel who is interested in Kate. At the same time, you will find out that the American detective Cantin, who is also looking for a girl, should arrive soon. When Efimova leaves the office, turn on her computer and read the messages. pay attention to image of a squid in the upper left corner of the monitor. Unexpectedly, Cantin will come out on the video link, who will recognize Kate and tell her the stunning news.
Approach the knight model and activate the lever on the wall. The game will point you to a sword hilt and a shield. On the handle, you need to bend the clamps (on the left) and collect the image of a squid.

Inside there will be a clue to solving the puzzle on the shield. Rotate the stones on the shield so that the following colors are visible:

A secret passage will open. Enter it and see how Efimova and an assistant doctor open taps with fuel oil, which flows through the canal directly into the local lake, the Yukol tribe stopped next to it. When the doctors leave, take the canister and fill it with acid from the barrel in the far corner. Apply it to the chain of the boat in the channel. Get on the boat and sail away.
Congratulations, Kate Walker has left the hospital and gone to rescue a friendly tribe.
To be continued...
The first part of this game was released back in 2002, and it was a definite success. She set a new bar for the genre, which at that time was in stagnation. An interesting quest about a young lawyer who, by the will of fate, becomes involved in a journey to a mythical island where live mammoths have survived, was liked by many. The continuation of the project was not long in coming, after 2 years a sequel comes out, which turned out to be somewhat worse than the original. And now, after thirteen long years, the third part comes out. In Siberia 3 review of the game, we immediately note that part of the series turned out to be rather ambiguous.
Plot
Let's start the review of Siberia 3 with the plot. The history of the third part of the game cannot be considered in isolation from the previous two, since it is a direct continuation of them. So let's remember what happened in the game universe before the events of Syberia 3. The main character named Kate Walker comes from New York to a fictional (like everything else in the game world) town in the Alps for work. She is an employee of a law office who has arrived to complete a purchase agreement for a local mechanical toy business. A seemingly ordinary deal turns out to be the beginning of a large-scale, long-distance and fateful journey. Together with the sentient, human-like "automaton" Oscar, Kate goes in search of the real owner of the factory - Hans Voralberg. This eccentric and brilliant hereditary inventor devoted his life to one great cause - the search for the legendary northern island of Siberia. On the way to Hans, Kate is involved in a variety of adventures in pseudo-German, and later on pseudo-Russian lands, also visiting other interesting places. Let's not spoil too much, in the Siberia 3 review we will simply report that in the end Kate met both Voralberg and those very mammoths.
The third part begins with the fact that the main character was left alone in the middle of the tundra. She is saved from death by nomadic yukols - a tribe of short people with a dense physique. The aborigines were just performing a ritual migration on harnessed snow ostriches (huge fictional animals, designed to partially replace mammoths). Kate regains consciousness in one of the hospital beds in the town of Valsembor. She immediately faces the need to unravel a large tangle of problems, the main of which is some villains who, for some reason, decided at all costs not to let the yukols come to the right place. The unscrupulous activities of the one-eyed army colonel and the even more disgusting doctor Olga are also directed at Kate. Naturally, the main character without hesitation begins to help her new friends who saved her life.
Gameplay
Let's continue Siberia 3 review with gameplay analysis. A good plot and atmosphere are present in the game, but not everything turned out so well with the gameplay. Firstly, the point-and-click system that was present in the previous parts of the series, and which was later added to the game with an update, disappeared. Secondly, the project chose not a very good goal - to please beginners who are not familiar with the previous parts in every possible way, which is expressed in a bunch of little things to simplify the gameplay and focus on the console. Thirdly, flaws and bugs, of which there are a fair amount in the game. With the update, there are fewer of them, but the crooked animation can no longer be cured by any patches.
It should be noted in the review of Siberia 3 that during the game the character of the main character is not revealed in any way, which confirms the version that the main developer of Syberia 3, Benoit Sokal, made the game mainly for non-fans of the original. This includes the addition of fashionable dialogue variability (with a completely linear plot) and the ability of the main character to talk to many NPCs.
The in-game world has revived a little, it should be noted in the review of Siberia 3, the characters for the most part depict violent activity, walking around the neighborhood and pestering others who are just as active. This made the story more dynamic. In general, the third part became more cheerful to play than the previous two. 
As for the quests, in the review of Siberia 3 it should be mentioned that Sokal tried to make the puzzles more friendly, since the previous parts were difficult to pass due to the mass of non-obvious decisions of the developers. And he partially succeeded, to the delight of not only newcomers, but also old fans. But the game still has its share of difficult tasks that can discourage a considerable number of players.
Outcome Siberia 3 reviews
Despite the technical flaws revealed in the review of Siberia 3, we came to the conclusion that the game is quite tolerable, although it does not reach the level of a dilogy in terms of plot and concept. Those who are ready to forgive a lot just for the sake of another meeting with Kate Walker and a bizarre gaming universe will certainly enjoy the game. Benoit Sokal did a good job in the end: he kept the atmosphere of the original, gave us an interesting story and complemented it all with wonderful music from Inon Zur. Siberia 3 review is over.
The sequel to the cult series of adventure games from the French studio Microids. This time even more mystery, adventure and, of course, puzzles!
Clinic Valsembora
After a dialogue with Kurk, we are trying to leave the room, but the door is closed. The bell next to the door also does not respond to our efforts. From the table, you can pick up a knife and use it to open the bell by unscrewing the screw from it. Inside, we can see the green wire lying around, and this should be fixed by putting it back into the free slot.
After going out into the corridor, we need to get to Dr. Mangeling - only with his permission can we leave this strange place. His office is easily identified by the two orderlies standing right outside his doors. After a dialogue with the doctor, we get the key and now we can try to open the elevator, sealed with a fancy lock. This is the first puzzle, and it is solved quite simply - you need to arrange all the tentacles so that they cover the holes. It is difficult to confuse here, since all the puzzles exactly repeat the rotated elements, and finding two similar options here is more difficult than just putting everything in its place.
As you might have guessed, the key did not fit, or rather, it fit, but the grate remained closed. If we examine the key carefully, we understand that something is missing in it, as if something had been pulled out of it. We'll have to look for a working version. We return to Dr. Mangeling's office. In the drawer of the table, rummaging among the books, we find the magazine "Clinic of Valsembora". Having looked through it, we open the page with the image of the key. Then we open the inventory, find our "broken key" and use it on the magazine. Everything becomes clear - only one hairpin is missing. But where can I get it?

We return to our room and talk with Kurk. Showing him a brochure from Mangeling's office, we find out that the blacksmith of his tribe can easily make such a detail, and you can transfer the drawing to him through an owl. She is perfectly visible from the balcony, she is sitting on the neighboring roof, but does not react to us in any way. Need to come up with something. To the left of the doctor's office is the local canteen, where two patients are playing chess. After talking with them, we learn that one of them is so “good” with the new treatment regimen that he falls asleep right on the go. Going out into the corridor and waiting a little, we find one of the chess players in the center of the hall, who complains about his friend, they say he fell asleep again during the game. We must not miss this opportunity, we go to the dormouse and take the key from his neck. Now you can get into the room with animatronic birds (we have the key) and take one of them with you. This will be our owl bait. We put the iron bird on the railing of the balcony in our room and give the brochure with the key scheme to the owl. Returning to the ward, we are waiting for a meeting with Madame Olga.

After an extremely unpleasant dialogue with Dr. Efimova, we need to return to the balcony and take the key from the owl, which the yuks have already repaired. Now nothing prevents us from leaving the floor, just talk to Kurk. He will tell the main reasons why he cannot leave the clinic, and will hint that the head doctor, Dr. Zamyatin, is quite a good person and can be trusted. So, we insert our serviceable key into the unlocking mechanism and, voila, the grille opens. We go down to the first floor.
It is also dark and somewhat dull here. After talking with the nurse at the counter, we understand that the hospital is in quarantine, the funiculars are not working, and, in general, we have one way - to Dr. Zamyatin. The door to his office is ajar, but you can also navigate by two orderlies who are talking not far from him. Kurk was right - Zamyatin turns out to be a very good-natured old man, but Kate does not succeed in convincing him that Dr. Efimova is more likely to cripple his patients than treat them. And we can get out of here only with the permission of Madame Olga herself.
We run to Dr. Efimova, her office is very close. After listening to the insidious plans of Madame Olga and a certain colonel, we learn that another American will soon appear in the clinic, detective Nick Cantin (the same one from the second part), with whom it would be nice to contact. But this is later, first we examine the office, while Efimova disappeared somewhere. Let's start with the computer. After examining the letters, we will be able to chat with Nick. He will also add sad news, promising to arrest Kate at the meeting and send her back to New York.
It's time for the next puzzle. Pull the rope on the wall next to the knight. Now let's turn our attention to the hilt of the sword. After removing the three latches, we begin to rotate the wheels so that the three elements form a symbol that can be seen on the computer at the top of the monitor. This will cause the sword to come out of the fastener and reveal the color code to us. This code should be used on the shield that hangs nearby, and then we can open the hidden passage where Madame Olga disappeared.


We go down after Efimova and get into the local sewerage in the best traditions of the catacombs. And then familiar voices reach us - doctors Mangeling and Efimova, who figured out how to annoy the nomadic tribes. We listen to their dialogue, and then we are in no hurry to cross over to the other side. If you go all the way to the left, you can find a canister, which will come in handy right away. Now we go to the iron door where the villains left. Next to it is a barrel of acid, here we use our canister. Now our goal is a boat that can be reached by passing chemical tanks. It remains only to deal with the chain holding the boat, but here acid will help us out. That's it, we got out of the hospital.
Yukolov parking lot
A couple of ostriches have already been poisoned by water from the lake, and we will have to help the yukols - after all, these guys helped us. After talking with the female shaman, we go to the right of the tent. We need to get back to the dam that we swam through while escaping from the clinic. Actually, there are four valves waiting for us there that regulate the pressure of water (they are numbered from 1 to 4 in the screenshot below). If you turn it counterclockwise, then the sash closes, and water cannot pass in this place, and if it is turned in the opposite direction, then the water increases the pressure. Thanks to the hint next to the dam pressure indicator, we find out that valves 1 and 4 should be closed completely (counterclockwise as far as it will go). And valves 2 and 3 should be open, but if you open them completely, the pressure will be too strong. We need the barometer needle to remain in the green zone, so we carefully tighten valve 2. That is, the second leaf should only be ajar, as you can see in the image below.

It's time to go back to the camp, where we are welcomed as a hero. But we need to Ayahuasca. We go into the tent and go left to the statue of either a squid or an octopus. In fact, this creature is called Quilak, and it lives at the bottom of the lake. On the opposite side of the statue is the shaman's room, we should look there. After a dialogue with Ayavaska, we learn that we need to get a pass if we plan to get to Valsembor. This is what we will do.
Now we need to leave the tent from the other side and go to the policeman who checks the passes and does not let hares into Valsembor. It will not work to persuade him - he has a strict order from Mayor Bulyakin, so we go into his lodge next to his post. There is an apparatus with which you can put a seal on a document, but the seal itself and the document are missing. Now we need to pick up a dry sponge and lining for printing.

We return to the market, but turn right in front of the tent. There is a dead squid on the shore in a pool of its own ink, and this is the place where you need to use a sponge to soak it with ink. In the market you can find a man from Valsembor who runs a tavern there. You can identify him by his hat, waistcoat and red caftan. After talking with him, we get a form of a document that was intended for his wife, but she fell ill, but the document remained, but, of course, without a seal. In addition, we need to climb into the house of one of the yukols by the stairs. He's the only one here, so don't get lost. Here we are interested in a box of trash: there is a lot of all sorts of nonsense, but if you dig, you can remove a bunch of candles, which are now useful to us. There is only one thing left - to talk to the blacksmith. He is ready to help us, you just need to show him the lining for printing and give the candles. We have a print. The puzzle "Print for Valsembor" is almost solved, it remains only to correctly apply all the components on the "printing machine".
We put the lining, the form itself rests on it, then we fix the paper with clamps "4" and "5" (see the screenshot below), we put the sponge on the stand "3", where we took it, now we use the seal in the place numbered "2 ” and clamp it by turning the handle “1” down. We move support “3” under the print and use the device. Then this stand "3" must be taken aside and once again we make a stamp, only this time on the document. That's all, remove the clamps "4" and "5", pick up the document. But it's too early to rejoice, the same detective Kantin, with whom we talked through Efimova's computer, enters the lodge.


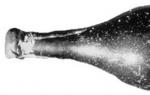
The detective does not want to listen to Kate, and ties us up to take us to court in New York. As soon as you distract his attention, you should first drop the cabinet with the bottle, and then break the latter with the help of the lamp that is on the table next to the door. We go outside and show the pass to the policeman.
Valsembor
Our main goal is to get a leg for baby Kurk. Therefore, we head to Steiner's workshop. We run around the giant ship "Crystal" on the right. If you met a drunken captain, then you are on the right track. Then you should meet "Moskvich" without a back door, and right behind it - a blue sign "Cafe" and the entrance to the tavern, the owner of which helped us a lot in the Yukol camp. In it you can chat with Sarah Steiner. Yes, yes, the daughter of the very watchmaker we are looking for. Sarah is a very nice girl, she will tell you how to get to her grandfather. We go outside. If you stand with your back to the door of the Tavern, then you need to turn left, reach the crossroads and turn left again. It will be a long walk, but there will be no more forks. You will not miss the watch workshop, you can navigate through the shop windows.

In the workshop we immediately meet Mr. Steiner. He was very interested in our medallion, Oscar's heart. Nervous, the old man grabs his heart. We need to help him find the pills. On the counter opposite the watchmaker we take a mug. You can explore the drawers of the table at which Steiner is sitting. This will give us a hint that usually the old man should take his pills during his afternoon snack. Another clue is hanging on the wall in the basement. We go to the old man and interact with the clock behind him. We put a mug on the lower stand, then open the glass and set the hands to 5:00. It is at this time that Steiner usually takes his medications. Now we see that the clock starts to strike and the pills appear. We give the medicine to the old man.

After apologizing for his incredulity, Steiner promises to complete Kurk's mechanical leg and take it to the hospital to Dr. Zamyatin. However, it remains to figure out how to help the yukols cross the lake. The watchmaker invites Kate to go down to his basement and watch a film about Baranur - the city where the ostriches go. The film itself lies under a pile of junk in a box next to the exit from the basement. What to do, since we need to go there, we will have to look for a solution, and we have only one thing - to use that giant ship that we saw at the entrance to the city.

But we also saw the captain, and his uniform, to be honest, did not inspire confidence. At this time, Sarah comes and promises to help with this deep drunk, Captain Obo. We return to the tavern and talk to Obo, he is sitting next to the fireplace. As we thought, the local "legend" does not really understand what is happening around. We go to Sarah and the innkeeper who will help us again, promising to give the captain some sobering cocktail. Talk to Obo again. The cocktail really helped us start a constructive dialogue. Do not be rude in conversation, use flattery and play on the sailor's pride: that's what will help you convince the former "thunderstorm of the seas."
We rise to the "Crystal" and go to Obo: he is waiting for us on the captain's bridge. His first task will be to replenish coal reserves. To do this, we need to do three things: open the hatch on the ship, where we will fill the coal, then get into the hangar and get some fuel there, and then, finally, use the crane to move the coal to the ship. The first is the simplest - you should turn the valve, which is located very close to the place where we climb on the ship.

Now we go down to land and go to the hangar. It is located directly opposite the gangway, next to the crane. To get there, you need to enter the code that the captain gave us. This code is "0509". Inside, we immediately take the chute and fittings, they lie next to the path change lever. The lever itself will be used later. Now we grab the cart and roll it to the other end of the hangar. On the sides of us there will be racks with doors. Here we will use our gutter on them. This will have to be done until we find our coal, since it will not be everywhere. Armature can be used to determine if something is in the rack or not. Kate just hits the box with rebar, and we have to understand by the sound whether this is our “client”, or we can move on.

Having filled the cart, Kate will no longer be able to push it so easily. We'll have to use the blue jalopy, which stands against the far wall. But before you sit on it, pull the lever that we saw a little earlier to change the direction of the rail. Now we sit down at the machine: we see 3 buttons and one empty slot on the control panel. Pressing these buttons will not lead to anything, so we pick out the first of them with a knife and insert the resulting part into the empty hole on the right. Click on the "new" button (it should turn green), and then pull the switch up.

The last thing left is to load the coal onto the ship. We climb onto the crane using the same code as for the hangar. Crane code: "0509". There we are waiting for a rather interesting control panel (see screenshot). Lever "2" changes the direction of movement of the crane: in the upper position, the crane moves parallel to the ship, and in the lower position it moves perpendicularly. With lever "1" movement occurs in one of two directions, determined by the position of lever "2". Lever "3" allows you to rotate the crane about its axis. Buttons "4" switch the cameras of our view so that we can accurately determine the location of the crane. Finally, buttons "5" lower / raise the lifting mechanism itself.

Next, first we move the crane as close as possible to the trolley, turning it towards it in front. Press the top button from block "5". Now we move the crane in the opposite direction until it stops, turn it to face the ship, use the lever "2" to drive closer and use the button from block "5", but now the bottom one. Here are two screenshots with the correct tap positions:


Well done, the coal was loaded, and now we need to replenish water supplies. We go up to the ship and next to the valve, which we have already turned earlier, we see a hose from the water tower and a pipe where to pour water. First, uncork the pipe by turning the switch to the right, then insert the hose into the hole that has opened and return the switch to its original state. Here we did everything, it remains to turn on the water supply on the tower itself and you can go report to the captain.

Obo distinguished himself again - he lost the ship's ignition key. Well, how I lost it, I threw it out a long time ago, so that I would never again take the helm of the Kristall, but that’s not the point. As it becomes clear from the dialogue, the ship was designed by Steiner himself, and if anyone has a duplicate, then only he has. Again we go to the watch workshop.
What a nimble old man, he had already run off to the hospital to Zamyatin and even grabbed a leg for Kurk. But Sarah will meet us in the workshop, who does not know if there was a spare key, but she will tell us that there is a “Crystal” model in the basement, and will give us a handle from the locking lock. We go down to the basement, insert the handle into the lock under the showcase behind which the ship stands, and get access to the model itself. On the side there is a convenient toggle switch - pull it to turn on the lighting. We examine the rear wheel on the ship and see the numbers with an arrow. We need to dial the following cipher: 30 - 80 - 60 - 100. One division is equal to ten. To get 100, simply deflect the arrow to the maximum and release. With each successful action, the anchor will drop lower and lower. In the end, we ourselves will have to pull it down to the stop. After that, the upper part of the ship will move to the side and part of the key will appear. We'll turn it around and get the whole key.

The key is a bit small, it's not for nothing that 50% is engraved on it. But old Steiner in the basement has a solution for this case too. Directly opposite the model of the ship is a machine with which we will make a duplicate of the size we need. We insert our mini-key into the left compartment and press the button to fix it. In the right one - a blank for the key (you can get it under the same table in a special box). Using the knob, set 200% (this is a twofold increase) and press the red button. That's it, we take out the finished key of the correct size from the right compartment and return to the captain.


The ship is ready to sail, but Valsembor will not let us go just like that. The port is locked, and the gates can only be opened with the permission of Mayor Bulyakin. No, you can also use dynamite, but we are civilized people, let's try the healthy dialogue method first. If you can't find City Hall, then here's an indication for you: stand with your back to the cafe door, turn left and go to the intersection with the car. Behind this very car there is a passage between the houses, after passing which just go straight. A rally of dissatisfied shopkeepers is taking place near the city hall, and it is difficult to miss this event. We start a dialogue. Correct answers:
- "I'm sorry to trouble you..."
- "Leave the city with the yukols"
- "You are taking a big risk"
- "Show them who's boss!"
- "It will do you good"
You can make a mistake a couple of times, but it's not difficult to convince the mayor. As a result, he gives the go-ahead to our enterprise, but we will have to open the locks, plunging into the cold waters of Valsembor.

For advice, you should go to our bosom captain. Obo will tell you that a diving suit can be taken from the warehouse. This warehouse is located right under the lighthouse, and a lone fisherman hangs out nearby. Let's go there. Inside you need to find three things: a helmet, a suit and empty oxygen tanks. The diving suit is hidden behind other things hanging on a hanger. Cylinders lurk next to him at the entrance, and the helmet lies in the most conspicuous place. We put the cylinders on a special rack and fix them with a metal holder, lowering it down. We go to the control panel, where we select the value 180 and press the green button. We return to the cylinders - here we just have to pull the oxygen supply lever and that's it, the suit is assembled. We go into the dressing room.

Going down under the water, Kate has to open two locks. They have the same mechanism. The first shutter on the way looks completely disassembled, and at this stage we just need to collect all the loose parts: 3 gears and a square key. Now we stomp further to the second castle (second screenshot below). We use the square key on the hole under the valve and open the cover to see the inside of the mechanism. Turn the valve to the left and lower the lever. One shutter slowly crawls to the side, and we return to the first shutter (first screenshot below). We insert a large gear on the shaft at number "1", on "2" - a regular gear, and on "3" we put on the remaining stepped part. Turn the valve all the way to the right and use the lever. Perhaps this is a bug, but this is how this quest was counted by the game in my case, but it is known for certain that there is also a normal passage option (find a chain in the wreckage of a destroyed ship and add it to the rest of the details in the first gate). Gear puzzle solved.


After an exciting video, we return to the Kristall. First, we will talk with Ayahuasca at the bow of the ship, and then on the descent from the ship we will meet an excited Sarah. It turns out that Steiner never returned from the hospital, and Kurk is still missing. We'll have to return to the Efimova's lair, where another type has already settled, with whom Kate would not like to deal, a certain colonel with an eye patch. But there is nothing to do, we need to find and use the funicular. You can get to it either by going through Steiner's workshop, or through the city hall. I would advise you to go the second way, as for this you can get an achievement by talking to the excited mayor there. Immediately after the city hall, the local lift station lurked, the door of which was closed. The funicular itself is not visible, but most likely it is at the other end. Now we need to move away from the closed door and go through a couple more houses, go down the stairs and go into the lane, fenced with bars. There will be a cart, under the wheels of which there are wedges so that it does not roll away. We take one wedge, the second one will automatically go into inventory, but the third, the smallest one, will need to be picked up from the place where some kind of cart seemed to have stood, yes, in the past, exactly what it “stood”.

We return to the closed door and inspect its lower part. We need wedges. The sequence of actions to solve this puzzle is as follows: insert a small wedge on the left, push a regular wedge next to it, now pull out a small wedge and insert it on the right. We push the last wedge remaining with us even more to the right of the small “brother”, and we take out the “small” one and squeeze it over the right wedge. The door falls and Kate gets inside. There is no electricity in the room, so we open the power panel with our knife and call the funicular through the control panel. The booth arrives, and we go into it and use the remote control already inside it.


And so we returned to the Valsembora hospital again. Before you go inside the building, go around the helicopter, as the passage to it will be opened from the back side. In it, among all sorts of unnecessary things (grenades, cartridges, etc.), we will find and take a walkie-talkie with us. Now we open the door and get into the hospital. We will distract the colonel and his soldiers at the counter, where we once communicated with the nurse, with the help of a new walkie-talkie. We go to Dr. Zamyatin, and then to Madame Olga's office - there we will find Kurk in a very bad condition.
We need to save the young guide, but first we take the figurine from the table. Now we examine the chair of Kurk. Under his right hand, a tablet with documents is attached to the chair, we need to pick up a paper clip from it. We turn the view to the back, open the lid to the side and clamp the wires with this paper clip. After that, you need to deal with the tranquilizer. We take the needle of the syringe to the side, thereby pouring out its contents. We return the needle to its place, but open the upper part of the syringe and pour in the shamanic potion that Ayahuasca gave us with it. You need to give Kurk this injection, and then he will come to his senses. However, there were clamps on the hands. Under the left hand of the trigger there is another cover behind which the panel is hidden. Here you need a password. We do not have it, but there is a figurine - we use it on the panel. Everything, yukola, we freed. It's time to leave this place!


When the ship hits the ice, the captain will send Kate to the engine room to turn on the super icebreakers. There we are waiting for another "terrible" panel. Puzzle solving scheme:
- Turn the valve all the way.
- Press the red button and select first gear.
- Lower the lever down.
- We switch the third gear, and then immediately select the second.
It should be noted here that the main thing is to quickly change from third gear to second. I don't know how difficult it is to do it on a joystick, but with a mouse it's definitely not as easy as it could be.

We almost arrived at Nakhodsk when something hit the back of the ship. Who's going to check? In general, we go to see what happened. Kraken! Here, however, they call him Quilak, but the essence is the same. As Captain Obo suggests, the monster was attracted by the light from the searchlights, and it is necessary to cut them down by any means. I advise you to start from the right side, since there is a crowbar next to the box, with which we will put out the light. Two searchlights on the left, two on the right, one on the prow of the Krystal, and another at the very rear of the ship, well protected by tentacles. One of the lanterns has a broken trigger, and Kate needs to move the box up to it, climb onto that box, and then let the tire iron finish the job. Now we run inside the ship, where the yukols are hiding. There, on the floor, you need to find homemade matches and one secret hidden between the benches (screenshot below). In this cache is the "Emergency Flashlight", they should distract the monster from the last searchlight, and then calmly approach and "deactivate" it.

Apparently, not only the light attracted Quilak to our ship. It is necessary to turn off the engine, so we go down to the engine room to the icebreaker control panel - the switch we need is very close to the right of this panel. We rise back to the stern and talk with the captain - he climbed into the lifeboat on the starboard side of the ship. He wants to distract the squid from the Crystal, but he needs a light source. We rise to the captain's bridge, but not to the helm, but to the bookcases, where the gramophone used to be. Examine the books that have fallen from the shelves; a bottle of vodka is hidden in one of them. You need to look at the suspicious book twice, as Kate will only show interest at first, and then look inside. We go down back to the engine room to the workbench, next to which the yukolas are rubbing. There is a lamp on it, we collect it, fill it with vodka, set fire to this case and return to the captain.

Baranur
While Kate was out, the ship managed to run aground, and not in Nakhodsk, but in Baranur itself, where we did not want to go. And then there's radiation all around! You need to get special anti-radiation goggles from the machine gun that is on the nose of the Kristall. True, it is blocked, but this is easy to fix by inserting the same ignition key into it, which Kate, one might say, made with her own hands. You can find this key next to the captain's helm. Putting on glasses, it becomes clear that the beach is relatively clean in terms of background radiation. Therefore, we go ashore, because we need to somehow pull the ship to the beach so that the ostriches can safely leave the ship's hold, otherwise they will simply drown. Looking around, you can see a special tractor that can pull the "Crystal" ashore, but it still needs to be reached. We also immediately see that cables are coming from the tractor in our direction, hanging on a pole next to the yukol. Remember them, we need to remove them somehow.

We go down to the beach from a wooden pier along a leaning board. A staircase is visible a little in the distance, and an automaton sits on a bench next to it. Kate immediately notices that Oscar's heart can be inserted into it, but until we can open the chest plate, we will return to it later. We don’t climb the stairs yet, but go to a wooden house at the end of the beach. Climbing the stairs, examine the veranda of this house - there is an "automatic probe". Now we return to our ship and remove the wires from the pole with a probe. Shorty Burut, who is standing nearby, “assures” that he can plug them into the socket, and we will believe him.

Now you need to go into the park itself through a massive rusty gate and turn into the first house on Kate's right hand. It will be something like a Voralberg workshop, but we do not linger here yet, but run to the other end and exit the back door. We need to get to that tractor at the beginning. We go along the rails, and, in the meantime, inspect two broken cars on the tracks. Kate will remove this barrier with a skillful movement of her hand. We interact with the rear of the tractor - the winch is in quite a tolerable condition, but the automaton driver is no longer capable of anything. But he has the key in his hands. We pick it up and return to the workshop. Thanks to this key, we open the box and get the cross-shaped Voralberg key and wrench. Immediately opposite is a box, in it you can find a gear. And the most delicious thing is that there is a map hanging on the wall, which promises an extremely “delicious” puzzle of Baranur Park.


Yukols threw up another headache - that's their way through poisonous vapors and that's it. We will add this goal to the end of our tasks. Let's go back to the automaton in which we wanted to insert our friend's heart. Now we can open the chest plate. Inside, an old heart beats slightly, we pull it out and insert our “medallion”. Raise the top valves and insert the plugs into them. Using a wrench, unscrew the bolt and lift the shiny cover. And there is another lock, and it needs an even more individual Voralberg key.


We go back to the park, but before entering Kate draws our attention to the car from the roller coaster. Yes, this is the puzzle that needs to be solved now. However, first you need to get one thing: there is a giant headless diver in the park (he looks like a teddy bear from below), and if you go behind him, you can pick up a twig next to the bench.


Now we go to the building above which we saw the typewriter. This is to the left of the entrance to the park, if you stand with your back to it. We rise to the roof of this house and sit in the car on the rails. We see the control panel of the attraction in front of us, and on the right on the next seat you need to raise the second iron rod. Now the actual puzzle:
- We scroll the handle so that the arrow reaches the stop and stops there.
- We stick one twig into "15", and the second into "25".
- Lower the right lever down.
- When the trolley stops, take out the twig from "25".

The cart brought us to an attraction that we could not get into because of the blockages at the entrance. We go down and go to the trailers. The last one looks very lively. We go into it, pick up the photo album and leave. And at the exit we meet the mistress of this cozy place, the former military Katerina. If you are not rude to her and be polite, then you can very easily get the key to all the automata in the park. Right answers:
- Sorry.
- [Introduce yourself].
- Lie about a cozy environment.
If you didn’t manage to get the key right away, then you will have to walk to the rubble at the entrance and find the token of Katerina’s deceased husband there. And already this token is exchanged for a key. We return back to the park.

We go to the automaton at the entrance to the park and, finally, start his heart. Oscar is back with us! And he does not like the prospect of walking "naked". I'll have to drive again to Katerina and ask her for the clothes of her late husband. She doesn't mind if we return the key to the park robots. We agree, and Oscar gets an extremely fashionable suit.

We return to the tractor and start a dialogue with Oscar. He is ready to start towing, but there is no power, and the ship is not yet tied to the tractor. To supply power, you will have to go all the way back to the engine room and turn back on the lever that we used to turn off the engines. When leaving the ship, nomads are standing, talk to them so that they tie the cable to the tractor and you can give the “Start” command for Oscar. The first attempt showed that in this way we only drive the Kristall deeper into the sand. We unscrew the bolt at the rear of the tractor and loosen the cable. Again we ask Oscar to begin the process. Now everything went much easier. We ask two yukols nearby to unhook the hook and tie it to the Ferris wheel. Having bypassed the wheel on the right, we climb up the stairs. Next, insert the gear into the mechanism and pull the lever. Press the red button and enjoy the result.


The ship was pulled ashore, so that the ostriches can finally be released. Through the beach we go to the back of the ship and pull the switch there. Nothing else keeps us in Baranur.

Metro station "Historical Center"
We go to check the tunnel with the "red eyes", and then talk to Kurk. Gotta scare the bats somehow. We go into the passage on the right, inside of which there is a sign "Center for Atomic Research". Going down the stairs, we find ourselves in a flooded tunnel: at one end you need to pick up algae, and at the other - pick up the root from the yukol. We return to the central hall.

At the very beginning there are ostriches, you need to pick up a rag from one of them (left screenshot below). We rise along the stairs to the right and inspect the blacksmith's table (right screenshot below). We take the vial, flint, and insert the root into the hole. We wrap the piece of wood with a rag, pour out the contents of the bottle and set fire to the torch with a flint and flint. Trying to scare away mice.


The bats were very frightened, but they couldn’t fly away - there was simply nowhere to go. But from above, Kate notices a ventilation hatch, so you need to open it. We go into the left passage, where Oscar is already waiting for us. He understands that no one can endure street radiation except him and volunteers for this campaign.
We go outside, inspect the hatch on the roof, which we need to open, and go in the direction of the monument. There is a fire truck next to it. We sit in it and start it with the key (the key is in the glove box). We remove the handbrake and drive closer to the hatches we need.


Let's go back to where the fire engine used to be and reach the end of the street. If you walk on the right side, you can go to the bank, which you can go to. There we select locksmith scissors. Now let's go up to the fire station to the staircase control panel. The easiest way is to first raise the ladder all the way up, then turn it sideways over the hatches, use the lever to lengthen it and lower it down until it hits the roof. We rise to the hatch and open it with scissors like a tin can.


The manhole cover crashes down and attracts the attention of automata dogs. We need to somehow get rid of them. We go down a little lower to the fire hose. We take out two plugs on the chains, insert the hose into the front hole, turn the valve and fight back the evil dogs. You can go back to Kate.


When Oscar begins the disinfection procedure, it turns out that the system does not have enough iodine. We will not leave a friend, especially since we have algae - there is more than enough iodine in them. We put them in a special compartment and wait for the end of the test. We return to the blacksmith's workbench and leave the subway.
Temple of the Red Moon
After talking with Kurk and Ayahuasca, it turns out that the sacred temple of the Red Moon is hidden somewhere nearby. And the yukols definitely need to make a pilgrimage to him. But go find him. We go to the stadium and turn right, passing through the gate. There we see a couple of short men who are afraid to go into a small lighted passage. And they do it right. After all, we will soon realize that this path leads to the cemetery. But we definitely need to go there. The daughter of the previous guide, Dunyash, lives in the undertaker's house. She will share a very useful diary of her father and ask Kate to arrange a meeting with Kurk.

Before leaving here, you need to run to the left of the house, if you are facing it. There, in a small cave, there is a tombstone, and a lens is inserted above it. We pick it up and return to the fire to talk with Kurk. He will translate the diary for us.

These records contain the history and description of the Yukol signs, which will help in solving the next puzzle. We return to the cemetery, but we go not into it, but into the stadium. Now we just go straight until we come across a lone chair. Opening the lower part, we get a combination lock of six elements. It separates us from the second lens. The correct solution is in the screenshot below, and the correct sequence of signs is as follows:
- Death.
- Victim.
- Sorrow.
- Death.
- Pain.
- Madness.

Let's go back a little and go up the escalator to the second floor. There you will find a room with trophies. Examine the glass and use the scarf to get to the last third lens.

We leave the stadium and run to the left. We go along the wall almost to the stop, until you see a turn to the left of Kate, marked by a pair of lampposts. This is the path to the pool (see the screenshot below), we need it now. Once inside, we immediately climb the ladder for jumping into the water. At the very edge, you can see three pits, you need to insert lenses into them:
- The first pit is Lens "2".
- The second pit is Lens "1".
- The third pit is Lens "3".

And the yukols knew how to hide their temples. We have to solve the puzzle with mirrors in the pool. There are only three beams at the entrance, and at the end we have to illuminate one red stone, two green and four blue ones. You can always click on the door of the temple and Ayahuasca will show the current state of affairs.
Let's start with the green beam. The pictures below mark those mirrors that have to be rotated for each specific case. For the blue beam, simply evaluate any remaining unused mirrors and engage them. As a result, the starting blue beam should split into four separate beams and illuminate all the stones of the desired color.


sacred bridge

The old Yukolsky bridge has been destroyed, and in order to cross the new one, you need to get the blessing of the guardian who sits on the other side of the river. We return to the house that we ran through when we went to Kurk. In the back of it there is a passage and stairs down. We go down below, and then along another ladder we get to the very bottom and pull the lever here. Now we return to the bridge and knock on the window to the customs officer.

Once on the other side, we go into the yurt to the guard. He is very friendly and ready to help us, but he needs vodka to appease the spirits. And after that, a prayer with a special ritual, to be absolutely certain. We return back across the bridge. The customs officer was caught extremely timid, and he simply could not stand it, escaping on a motorcycle. We go to the place where the "iron horse" stood and pick up a brick there.

We go around the building on the right, where the "fugitive" was sitting, and with the help of a brick we open the back door.

Inside you need to find vodka and paper. A flask of vodka is waiting for us in a basket of fresh fish, and the paper is a little further on, on the table next to the radio.


We leave the building and go down one floor below. Here we run into a room where you can press the button and call the trolley. We throw a flask into this cart and send it back. In exchange, the guard sends us sawdust. Almost everything is ready so that we can proceed to the final puzzle, but first we run to the Ayahuasca tent (Oscar is standing next to it). The shaman has a staff in her chest with extremely useful information for us.
And now let's start to deal with everything in order. On the front we see four drawers. In each of them you need to fill up sawdust. Now let's look at the bottom. We press the button and open the doors of the lower compartment. We take the resin from here, three funnels for smoke and a log. In the center we put a tree, put paper and set it on fire with a flint and flint.


Close the sash and inspect the back of the device. We see here four chimneys, and each one opens. We pick up the last funnel and begin to arrange them in the correct order. All funnels are numbered. Let's start putting them in reverse order. Funnel “4” will go into the first chimney, and funnel “1”, respectively, into the last one. We close all the doors and return to the front side.

We examine the pipes - they also open, like the chimney flaps. We take all the resin and move away from the apparatus. Behind us is a stump, put a semicircle of blue resin on it and cut out a quarter with a knife. We return to the pipes that have just been opened. Here everything is somewhat more complicated. Each pipe has a special grid, one quarter of which is empty. Under this grid there is a special block with the same empty quarter. It is necessary to make sure that the empty slot at the bottom is not under the empty slot on the grid. If this happens, then raise the grid all the way up, twist the lower part to change the position of the hole and lower the grid back.

It remains to decompose the resin. We put the quarters on the grid so that at the bottom of the pipe under this place it is empty. Four pipes - four quarters of resin. One yellow quarter will remain superfluous. The colors must be arranged in the following order according to the wand: Red - Blue - Blue - Yellow. We close the front flaps and turn the lower handles on each pipe to a vertical position. The same handle must be turned on the pipe that exits the apparatus on the left.

If you did everything right, you will get exactly the same result:

Ferry trip "Crystal"
We speak with Captain Obo. He will tell us to run to the engine room to start the ice-picking device. We go down to the hall for passengers and pick up the matches of the yukols. We pass into the department of control of the ice-breaking device. First, turn the valve on the top right side. We put the lever in 1st gear, then press the button, pull the lever to the lower position, then put the third gear and then into the second.

We will be attacked by a giant octopus. It is necessary to break all the searchlights that are on the ship. Scrap will be found on the left side of the deck near the boat. However, the last spotlight prevents us from breaking the monster. We run into the hall for passengers and find a box on the floor, there we select an emergency lamp. We use it near the monster and hit the spotlight with a crowbar. However, the kraken will not calm down, we run to the department where we launched the icebreaker, there we will find a lever on the right, pull it down, so we turn off the engine. however, this does not help either. We find the captain in the boat. He wants to distract the octopus. We run after the lamp to the lower deck, we find the lamp on the table:

However, we have no fuel. We run into the captain's cabin, without climbing the stairs, we will find a bookcase, we see a place where books are scattered. A bottle of alcohol is hidden in one of them, this will be the fuel for the lamp. We fill the lamp with vodka, after which we use the matches found earlier. The ferry ran aground right at the pier. Now you need to measure the background radiation. We run to the bow of the ship, there we will find the device, but we need a key to pull the lever. We run into the wheelhouse with the steering wheel and take the ignition key. We insert it into the device and pull the lever, now we can take the glasses. We go to the pier. We go down the board and run to the wooden house on the supports. We pick up a telescopic rod there and return to the pier. We apply this rod to thick wires from above. We speak with Burut.
Baranura Park
We approach the automaton, which lies behind the broken part of the pier and inspect it, select key. We go into the nearest building, there we will find a small chest, apply to it the key we just found. We select Voralberg key, as well as wrench. We also pay attention to the map with the route, on which some Roman numerals are signed.

We find another door and go out, we will see the yukolov. We examine the territory and find a metal bar near the shop. We leave through the gate and get to the beach, go to the automaton sitting on the bench. Open the lid with the Voralberg key. Insert Oscar's heart and connect the "arteries" to the heart valves. We unscrew the bolt with a wrench, but we do not have an activation key. We rise along the stairs to the left and go to the gate. We hear a sound, they will show us a typewriter from a roller coaster. We pass through the gate and turn right, go up the stairs. We see the rails and the machine, inspect the dashboard. There is a scale up to 50 and holes in some places. Remember the map with the strange Roman numerals? We need to first start the machine up to 50, and then insert a metal rod into one of the holes. Then we pull the start lever. The machine will stop where the metal rod inserted into the hole allowed.
So, remember on the map the designation 15+25 . We first unscrew the arrow to 50, then insert a metal rod at 25 and immediately at 15 (we will find the second rod to our right in the typewriter). We pull the lever, stop at 25, remove the rod and stop at 15. This is where we need it.

We stopped at the mock-ups of rockets, we go out and find a descent down the stairs, we go down. We find already a gentle staircase down, go down and inspect this place. We go into the car and examine the photo album. When you exit the car, Catherine will meet us, we talk to her and ask for the key. She will give it to us. We run back to the typewriter and remove the rod, which lay at 15. We speak with the yukols and run to the beach to the automaton. Start it with Catherine's key and talk to Oscar. He will demand clothes, we go through the gate on the left into the park and find a passage to the subway, the rubble has already been cleared by yukola. We run into Ekaterina's car, Oscar himself will come and choose clothes from Ekaterina's closet. We run to the pier, if you have not yet connected the electricity to the park through the ferry, then run to the compartment with the ice-axe remote control, turn on the power of the crystal.
Now we ask Oscar to tow the crystal, but nothing will work. We ask the yukolov to tie the cable to the Ferris wheel. But first you need to go up to the control panel and insert the gear into the mechanism. When the cable is tied, we start the wheel on the button.
Metro Baranura
We get into the subway along with the yukols, but the road will be blocked by bats. We need to find a way to get them out. However, Kate, made sure that they can only be driven away from the outside, but there is strong radiation, we talk with Oscar, after which he himself will agree to help. Now let's play for Oscar. We go outside and see the Historical Center. Next to him is a fire truck. We sit in the cab and find the ignition key in the glove compartment, start the engine and pull the lever. We're getting closer to the center. Now you need to climb to the staircase control panel. We direct the arrow to the ventilation pipes, pull out the ladder and go to the roof. It will not work to open the grate, we go down to the street and look for Bank. We'll find big pieces there. Again we go to the roof and cut the bars. After that, we go to the fire hydrant and remove the plug from the hole, remove the pin from the hose winder, insert the hose into the hole. We deal with the dog and return to the subway to Kate. However, a dose of radiation has been received. But Kate has seaweed that has iodine in it. We will find this algae nearby, if we go down the stairs to the right from the shelter of the Yukols in the metro, there is a river flowing, and there we will find this algae. Now again we play for Kate. We cross the railway tracks and go up to the table, pick up the right things, watch the cut-scene.
Going outside, we speak with Kurk and the shaman. We find the gate on the screen, we pass there.

We go up the escalator, explore the corridor and in another part we find the descent along the escalator, we find a large staircase down. So let's come to the gate, go outside and find a house with Dunyasha Dubrovskaya, she will give us a notebook, go to Kurk to give him this notebook.

After talking with Kurk, let's run through the camp, run along the building to the left. On the other side of the road we will see a turn, it will lead us to the doors.

Behind this door is a large swimming pool. We go to the springboard and inspect the three round depressions, go down and look for a ladder down. We examine the stones. That's all for now, we return back to the camp. In places of those round pits, we must put lenses.
Sometimes it's better not to come back. Review of the terrible Syberia 3
The genre of classic quests is dead - whatever one may say, it's time to admit it. They have morphed into what the industry calls adventure games. These are adventure games that focus on storytelling, deep storytelling, character development, and not on finding a tiny key in a huge estate. The second part of Syberia was released in 2004, when such mechanics were still appropriate. After a long time, the developers took up the third game and tried to bring it up to modern standards. It turned out it wasn't worth it.
During the passage of Syberia 3, one gets the impression that the French from Microids studied Dreamfall: The Longest Journey and The Walking Dead, looked at their budget, sighed and decided to add adventure elements at least for the sake of appearance. There is no other way to explain the changes that have taken place. Syberia 3 at first even pleasantly surprises: the game offers different lines of behavior in dialogues, shows how your remarks affect the mood of the characters, and when you are silent for a long time, the interlocutor will also hurry you up - why are you silent, say something already. Everything would be fine, but before the series did excellently without this tinsel and was about something completely different.
And it was about the fabulous adventure of lawyer Kate Walker, who went from bustling New York to the provinces to just draw up a standard contract for the sale of a factory for the production of mechanical toys. Soon the girl forgot about her former life and went to look for a brilliant inventor and the only heir to the company, who left to look for mammoths in a mysterious land. Well-written characters, subtle humor, complex but logical puzzles, study of documents and a cozy atmosphere have become strongly associated with Syberia.


Not to say that the new game does not have all this. Kate is in trouble again: the Yukol tribe finds her in the snow. Nomads have a peculiar tradition: they periodically migrate from one place to another on snow ostriches so that the creatures can breed in a new location. Local residents, on whose territory the tribe is stuck, are not happy with this way of life. These people are more advanced and dislike wanderers, so they are in no hurry to solve their problems. Kate is taken to help yukolam.
The game has completely moved to the three-dimensional dimension. But the camera is not attached to the back of the heroine, but hangs on the corner of the location. Motion control comes from the keyboard, and together with unsuccessful (not always, but often) viewing angles, this results in a disaster. To move forward, sometimes you need to hold the stick or buttons in any direction: up, down, left, right or diagonally - depending on what angle we see Kate from. But the problem lies in the change of perspective when moving to another location. First, look at Kate from the back, she is walking forward. The next map is loading - the heroine is already being shown to us from the front, and, accordingly, you need to press "move down" so that she walks straight.
Sometimes the control does not work correctly or you did not set the side accurately enough - then Kate slowly turns around and goes to the previous map, this animation cannot be interrupted. Worst of all with the stairs: the heroine barely crawls up them, and the step on the first step is more difficult for her than Neil Armstrong when going to the moon. Walker runs into walls, rams characters, stops in front of ankle-high bushes, and can get stuck where girls can walk unstaggered in stilettos, let alone in hiking boots.
Real hell begins when the heroine enters somewhere in the background. It's hard to see where she got confused. This situation happened in the underwater episode: it’s dark, you can’t see anything, Kate doesn’t go further - is this the edge of the location or is she stuck? But after all, she can’t go back either - it means she got stuck after all.
Walker runs into walls, rams characters, stops in front of ankle-high bushes, and can get stuck where girls can walk on stilettos without staggering.
The main puzzle here is not to find a damn chain or find out what time the watchmaker deigns to have dinner, but to cope with the controls. When this is difficult to succeed, you can begin, in fact, to study the game. Syberia 3, although it has passed in terms of characters, is still addictive with a story. You accept the problems of yukols as your own: either ostriches risk drinking poisoned water, or the character needs help with a prosthetic leg, or something else. Of the secondary characters, perhaps the captain of the ship came out the best: at first he was always drunk, but if you take him “weakly”, then he will help a lot and generally show himself on the good side.
Puzzles are one of the few that Microids did not break in Syberia 3. Most of the puzzles are solved in a logical way, only in a couple of cases a real “plug” can arise, which is passed by searching through the available options. Otherwise, there should be no problems: we raise everything that we see, remember the principle of operation of devices, and then think about how to put it all into practice. There were even situations typical for quests: the character became ill, you need to find his medicine. It will take about thirty minutes, if not more, but the hero stoically endures the attack - he remains conscious and will never say where he left the potion.


The developers have changed only the approach to solving puzzles. As a rule, before we first found a ton of junk, and then tried to understand why it was all necessary and how it fits under Kate's jacket. Now they often set a clear goal: find something to do that. In terms of simplifying and targeting the “new generation” of players, this approach is appropriate, but fans of the first parts of Syberia may find the quest too simple.