Clothes for animals do-it-yourself patterns. We warm the pet - do-it-yourself clothes for dogs: patterns, comfortable cut. Sewing sleeves and hood to body
A small dog cannot do without its own wardrobe. And if you can do without decorative costumes, then the presence of functional clothing has already turned from a whim of the owners into an indispensable element of keeping the animal. Functional clothing includes items intended for autumn and winter walks, safety shoes, hygienic panties for use at home.
Walking clothes are sewn from easy-care, well-washed fabrics. Autumn options - single-layer, designed to protect wool from dirt and slush. Winter things have an additional warming layer and are in high demand among owners of smooth-haired and small breeds.
Sweatshirt


You will need two measurements - back length and chest circumference. In accordance with them, cut out the details of the back, chest and hood from the knitted fabric, not forgetting the seam allowances. Collect the hood. Connect the chest and back and sew on the finished hood. Armholes, bottom and edge of the hood are treated with contrasting tape.
If you have mastered these simple models, then the next step is for your baby.
Beanie
To determine how many loops you need, you need to dial 20 loops on the needles, knit 10 cm and count how many loops fit in one centimeter.
Measure the circumference of your head and divide the resulting number in half. Cast on the number of stitches corresponding to the half-girth. Knit a fabric equal to twice the height of the hat. Knit the first and last 3-5 cm with a 1x1 elastic band.
Fold the resulting canvas in half so that the elastic band of the front part protrudes by 1-2 cm. Sew the side seams, and decorate the corners of the cap with pompoms or tassels.
In addition to such a hat, you can knit a scarf or scarf.
Sewing and designing clothes for a pet does not require a lot of time and can turn into a favorite hobby that will bring you pleasure, and your dog will constantly replenish his wardrobe.
If before you did not have to sew for a dog, then you can start with such a T-shirt. There are only two parts, and it is not at all difficult to sew. But your dog will be smart!
To sew a T-shirt for your dog, you need to take standard measurements with a measuring tape. Chest circumference is the circumference at the widest point of your dog's chest. The circumference of the neck must be measured where the collar is located.
Length - the distance from the girth line of the neck to the base of the tail. Record all measurements. These are the main measurements. We will sew such a mischievous T-shirt for our pet.

I advise you to use light, stretchy fabrics to keep your dog cozy and comfortable. It is not necessary to buy fabric in the store, your old t-shirt or turtleneck can be used. You will need two pieces of a dog shirt pattern: back (left) and front.

The midline is the length you measured on your dog. Sew the side and shoulder seams in front and back. We make a hem of the bottom of our T-shirt.

To process the neck and armholes, you can use a trim made of the same material or stretch tape that is sold in fabric stores.

The owner, who cares about his pet, pays attention not only to nutrition, physical activity and health of the dog, but also seeks to protect it from cold and rain, as well as dress in accordance with fashion trends for pets. A brightly and tastefully dressed dog cheers up both its owners and the people around them. And if the owner also knows the art of sewing, then the task becomes much easier. It is enough to purchase the necessary fabric and find suitable clothing patterns for dogs - you can create the entire wardrobe with your own hands, from raincoats to holiday dresses.
When choosing patterns of clothes for dogs, you need to pay attention first of all to:
- Different dog breeds have different body proportions. For example, a Stafford and a Poodle, even though they are approximately the same in size, however, clothes sewn according to a pattern for a Poodle will be small in the chest for a Stafford. Therefore, clothes for pets are often sewn to order according to individual measurements.
- Do not forget that clothes for a dog should be comfortable first of all. Therefore, pay attention not only to the beauty of the clothes, because manufacturers first of all sew clothes, oddly enough, for the owners, in accordance with the fashion of the canine world.
You can also sew shoes for a dog, but it is worth noting that not all dogs perceive shoes on their paws right away. This may take time.
Raincoat
In rainy weather, a raincoat will come in handy in a dog's wardrobe. Made of waterproof fabric, this raincoat with a hood will keep your dog's coat from getting wet and dirty during a walk.


- We cut fabric for a raincoat.
- We cut two parts of the hood. We sew them, sew on the lace gathered on the thread.
- We also sew lace around the entire edge of the cloak.
- We sew the hood and body, you can decorate it with appliqué.
- Add Velcro fasteners.
- The coat is ready!
By reducing or increasing the pattern, you can sew a raincoat for both the Yorkshire Terrier and the Great Dane.
Universal pattern of overalls
This overalls pattern is called universal because, having made small edits, it is easy to form another pattern out of it and the pet will have a different wardrobe item - for example, a jacket.

- For tailoring, you will need a measure of the length of the back. It is removed from the base of the neck to the root of the tail.
- We divide the length of the back by 8 and get the side of the square of the dimensional grid, along which the pattern is built.
- By changing the length and volume of the legs (when trying on), we adjust to the parameters of your pet.
- Detail 2 is a wedge that is sewn between the front paws with a narrow end.
Warm sweater

Next in line is a warm jacket for the dog. Here is her pattern.


On the image:
- Bottom trim. Size 2*2.5 inch.
- Cuffs. Need 2 pieces, size 1.5*2.5 inch.
- Collar. Height 7 inches, length should match the pattern.
- These parts are best cut out of stretch.
- We fold the details of the cuffs and neck in half, sew.
- It turns out the detail, as in the photo.
- We bend the fabric of the main part in the middle and cut it with this in mind. We unfold, make sure that the part is symmetrical and return to its original position. Sew along the line in the second picture.
- Sew on the edging, cuffs and neckline.
harness
A soft harness for a chihuahua is one of the easiest to make.

- We cut according to the pattern 4 parts made of denim, mesh, synthetic winterizer or fleece and lining.
- We sew the appliqué to the mesh and denim.
- We sweep all the details together, we sheathe the edge with an oblique trim.
- Sew the fastener straps to the harness.
Dog bed
In addition to clothing, a comfortable lounger can also be sewn for a pet.

1. We start by building a pattern. For dogs of different sizes, it is advisable to make a larger or smaller bed.


2. We cut the fabric according to our pattern, not forgetting the seam allowances.

3. We sew a side. This is how it looks when finished.

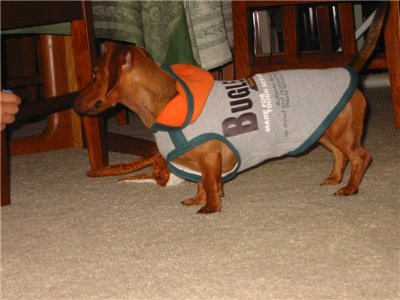
Today, there are a large number of clothes for dogs of small breeds on sale, and this applies not only to decorative items, but also to functional ones, which are an essential requirement for keeping such pets.
But you can replenish your dog’s wardrobe on your own, sewing the necessary things with your own hands. This will require a minimum of knowledge, material and time.
Miniature Chihuahuas in cold weather can not do without walking overalls:

English bulldog in a padded vest a la down jacket:

Bichon Frize in stylish denim:

Tracksuit for Griffons for a walk on a cool evening:

Knitting: Jack Russell Terrier in a cozy vest:

Not only small breed pets should have their own wardrobe. In cold winters, warm overalls will not hurt and dogs of medium and large sizes, especially smooth-haired: Boxer, Basset Hound, Great Dane and others.

For beginner seamstresses or those who do not want to fiddle with the calculation of the parameters of the pattern and sewing complex things for the dog, we present an easy way to sew a vest for small pets.
To build a life-size pattern, you need to take the following measurements from the dog:
- The length of the back is from the tail to the neck.
- Chest girth - behind the elbow joint.
Divide the resulting back length by 10 - you get the size of the side of the squares that will be used to build the following scheme:

On a suitable sheet of paper, draw a grid with the size of the square obtained as a result of the previous calculations. Draw the back, and then move the remaining points along the squares - A, B, C and D. The distance from the top of the back to points B and C should be equal to the half-girth of the chest.
Please note: the belly is a one-piece piece, and the back will consist of 2 parts.
By connecting the points obtained, as in the figure, you can begin to transfer the resulting pattern to the fabric (fleece is well suited). It is circled with chalk or soap, observing the following nuances:
- if the sewing machine has a “zigzag sewing” function, then the parts will need to be butt-sewn;
- otherwise, it is recommended to leave seam allowances.
Now you need to sew a zipper, plastic is best for this.
Tip: if the vest is sewn from fleece, it is better to first baste the zipper, and then just stitch it, as such materials can stretch.
If you plan to make a product with a lining, you will need to cut identical parts from the selected material using the same pattern and connect them to similar parts. At the end of the armhole and collar must be further processed.
From the following patterns, you can choose suitable patterns for Yorkies, Chihuahuas and other small dog breeds:

One-piece pattern:

All provided patterns can be downloaded for free and printed on whatman paper to fit the size of your pet. If there are no difficulties with the simplest sketches, you can look for more complex options in the Burda magazine.
Step-by-step guide to making a pattern for a Chihuahua and a Yorkie
A small breed dog especially needs clothes both in winter and on cool summer evenings. If there are usually no questions with summer T-shirts and shorts, then it can be quite difficult to sew winter suits the first time.
Therefore, we will figure out how to build a pattern for a future jumpsuit for a Yorkie or a Chihuahua. For example, let's take one of the patterns shown earlier:
The step-by-step process of creating it will look like this:
- Measure the length of the back, which is determined from the neck to the tail. This distance will be the segment AB, draw it on paper first.
- To find point F, you need to set aside a line perpendicular to the first segment, equal to the half-girth of the animal's chest.
- G is the end of the segment from point A, equal to the length of half the size of the collar.
- E is the half-circumference of the dog's waist, set aside from the segment AB.
- DC - a segment from the bottom of the tail to the beginning of the thigh (for small breeds it is usually 4-5 cm.
- The width of the parts for the front and hind legs is measured according to the semi-girths of the limbs in their upper and lower parts. Length is optional.
- To build a breast pattern, the dimensions are taken based on the main part - the length of the segments FE and DC.
- Length FF is the distance between the front legs from the side of the breast, DD is behind the hind legs, CC is under the tail (usually this segment is 2-3 cm).
The pattern is ready, you can transfer it to the fabric and cut it, taking into account allowances of 1 centimeter on all sides.
If the owners have a lapdog or, for example, a cocker spaniel, you can also use this pattern by carefully measuring the pet in a standing position.
Pattern of blankets and harnesses for dogs
A pattern of the simplest blanket can be built according to the following scheme:

AB - length from neck to tail, collar BAB - neck girth.
To sew blankets, connect the back and collar along the BAB line. Please note that the same points on different parts must match.
Sew the collar into a ring, sew a belt to it. The T-piece should wrap around your pet's back. For convenience, some sew a loop for the tail at point B.
By a similar principle, you can build a harness pattern for miniature breeds, the diagram of which is shown in the following figure:

After sewing it, suitable fasteners, such as Velcro, can be fixed at the ends.
Clothing for your pets should be chosen from well-washed and easy-to-clean fabrics. For autumn, single-layer sweaters and overalls are suitable, for winter - suits with a warm layer.
For decorative clothes, you can use any fabric, the main thing is that the thing is tailored to fit and does not rub anywhere.
When choosing the size of a future element of a dog's wardrobe, it is better to take a larger item, since any dog loves freedom, because she will need to run outside, play with her owner or four-legged friends.
And remember that you can’t force your pet to get into new clothes by force, it may take time for the dog to get used to the new thing.
P.S. The grammar is very lame in the article and in the figures, so I will not dare to give the source.
- The copyright for the text and photos of this site belongs to the site administrator site.If you liked an article or a master class, you can post it on your website, subject to the conditions that are specified on the page:
- My experiment is a story about how I sewed a jumpsuit for a dog with my own hands - for my little Beads,

- But first, let me give you a little background.
- One friend gave my older Chinese crested dog Lyalechka a ready-made, light jumpsuit bought at a pet store.
- Or rather, she had to do it, because. she bought it for her Spitz-boy Lucas, but did not see that there was no hole for the pussy.
- She did not bother and cut a hole for the most important "male" organ, but simply gave it to us.

- Well, it will come in handy for us on the farm, who will refuse freebies?
- Lyalechka has enough clothes, fully packed, there are suits, coats, hats, shoes and, but an extra supply does not hurt, especially since this gift came in just right for her, very comfortable, spacious and cute.
- But I still have a younger one, baby Bead. So Lyalya is everything, but she doesn’t have such a little thing, and I rushed to the “Cat's House” to purchase a similar “product”.
- And there - after all, they were just waiting for us - the choice is huge, but not about us.

- I sat, thought about it with my brains, well, I’m completely armless, because it’s not the gods who burn pots and climbed into the Internet, typed in a search engine a jumpsuit for dogs with my own hands and began to look for information.
- The trouble is that in patterns I don’t understand much, as they say stump-stump, but I really wanted to try.
- I shoveled a lot of sites, visited forums, reviewed an uncountable number of all kinds of different patterns and everywhere the same thing: "You need one single measurement - the length of the back from neck to tail."
- And then what?
- Directly a state secret, no one reveals secrets. Finally, I came across a pattern that looks very much like a jumpsuit,

- but what to do with it further, I did not know.
- As always, my best friend came to the rescue - a cutter and a seamstress from God.
- Firstly, she scratched at the bottom of the barrel and gave us an antediluvian cloak and jacket from the "master's shoulder", which should have been ripped open and smoothed:

- And secondly: she gave me homework to build this pattern on paper specifically for Beads.
- The length of my pet's back from neck to tail is 30 cm, and 30 divided by 8 is 3.8 cm.
- Therefore, the side of the square of the grid, where the pattern will then be located, will be equal to - 3.8 cm.

- And we accurately transfer the pattern into squares, and then cut it out:

- After completing all the instructions and collecting all the belongings, I went with the little Bead to gain intelligence with my girlfriend.
- I want to warn you in advance that in this master class I will tell you everything in detail, step by step, how the overalls for the dog were created with my own hands.
- So be patient and go ahead!
- We transfer the pattern to paper or a piece of wallpaper:

- On the pattern, you can immediately see that the length of the legs on the paws is too big - the bead has not grown to the long-legged model for the podium, so we measure the length of the front and back paws from the armpit and mark with a red marker, and round the sharp corners between the paws with a smooth line:

- Cut out:

- And iron it out:

- Now you need to cut out the legs for the paws that are inside. Again we take a sheet of paper, transfer the working pattern to it:

- and draw the legs for the paws:

- To make it clearer, you need to look at the pattern from the Internet and connect the points M, F, B, N - the back leg and L, G, D, I - the front leg for the foot (do not forget, so as not to get confused, immediately mark on paper, and then on the fabric, where is the front, and where is the back of the product):


- And now we need to cut out a bar - the middle (bell), to which the legs will subsequently be sewn.
- To do this, we transfer the working pattern to paper and measure the length from the neck down, along the legs to the buttocks - for the Bead it is -52 cm:

- We measure the width of the strap between the armpits from one foot to the other. We have it equal to 15 cm between the front paws and 13 cm between the hind legs, plus 3 cm each for the seams and free fit, in total we get 18 and 16 cm, respectively (I want to warn you in advance that the bar will have to be adjusted, because .all dogs are different):

- And cut out:

- All paper details are ready, now I strongly recommend trying the cut on an old tablecloth or sheet:


- And we sew our trial version of the jumpsuit on a typewriter:

- We get this product:

- Let's do the first example:

- It turned out that the bar, although it was calculated correctly, turned out to be too big, so we remove 2.5 cm directly on the product.

- We draw a line from the armpit of the front paw to the buttocks and immediately transfer the changed size to the pattern:

- Now we are all set to transfer the pattern to the fabric:

- It turned out that when laying out the pattern on the fabric, there is a little lack of material for the legs, but don't be discouraged - you just need to tuck the legs on the pattern and then cut it as it turns out, and not as you want:

- The missing size will be cut from another fabric:

- And we get these two sides of the overalls:

- Cut out the rest of the details:

- And the collar:

- My girlfriend spent almost a whole day with me, but she told everything, chewed it, put it in her mouth and showed it by a good example, it was up to me to collect and sew everything:
Made all the details
 Made all the details
- I planned to thread the rubber bands at the bottom into the trousers, but then I changed my mind and made lapels:


- Then I measured the neck:

- and cut the other side of the collar:

- I cut off the top bar for the clasp in size from the collar to the buttocks:

- And she immediately designed it to her liking:

- I sewed everything in order:

- It remains to sew a lock and process a hole for the ass (I threaded a lace into the collar and into the hole for the ass):

- Two nice pockets remained from the old jacket, which I immediately decided to attach to the overalls, everything will turn out more diverse:


- So all my "ordeals" to create a seemingly good and necessary little thing for my little Bead ended:


- I would be very happy if my long and tedious lesson is useful to someone and he can try for his beloved pet.
- If you want to easily and simply sew panties from old socks, please read.
- I want to introduce you - this is my baby Bead, for whom I tried so hard!
Video: Little Boo Boo
or just bead!
P.S. Recently, a visitor to my site, Natalya, sent her work-overalls for a four-legged friend, which she sewed according to the above pattern with her own hands. Great, no words!
Natalia's work
 Natalia's work
 I hasten to add one more addition. Perhaps you will not read all the comments about sewing overalls, but today one of the visitors, Galina, sent useful advice, read for yourself:
The children have a Chinese Crested dog. Very cold. When the question of warming arose, they were horrified by the prices for overalls in stores. We decided to sew ourselves. Reviewed many patterns. We settled on yours. But when a trial version was sewn from a sheet, it turned out to be about the same as in your photo. Great in volume.
Since the dog is long-legged, there were no problems with the length of the legs. We started looking for other patterns. The result is the same. We decided to build a pattern according to individual measurements. And so, reading the description of the construction of the pattern on one of the sites, I realized where the mistake was made - when building, measurements were taken of 1/2 of the chest circumference and 1/2 of the waist circumference, and it is necessary to take these measurements only up to the armpits. Then, when you sew an insert on the chest to the two main side parts, everything will be perfect.
To make it clearer, I’ll explain with an example: our dog has a full chest girth of 40 cm. Half of the girth is set aside on the pattern - 20 cm. we take a measurement from the armpit to the armpit through the back, and we have it 34 cm, divide it in half and put it on the pattern, then after sewing in the insert 7-8 centimeters wide, we get 41-42 centimeters in volume along the breast. We have 1-2 centimeters for freedom of fitting. By the way, the width of the insert must also be cut according to individual measurements, since the width of the breast is different for different breeds. We measure the width of the breast between the collarbones (protruding bones on the breast). I really hope that my experience will be useful to someone.