Game portal. Complete walkthrough of the game Thief (2014)
Break into the bank
We head to the entrance to the bank. We find ourselves at a small dead end, jump over the grate to the other side on the left, we see the main entrance to the bank, which is guarded. You can sneak through the guards and cells to the main entrance and pick the lock
Or you can go to the left of the bank to a small dead end, if you look up there will be a beam that you can shoot with a rope arrow. We climb the rope to the second floors to the window. We overhear how one of the employees says that he found a piece of paper with numbers, which can be a combination from the safe. He hid the scrap in one of the lockers, and wrote down the number of the locker and it lies in his pocket.
Open the vault. Find a combination
We are waiting for the employees who spoke to disperse. Both of them will stand against the cabinets with their backs to each other, we search their pockets, we get a note with the locker number - cell number 7. We go down to the lobby. We go into the rooms behind the bars - the lower offices, the clerk will walk back and forth there, and a woman walks near the bookshelves, where she walks in the desk drawer you can find the document “Vault Repair Report” from which we learn the second digit of the combination.

Next to the sleeping guard, we open a complex lock to the door, we penetrate into the external storage of the bank. The cameras can be turned off either with water arrows (you need to shoot not at the cameras themselves, but at the light in the mounts), go up to the cells and turn off the traps in the bust with wire cutters. Then we open the cell with one more digit to the code of the safe in the bank.

We look in the notes for the first two codes. Well, after that you can pick up the third digit to the safe in the bank. all in all, code to the safe 6-3-2
Steal the Star of Aldale
If we go upstairs, we go around the traps and make our way through the tables under the cameras, press the levers to open the bars, inside we take more letters and guarantees. We need to go down the stairs. On the sides of the stairs, you can unscrew the grate bolts and climb to the box in which we turn off the traps with the help of wire cutters. We go to the grate in the center, press the levers on both sides. Attention, before taking the star, on the left in the table, press the button to turn off the alarm and not raise the kipish. After that, you can take the "Star of Aldale" from the table. We leave the bank.
Handmade
To get the task "handmade" we go to Ector's store. Hector will complain to us about the fact that a certain Alfonso stole a mechanical hand for scratching his back from him. We need to get into Alfonso's studio and steal this hand from him.
After we accept the task, it will be displayed on the map, we go to the point we need. Arriving at the place around the corner, we observe the scene of how one man pisses off another. Waiting for them to disperse. One of them will sit on a bench and immediately fall asleep, the other will stand on the street.
Steal a mechanical arm

We go around it by standing in the shade and jumping light with a jerk or distract it with a thrown bottle. Behind him is the entrance to the studio, behind which the tailor communicates with someone. we go around from the back entrance, again we see them in the open door, we need to go around them. We rise next to the door to the second floor using the claw
In the room, we unscrew the bolts from the grate, in the wall, crawl into the bathroom, from it we pass into the bedroom. If you open the nightstand next to the bed, we will find a new trophy "Statue Lady" We go down the stairs to the basement, hiding from prying eyes, well, or in the old fashioned way with a fight. We open the iron safe in the wall, take the mechanical hand, leave the place.
steal a painting
razor needed
rope rope

We leave for Montessi's dwelling (located on the clock square). To get inside, we shoot with a rope rope at the beam, but do not climb up into the window of the house. Cut out the picture on the wall. Get the "Danger of Seduction" trophy
Steal sick Willie's wristwatch
Location: Clock Tower Square

Searching the painting
We penetrate from the street through the window into the house of Sick Willy. We search the picture on the wall, a secret room will open, there we will see the dead Willy. We go up the stairs to the attic. The box will contain a clock.
medical problems

Troy is constantly mumbling some bullshit
Tools: wrench
location Clock Tower Square
We penetrate by raising the window to the Pharmacy of Troy. Next in the corridor we unscrew the grate with a wrench, we crawl into Troy's room. Troy's miracle tonic lies on the table, we knock out Troy, or wait for him to turn away and grab his tonic. We leave the same way we came.
beauty inside
Steal a hand mirror

Location Clock Tower Square
Required tools: rope arrow
You can get there if you shoot a rope arrow at a beam on the street. We climb the rope up to the window, raise it and get inside the house of Miss Scarlett.
We open the lock in the bedside table next to the bed and a letter in which the girl writes that she spied on her father from the closet and wrote the cipher on the tree. a girl sleeps in bed, and her father constantly comes into the room. We go down to the first floor. On the ground floor, behind the picture that is near the window, there is a safe. code 8-2-4 in it lies our mirror.
General's trinket
We go into the basement in which there are two guards. You can go down the stairs, you can find the grate, unscrew the bolts and climb behind the guards. We eliminate the guards. We open the next door, in the chest will be this "new medal of the general"
booth
Meet Vittori at Siren's Rest

We leave for the Siren's Rest tavern to meet with Vittori. The guards confiscated his pleasure ship from him, and the thieves stole his valuables. He needs to get it all back. talking skull-seer. We accept this assignment. We get a new task "golden mean", the task of the booth is completed.
Look under your feet
We need to bypass the guards and climb into the room through the open window, with wire cutters we turn off the traps in the room on this task is completed.
What Easter eggs and secrets did the developers from Eidos Montrea fill their game with? Thief? In this article, we tried to collect everything that was discovered or found by players during their journey as a first-class thief.
I want to warn you right away that if you don’t like to find out everything ahead of time or haven’t completed the game yet, then you probably shouldn’t read the following text. If you have already passed Thief and are considering whether to do it again, then this information may spur you to action!
Easter eggs and references
secrets
In the basement of the brothel, you can find small holes that allow you to spy on what is happening in the rooms where prostitutes serve customers. The developers made several scenes with sex and BDSM, so to speak, to the taste of the audience.

In addition, you can find another erotic scene, although this is quite difficult. Initially, you need to find a secret passage in the brothel. Then go along it and look into all the holes. One of them will contain the code for the secret door. After that, go all the way to the right, you will find a peephole through which you can see the erotic scene in all its glory.
Codes for safes
In total, there are twelve safes in the game, you can find information and codes for them below:

Thank you for your attention!
Thief 2014 walkthrough guide for beginners
We immediately draw your attention to the fact that this game has many non-linear ways to complete missions. This instruction was developed on the use of stealth and the instructor avoided open clashes with enemies. In addition, he did not use combat arrows, flash grenades, and so on. We offer you a working mode of the difficulty level - Thief.
Thief 2014 walkthrough
Episode one can be considered educational. Here you will learn the rules of theft. We leave along the beam to the closed window. In the picture we find the button (when feeling, pay attention to the indicator below). We break the lock, pick up the decoration and go out the window. On the right, you need to take the item and switch to it.
Shoot with a bow at the beam, which is on top and use the rope to climb up. So you have to chat with the girl, run a little and sneak through the security unnoticed. Go to the stairs and follow the marker, break the handle. Then take up stealing in the room.

Follow the girl until she stops at the guard. Then steal her purse from her and carefully rinse off through the water, taking water arrows. Then shoot at the torch, again walk on the water. Next episode: you need to stun the enemy. Then carefully walk past the guards. Throw a bottle to distract him.
Thief 2014 walkthrough - Chapter One: Blockade
Climb up using the hook. Bypass the security. Stun or trick the man, take the arrows and go to the far wall. Above you can see the area. Get down into the alley. There, stun the guards and break the lock, take the mask. Exit at the top through the window.
Once outside, sneak down the street past the guards. In the lair, you can swing, choose ammunition to start the task. Walk until you reach the tavern. In it, talk with the hatter and buy additional equipment or upgrades on the street. The marker will point the way to the queen of thieves.
Thief 2014 walkthrough - Chapter Two: Ashes to Ashes
Use the rope to go down to walk under the bridge and up the stairs. Go past the dozing guard and get behind the bars. At the top, go to the flower, then you have to climb the ledges.
In the ventilation pass the guard, go down. Climb through the window, head to the door to pick the lock. Jump on the hook, roll until the guard appears, jump off. Rustle around, but don't step on the glass.
After opening the lock, go further, but very quietly. Behind the last guard there will be an unlocked door where you need to sneak through. Thief 2014, the passage requires maximum dexterity not to catch the eye. Climb down the ramps. So there will be a button at which you need to shoot a blunt arrow. Then climb up on the right and steal the key. Enter the metal door.
Inside, you need to climb onto the platform and loot the box. Then again on the hook.
Next, you will find a video, a short observation of the ram being prepared and a puzzle-lock. If you figure it out, take the ring and go outside. You need a lattice door. When the guard is distracted, jump into the hole and climb up the ledges through the window. Immediately climb into the closet and wait for the guard to leave. Thief 2014, the passage can be calm, or maybe with an abundance of shots.
When you get home, look at the ammunition and follow the instructions. Get to the bridge and shoot it with a blunt arrow. Go downstairs, find the person you need.

You need to get to the carts, but without getting caught by the arrows. If you turn right, you will find chests and equipment. At the next location, you need to turn into the right lane and approach the guards extorting money from the peasant. Bypassing them on the ledge, you need to climb into the window. Better get in when they're gone.
Clean everything inside and go outside. There is also something to enjoy. The marker will then point the way to the point. When you get to the marker, press the inspect button. Inside the hatch, move carefully, avoiding traps. They can be turned off.
After going through the mazes, find the girl and collect three posters. Take the medallion and go to the brothel. Getting there is easy enough.
Thief 2014 Walkthrough - Chapter Three: Dirty Secrets
Follow the baron. After passing the guard, go with him to the door and use the marker to climb up. Brothel nearby.

In the brothel we take the ring. In one of the rooms there is a painting behind which there is a secret entrance. At the bottom you need to find a column sticking out next to the candles. Next, find three symbols that are worn on the stone door. Then you need to open the door.
Going down, avoid traps. When he finds the treasure, take it in the usual way. You will find symbols in the openings and on the walls. Then go into the tunnel, turning off the traps with the pedal, which is on the right on the wall.
Thief 2014 walkthrough. Library. Use your fake vision to find the fake shelf. This is the way out. When you find yourself in a room with riddles, solve everything the old way and grab the book. Use the rope to climb up. After passing the last guard, go home for ammunition and a task. Visit the tavern and take a walk around the town.
Thief 2014 Walkthrough - Chapter Four: A Friend in Need
The markers will lead you to the mansion. In the mansion, in the room that is needed, there will be a housekeeper and a guard. You need to quietly approach the highlighted books. There you will find a button.
Take with you the drawings located on the second floor and twist the tower below. Then run!
Thief 2014 walkthrough. You are walking through a ruined city. You go down. When you reach the valve, unscrew it. Then take the elevator upstairs, where the right person is waiting for you.
Approach the big safe. It is lowered by a lever. Press the buttons on the sides and enter the code 3.1.9. The video will start. Run back to turn off the light on the panel. Quietly approach the safe and dial 0.1.8.
Take the little thing, collect the flowers, go into the light. Change weapons at home. A new challenge awaits you.
Thief 2014 Walkthrough - Chapter Five: Outcasts
You need to go to the shelter. In the men's section, turn the valve and leave. The marker will help you get into the room. Take the key, go to the women's department. It is not possible to enter directly, only through the ward.
Inside, rummage around and go to the treatment room. You have to turn off the voltage generator to open the door. In the room, rummage around, pick up the item that lies on the chair. Activate the script.

After going down the elevator, don't fight the monsters. Better just don't make noise. Go to the marker. After passing by the monsters, watch videos, collect flowers, etc. from the lair, follow the marker.
Thief 2014 Walkthrough - Chapter Six: The Loner
Follow to the main entrance. Inside the building there may be traps underfoot. Here you need to go to the baron. We'll have to break the generator. When it is broken, take a fragment and go to the grate that hangs nearby.
You need to go through the sewers to the boat. When you're in the city, look carefully for painted ledges and blue bars. When you return to base, rearm. Then go to the point that is poorly guarded.
Thief 2014 Walkthrough – Chapter Seven: Secret City
Follow the gate, which is closed. They need to be broken. Inside, you need to hit the bell, then another gate will open. Then it is desirable to hide from the guard around the corner on the right.
Inside, find the lever that drives the elevator. At the bottom, jump onto the wall to then make your way into the tunnel. After you pass the cracks, meet with the ghouls.

Try not to fight them for long. Moreover, you need to get rid of the trap by turning the valve when the fire subsides. Travel, clean everything, climbing the areas that are marked. By the way, you will face a dilemma - to defeat the catcher of thieves, or just leave.
It's not that hard to get it wet. To do this, use a bow and headshots. But first, with the help of water arrows, turn off the light and start the battle. If you don't want to fight, you can just leave by opening the gate.
Thief 2014 Walkthrough - Chapter Eight: Morning Dawn
You will have to walk through the catacombs very quietly. When you surprise the strange structure, jump down to dive into the hole in the wall. There you will have to deceive the guards a little, which you already know how to do.
Once you're at the top, shoot the rope arrow at the beam so you can climb onto the ship. Then go down and along the ledges leave the tower. Then go past the door to go down. There you will have to bypass a rather large brigade of enemies. This is very difficult, since key positions are guarded. Here you have to be smart. Thief 2014 walkthrough is about wit and the ability to make important decisions quickly.
When you get down, blow into the street, keeping to the right side. If you have an arrow-rope with you, you can shoot at the beam and get out onto the platforms. If you are left without ammunition, keep to the left, trying to pass through the guards unnoticed. You will have to pick the lock without making any mistakes.
Inside, you watch a video and follow the girl. You need to go around the girl and go from behind. You can go under the floor. Move forward past the monsters. It's not that hard since they can't see well.

Thief 2014 Walkthrough: The Last Stand
After the cutscene, immediately go left and select the shard. Next, go upstairs to reach another shard. Jump down to where the last shard is waiting for you. When you have a stone in your hands, the girl will see you and immediately strike. By the way, when you take the first stone, phantoms will already appear. They should be avoided. You will need to collect the stone in order to take it to the girl.
If you did everything, then everything, a happy ending to the game!
Thief 2014 walkthrough provided by us has three or four specially missed moments so that you can go through certain sections yourself. This will allow you to master the game faster, to feel what it is to be a thief. Good luck!
Begin Walkthrough Thief 2014 from watching a short video at the end of which we will find ourselves in a room that first we need to inspect and steal everything of value. Items that can be stolen will gleam, you can also extinguish standing candles and inspect the cabinets in the room (all these actions are performed by pressing the E button), while you need not to wake the man sleeping in the bed. Next, by pressing the “space” we get out into the street through the open window and, after walking along the board, we get to the house opposite, we also climb into it through the window, and to open it, first hold down the E button, and then press it several times. Thus, once in the attic of the Aldale Bridge, we pass to the end of the corridor and turning right we get into a room with birds in cages. You need to go through this room without making sudden movements, to do this, press Ctrl while walking. At the end of the room with birds there will be a picture that will attract the attention of our thief, approaching it, press E, then pressing the movement buttons and moving the mouse, we probe the frame of the picture for hidden switches, as soon as you find the switch, the circle in the center of the screen will turn white, at this moment press E. After the picture leaves, press E to start cracking the lock of the safe, for this we simply move the mouse until each of the circles turns white, then immediately press E. After repeating the procedure three times and opening the safe, we pick up the Shiny Necklace lying in it, which is unique prey.
Hearing footsteps on the roof, we get out into the street through the window to the left of the safe, after getting out of the window we pass along the building to the right, around the corner before climbing to the roof we will find a small chest in which there will be a rope arrow, select it by pressing 8 and shoot at the beam wrapped in a rope above your head. Next, press the “Space” to jump onto the cable and W to climb it, after which we press the “space” again. After talking on the roof with Erin, we follow her overcoming all sorts of obstacles. As a result, having descended from the roof into the alley, we continue to follow Erin, trying not to catch the eye of the guards (you can look around the corner by pressing E, and then using the A and D buttons). After Erin climbs onto the roof again, we continue to move along the alley, trying to stay in the shade and picking up all sorts of shimmering trinkets along the way. Having reached the stairs by pressing the “space”, we will climb along it to the roof where Erin is already waiting for c, after a short conversation we continue to follow her again (to crawl under the pipe, sit down by pressing C.
When viewing, to switch between videos, use the “Playlist” tab, and if the video helped or you liked it, you can like it) ...
Having concluded a bet with Erin, we turn right and go to the winch which we break by pressing R and then go up the stairs. Having gone forward along the roof, we jump into the window, after passing along the corridor we open the door lock on the left, but before that you can look through the keyhole into the room while holding E. Having entered the room, we take away everything of value, including the peeping diary lying on the table. Having got out of the room through the open window, turn left and go along the wooden beam to another building where again you will need to open the window marked with a marker. Indoors, we rise to the second floor where we again communicate with Erin.
Once at the entrance to the gardens and after talking with Erin, we move in the indicated direction, remaining in the shadows and trying not to catch the eye of the guards patrolling the territory, to quickly move between the shadows, you need to press the “Space”. Having reached the guard standing with his back to us, we approach him closer and rob him while holding E. And after he moves away, we move forward to the indicated point, in order not to attract attention, sit down by pressing Ctrl (especially while moving through the water). Having reached the casket with water arrows, we shoot at the torch on the wall, extinguishing which and crouching we can walk through the water past the guard standing on the bridge. Further, having climbed the stone stairs, we meet with Erin and two guards, the girl will kill one of them, and we need to stun the second one by approaching him from the back and pressing Q.
While holding E, we remove the body into the shadows and, after talking with Erin again, we break open another lock. Having opened the door, we pass forward and taking a bottle from the box, we take it in our hand by pressing 0 and then we throw it to distract the guard standing in front. Having bypassed the distracted guard, we climb the stone fence along which we get to the cable leading to the roof where we meet Erin again. After talking with the girl, we approach her from the back and hold E and steal a device called “claw” from her. Then it remains to watch another video.
Chapter 1
Blockade
At the end of the video, we go to the Clock Tower, before we continue on our way, we will be asked to concentrate on vision, for this you need to press F. During concentration, you can see both valuable objects and movement paths, such as this time you can see the stairs. And so, having collected everything of value in the courtyard, including a newspaper with the note “On the curfew” lying at a dead end on the left, we climb the stairs on the wall on the right, to jump to it, press the space bar. Next, pick up a bag of food from the barrel that can be eaten to restore health by pressing H, climb the wall with a grate illuminated in blue. Thus, once in the Stonemarket at the “Gate of Traitors”, we move to the other side of the street along the wooden flooring and the pipe, jumping from the pipe to the flooring on the right, we pass along it into the gateway, as a result, jumping onto the boxes on the street called the Back Door. Then you can go forward along the street, stunning a person who searches a corpse next to which you can pick up hunting arrows, and a little ahead you will again have to jump onto the stairs along which we will get to the locked door. Having opened the lock, we go forward picking up food, then hold E to squeeze further past the boards and barrels. One of the trees will have to be moved by pressing E several times.
Once in the Stonemason's Yard, you need to go past the next locked gate for one, looking into the jewelry store along the way. You can get into the shop both through the main entrance, and bypassing the building to climb out the window. But before you go to the shop, you can go downstairs to look into a small nook on the right side called the East of the Stonemason's Yard. In the end, if you decide to get into the jewelry store through the main entrance, hiding in the shadows, let two guards patrolling the street and then quickly move to the entrance. The door will be closed, and there is little time before the guards return, so we quickly and carefully open the lock and go inside. In the room, first of all, we stun the guard, and then we collect all the valuable items in the room, including the Mask with jewels in the display case. Also on the first floor of the shop, which you can navigate along the beam under the ceiling, you can find a room with a safe and a guard snoring nearby, try to open the lock of the safe on the first try, as an unsuccessful break-in can wake up the guard, then if you don’t want to fight with him you will have to hide quickly. In the safe you can find money and a trophy - Blackened Bracelet.
Having climbed the stairs to the second floor, we will stumble upon another sleeping guard, as well as a woman sitting in an armchair in one of the rooms. You can quietly walk past the guard, and stun the woman so that she probably doesn’t make a fuss. Opposite the room with the fireplace there will be a small room with a bed in which you can find another newspaper with the note “Who watches the watchdogs”. Also, before you leave the building, you should look into the basement, there you will find a safe with a code to open it. 739 . As a result, having cleared all the premises of valuables jewelry shop we get out of the building through the open window of the second floor, thus bypassing the locked gate. After landing, we select from the bench on the right one more item, after which we pass to the closed window, opening which we climb into the next room. Inside, opening another door, we will get into the back street of Blackfarrow, where there are a lot of guards, so moving forward we try not to catch their eyes, keeping in the shadows. As a result, with the help of the “claw”, it will be possible to climb up the pipe to the top, where, moving along the wooden flooring, you can bypass all the guards. In the end, you will need to go to the wall with a white spot and climb it, thus reaching the Clock Tower.
Clock tower
Once in the tower, we examine the room, which will now become the refuge of our thief, in front of the right there will be a chest in which you can find supplies, as well as some improvements. Also in this room on the table you can find a newspaper with a note about the “Star of Aldale” necklace, in addition, here you can see the unique trophies looted during the passage of the game. having looked around, we go up the stairs to the second floor where we watch a short video, after which, going to the window and pressing E, we go to a meeting with Brasco in the tavern “Lame Burrick.
clock tower square
After listening to the conversations of the guards, we pass along the upper tier of the building in the direction indicated by the marker, along the way you can look into the premises of the main guard department. Having opened the window, we turn off the light in the room using the switch on the wall on the left, then going down we read the document on the wall of the room, after which we examine the desk on which, among other things, there will be a newspaper with the note “Blockade” and a magazine with guard reports. There will also be a safe on the wall behind the table, which is also worth cleaning out. Having got out back to the street through the window on the second floor, we go down to the street and go to the entrance to the Lame Burrik tavern, and going inside we watch another video.
beggar queen
Leaving the tavern, we go to a meeting with the Queen of the Beggars, but before that we replenish supplies from the merchant marked with a marker. Having bought supplies and improvements from the merchant, we go to the chapel in Morningside to meet with the Queen of the Beggars. On the way to the old chapel, we simply move along the street in the indicated direction, nothing interesting awaits us here, in the chapel itself, on the table with candles, there will be a newspaper with the note “Old gods in the new city?” Entering the chapel, we watch a video where Garrett communicates with the “Queen of the Beggars”, after this conversation, in addition to information, you will also receive one skill point that can be spent on concentration abilities.
Task: Handmade
The task is taken in Hector's store in Stonemarket, the owner of the store will ask you to return to him a mechanical arm from his iron man. The hand is held by a ferret-like tailor named Alfonso, to get to Alfonso's studio, you need to exit Hector's store and climb the stairs on the wall to the left. Next, we squeeze between the boxes and boards while holding E, thus reaching Baron Avenue. Further, moving in the indicated direction, we twist the sign “First Bank of Stonemarket” from the wall, and when we get to the studio, the first thing we do is get rid of the guard standing at the entrance. Next, you can try to get into the studio through the main entrance by opening the lock, although you will most likely be noticed there, so if you want to complete this task, quietly go around the building on the right and get inside through the open window of the second floor. Having cleaned the premises on the second floor, we go down the stairs to the basement, where one guard will be located. By turning off the light in the basement, we will attract the attention of the guard who will approach the switch at this moment it will be possible to stun him, after which it remains to open the safe and pick it upmechanical hand. Next, we get out of the studio and go to the exit from the location, after which we return to Ector's store and return the mechanical arm to him.
Quest: Bank Robbery
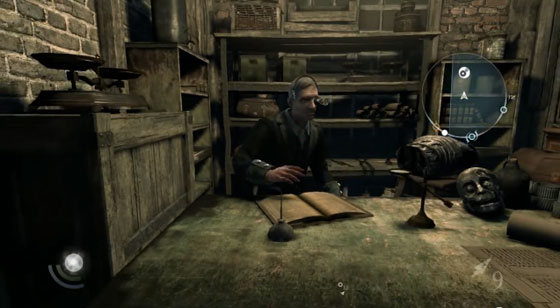
First of all, we pass to the entrance to the bank, which is located on Baron Avenue. Once on the territory of the bank, we move over the wall in the illuminated place, then you will need to get inside the building, you can do this from the left or right side, although it is also possible to go through the main entrance. The easiest way to get into the bank building is to the left of the main entrance, the main thing is not to get into the “mechanical eye” hanging on the wall and reacting to movement. Having reached the dead end, we shoot with a rope arrow at the beam from above, after which, standing on the box, we jump onto the cable along which we climb up. Having jumped from the cable onto the pipes, we climb into the open window, thus hitting the second floor of the bank.
Inside we see two guards standing at the table, from their conversation we will understand that one of them has a note with the number of the locker in which there are possible combinations of the cipher from the central bank vault. We examine the contents of the table and adjacent shelves, we follow the guards, turning off the light along the way and stunning another guard with a lantern patrolling the second floor. In the end, the guards will stop near the bookshelves, here they can be safely robbed, one of them will have a note that says about cell # 7. However, it is not necessary to look for a cell, on the second floor on the left side there will be a small room in which on one of the bookshelves you will find the “Letter of Maunders” in which the access code to the vault 682 will be written, although this code will not be entirely correct. Further going down to the first floor we go into a small room to the right of the entrance, it can also be accessed from the street through an open window.
In this room, on a bookshelf, you can find another document, and to the right of the window, you can find a ventilation grate. Having removed the bolts from the grate, we climb through the ventilation into the next room, there, having stunned the bank employee, we examine the contents of the desk in which we will find the “Vault Repair Report”, which says that the number 8 in the combination has been changed to the number 3, so the combination we need 632 . Then, after examining the room, collecting everything of value and stunning the guards, we open the lock on the door leading to the external storage. The next room will be full of "mechanical eyes", so trying not to fall into their field of vision, we look at all the tables and bank safes, collecting everything of value from them, while trying not to step on the parts of the floor highlighted in red. As a result, having stolen everything that is possible, we approach the dial plate of the door and put numbers on it 632 , after which opening the door we will get into the main storage.
Here, first of all, we carry out the premises in the back of the storage both on the first and on the second floor, after which we will need to open the door to a small cage in its central part. The door opens with two levers, first you need to pull the right lever after it we will have a few seconds to get to the left lever without stepping on the floor highlighted in blue. So you will need to go around the blue marked areas of the floor, there are several ways to do this, for example, go around the top by climbing up there on the bank cells, or run around, or climb through the ventilation under the stairs leading from the main entrance. In general, pulling the left lever and opening the door, we go inside and steal the “Star of Aldale”, after which the room will begin to fill with gas, so we immediately run to the exit to open the door, press the button in its center. Then it remains to get out of the bank building without getting caught by the guards.
Basso's orders
Dangerous Fiction
Taking from Basso all the orders that are available on this moment we go to fulfill them. Let the order “Dangerous Fiction” be the first, having arrived at the indicated coordinates, we climb inside through the window and steal everything we can, and for one we eavesdrop on the conversation of the author of the book that needs to be stolen. Next, we get out and go along the new coordinates to the bookmaker's shop of the clock tower, it will be possible to enter the building from the left side through a small nook. In the bookstore, in addition to the usual theft, pay attention to the shelf with books behind the counter, with its help you can open a secret hatch leading to the basement, you just need to find the right book on the shelf, the same principle as with picking locks. Going down to the basement, we steal everything we can pick up, including the book “This is a cursed city”, thus fulfilling the order “Dangerous Fiction”.
medical problems
Having got out into the street, we go to fulfill the next order, this time you need to steal a vial of medicine. Arriving at the place, we climb into the building through the window, then from the corridor we climb into the ventilation through which we will get into the right room. Having stunned the person in it, we steal everything we find, including a bottle of medicine from the table, after which we get out of the building the same way that we got inside.
beauty inside
The next order will be the theft of a hand mirror, having arrived at the indicated building, we climb inside through the window of the second floor, you can go upstairs using a cable that can be attached to a beam with an arrow (if you have not already done so). Having examined the first room, among other things, we will find “Miss Scarlett's Diary”, from which it will become clear that the mirror is in the safe on the first floor, and the code from it is scrawled in the closet opposite. Going down the stairs, first of all we will stun the man walking around the room, after which, having stolen everything we find, we climb into the closet where, turning on the concentration, we will see the code from the safe 824 . The safe itself will be moved behind the picture, which can be found at the edges of two hidden switches. Having taken the mirror and thus completing the task, we get out of the building through the window.
Sick Willy
The next order will be the theft of the sick Willy's watch, having reached the place we again climb into the room through the window. After searching everything inside, we will stumble upon another picture along the edges of which you need to find two switches. As a result, the wall with the painting will move off, and the corpse of the sick Willy will fall from the attic at our feet. By lifting the body, you can get another document, and climbing into the attic to find a chest with a clock inside. Having completed the task in this way, we get out of the house to the street.
Chapter 2
Ashes to Ashes
Having got to the entrance to the foundry, the first thing we do is go down, then there are two ways to enter the territory of the plant. To the left of the bridge, climb up the stairs and further hiding from the guards in the shadows and behind the boxes, move in the indicated direction to the locked door or go under the bridge to the right, there at the very end you can find a sewer through which you will enter the territory of the plant. Whichever path you choose, you will eventually end up near the fence with the “blue grate”, climbing over it with the help of a claw, we pass through the yard to the building that you need to climb through the pipes on the wall. In the end, having reached the hole in the wall, we climb inside and move through the ventilation until we find ourselves on the stairs and the guard standing at the bottom of which we stun with a jump from above. Next, you will need to go downstairs, but before that, you can go up to the room upstairs and pick up everything valuable from there.
Going down the stairs, we find ourselves in one of the workshops of the foundry, our task is to get to the conveyor and catch on one of the hooks on which the bodies are transported. The easiest way to get to the place marked with a marker is to go up to the windows, passing along which to the end of the room below you can see the grate, opening which and passing through the ventilation shaft, we will find ourselves just under the hook for which we need to catch on, all that remains is to climb onto the platform higher. Well, you can get to the hook through the workshop room straight ahead, knocking out the guards along the way. To hook on the hook, approach it as close as possible and press E, and after hanging, just wait for the code for the conveyor to start moving, and when you get to the next room, jump down by pressing RMB until the guard notices us.
Thus, having reached the old foundry, we move in the indicated direction, looking under our feet, as fragments of broken glass will lie on the floor in places and stepping on them can attract the attention of the guards. Having reached the locked door and opening it, we will get into a small room from which you can exit through the door or through the ventilation, the second is a little safer, since guards are patrolling behind the door in the corridor. Moving through the ventilation without noise and dust, you will reach the next room, then moving along the conveyor with corpses, we climb onto the platform on the top left, and going down from it we will find ourselves in front of the door, passing through which we will get into another room of the foundry with a guard sleeping on a chair and a locked door. To open the door you need to find the key, but before that you should stun the sleeping guard, just in case. Next, we open the locked chest opposite which the guard was sleeping, in it we will find the “key to the engine room”.
Having opened the door, we find ourselves in a room where we climb the wall to the top, inspecting a couple of chests along the way, and climbing the wall up again we cling to the hook, only this time you need to wait until the hook approaches you. Once in the new room, we jump off the hook again, continuing our way on foot along the conveyor until the next cutscene starts in which the general “Thieves Catcher” will remove the ring from the corpse of Cornelius, and our new task is to steal it. After passing under the floor, we climb up the wall, then, after stunning the guard near the table, we hide behind this table from the guards standing by the furnace. When the stove door closes, it becomes dark at this moment and we need to move to another table and so on. As a result, having reached the opposite side of the room, we turn to the right and, climbing the wall to the ventilation, we pass along it to the office of the master of the shop, in which the safe is located, opening it we get the desired ring. In order to open the safe, you need to expose a picture depicting the coat of arms of the general, for this you need to rotate its individual parts, as a result, it should turn out as shown in the screenshot.
Having taken the ring and pushed the general out of the room, we open the lock of the door leading to the street, and after leaving the building we move in the indicated direction, bypass the guards or kill it yourself. Having reached the gate, we neutralize the guard standing in front of them, after which, with the help of a claw, we crawl through the hole in the upper part of the gate. Then, after going a little forward, we climb along the pipe to the wall and then along the bars and beams illuminated in blue we will reach the open window. After getting out of the window and going a few steps forward along the roof, Garrett will fall into some kind of shed, until the guards hide in the closet in time for the noise. After the guard leaves, we go out into the courtyard and hiding in the shadows, we move in the direction indicated by the marker, thus getting into a small building, climbing the stairs to the second floor, we climb out into the street through the open window, thus leaving the territory of the foundry and completing the task. In the process of completing the task "Ashes to Ashes" in one of the secret rooms of the foundry, you can find a safe, the code for this safe 314
.
Basso's orders
Lady's testament
Looking to visit Basso, we will find that he can offer him a few more orders, the first of which we will take the “Lady's Testament”, marking the destination on the map for greater convenience. To complete the order, we need to steal Lady Christina's will, which she hid before her death. Arriving at the place and opening the lock of the front door, we go inside trying not to be noticed by people on the street. In the building we go down to the basement where there will be a closet to the left of the stairs, after climbing over it we will find a bedside table in which the will will lie. Also, through the hole in the left wall, you can get into a secret room, there will be two barrels on one of which there will be a button by pressing it, you can find a cache with the painting “Insatiable Hunger”.
Attack of insanity
Having chosen the next order “Attack of madness”, we go to the indicated address to steal the painting. Everything is quite simple here, you need to climb into the open window on the top floor of the specified building, you can do this by shooting a rope arrow at one of the two beams that are highlighted in concentration mode. Having climbed inside, we cut off the picture with a scalpel, thus obtaining a new trophy “The Danger of Seduction” and completing the order. You can get out on the street both through the window and through the ventilation, having previously unscrewed the grate.
Look under your feet
This order will be a training mission in which we will need to neutralize the traps in the room. Having reached the desired house, we climb inside, where our task is to turn off the traps in the room. To do this, you need to get to the panel on the wall highlighted in blue, you can get around the traps on the floor by climbing onto the cabinet. Having reached the marked panel and having a bite of the wire, turn off all the traps in the room, thus completing the task.
To fulfill this order, you need to steal the bust of Lord Alderley, so that when you get to the desired building, until there is no one nearby, we open the lock of the front door. Having penetrated inside, we also go down to the basement, where first of all we remove a memorial plaque from the wall, behind which there will be a button that turns off the trap in front of the bust. Having taken the bust and thus fulfilling the order, we return to the street.
Steal the loot
To fulfill this order, you need to enclose (the same thing as set up) a reseller’s shop, for this, leaving the building where the “Save Face” order was carried out, turning left, climbing the rope to the locked window of the second floor, entering the room, taking everything valuable inside, we get out into the street through second window. Next, we shoot at the flooring of the upper tier so that it takes a horizontal position, after which we pull the rope by shooting a rope arrow into the beam above the center of the street, thus hitting the “open upper tier”. Then it remains to jump to the rear from the opposite side of the street, to the window with bars. To lower the grate, shoot through it at the button on the left wall of the room, thus opening the window. Having climbed inside, we collect everything of value, after which we interact with the bookshelf, selecting the desired book, press E, after which, having found a secret room, we take away all the money lying on the table, thus completing the next order.
The Lost Poet
To continue the passage of the game, we go to the location “southern quarter”, there we will need to complete both a couple of orders and plot tasks. We will be the first to complete the order “the lost poet”, for this, having passed through the indicated coordinates, we climb through the window into the next dwelling. Here we will need to find five parts of the poem, the first of which lies on the cabinet to the left of the window. The second part of the poem can be found in the chest next to the closet, the third part of the poem will lie on the floor between the bedside table and the bed, under the bag of food. Then we go down the stairs to the floor down, here in one of the drawers of the desk there will be the fifth part of the poem, on the table itself you can find a newspaper, and in a small room to the right of the table you will find the painting “Out-of-season estrus”. The fourth part of the poem can be found in a small room that can be accessed through ventilation, the item you are looking for will be located on a barrel behind an open chest.
Golden mean
You need to start this task by taking the order “Balagan” from Basso, reaching the indicated place, the “Siren's Rest” tavern, and talking with Vittori there. Having accepted the task, we go out into the street and go through the “southern quarter” to the entrance to the Blackmarket, which by the way will be located not far from the building in which we were looking for parts of the poem in the order “the lost poet”. Once in the Blackmarket location, we eavesdrop on the conversation of the drunkard Lenny, trying not to catch anyone's eyes. At the end of the conversation, you need to help Lenny open the gate, for this we go around them on the right side, where it will be possible to climb over the fence by climbing onto the box and open the gate from the inside. Continuing to follow Lenny, we drive him along the way to the shelter, namely, when he stops to talk with his friends, shoot a blunt arrow into the bottle standing on the barrel next to them. the next obstacle will be a woman named Rosie standing on the bridge, to get rid of her, turn the valve to the left of the bridge. Well, right after the bridge, you will need to open the “Udot” gate in front of Lenny), opening the lock. Then it remains to get into Lenny's hideout and steal the skull from it, which is located in a locked chest on the second floor, and you can also find the “Strong Lady” trophy in the chest on the first floor.
Erin's hideout
The next plot task will be to search Erin's shelter, having reached the indicated place, we penetrate Erin's mill through the door. Inside, having passed in the direction indicated by the marker, we will find ourselves in front of a locked entrance to the shelter. To open it, press the switch (a stone sticking out of the wall) to the left of the entrance. Moving on, use concentration to find and disable the traps set by Erin. Having reached the locked hatch, we open it by pressing the button on the wooden pole nearby. After jumping down, Garrett will have a vision in which you need to follow Erin. As a result, once in the room, we examine one after another three paintings nailed to the walls with arrows. Once again in Erin's shelter, we activate the switch in the picture with the image of Garrett, thus opening the cache from which we will take the medallion. Then we get out through the window from the shelter, and then from the mill, after which we go to the “House of Flowers”.
Chapter 3
Dirty Secrets
Having reached the entrance to the “House of Flowers”, using the lever, we lower the wooden bridge, after which we can go to the “Catacombs” location. Next, you will need to find the entrance to the brothel, for this you need to follow the baron who is being led there, while trying not to catch the eye of the guards. If you want to deal with two guards standing opposite each other, you can shoot the valve behind one of them, and stun the second with an attack from behind. Further, moving after the rich man, you can open the ventilation grate, thus hitting the beams under the ceiling. Having passed along these beams straight and to the right, we jump down, after which we roll down the slope even lower and go forward to find ourselves near a healthy gate. To the right of the gate there will be a secret passage to which you can climb with the help of a “claw”. Having bypassed the first gate in this way, the second one will need to be opened with a lever, as well as the ones following them.
Having penetrated into the “House of Flowers” in this way, our task is to get to Madame’s chambers while trying not to catch anyone’s eyes, it’s also worth inspecting all available rooms and collecting everything of value. For example, in a room with opium, using the mechanism behind the tank, you can put everyone in the building to sleep . As a result, one way or another, having reached Xiao-Xiao's office, which is located on the second floor, and having opened the lock of the front door, we penetrate inside. In Madame's office, after looking around, we open the lock of the chest, turn off the trap installed on the safe, after which we open the safe itself, the code of which 573 . Also on the table to the right of the entrance you can find the diary of Madame Xiao-Xiao. As a result, having taken everything of value, we open a secret passage, and in order to do this, you need to find two switches on the picture hanging on the wall on the left.
Our next next task will be to search for a mysterious podium, for this we go down the stairs and move along the corridor until we find a pillar sticking out of the floor, in it there will be a recess into which you need to insert the medallion found in Erin's Hideout, but before that you need to find four symbols which are displayed on the medallion. The first symbol will be on the wall opposite the pillar, the other three can be found by peeping at the clients of the brothel through holes in the walls. In addition to the desired characters and all sorts of perverts in one of the rooms, Garrett will have a vision. And so, having found all the symbols, we return to the mysterious podium (pillar in the floor) and placing the illuminated symbols on the medallion, install it on the pillar, thus opening another secret passage.
When viewing Thief 2014 walkthrough video to switch between videos, use the “playlist” tab, and if the video helped, don’t forget to put likes) ...
After passing through the opened door, we set off to explore the ancient ruins. Moving in the direction indicated by the marker, we make our way along the littered corridor, and when we are at a dead end, turn right and squeeze through the blockage while holding E and continue our way along the corridor. Once near the next door, the first thing we do is turn off the trap on the floor in front of the door, for this you need to press the button on the wall on the right. Having opened the door, we will get into the forgotten ruins, moving through which in the indicated direction it will be necessary to also turn off the traps. Once on the top floor of the tower, we go down to see a creature similar to the local “golum”.
Going further and being in a tower similar to a library, you will need to find a certain book. Coming out of the tower on the wall on the right, we will see a bookshelf on which, having activated the desired book, we will get into a cache in which you can find a skill point. Returning to the library room on the opposite wall, you can find another bookshelf by activating the desired book on which we can go further, being near the library towers, here we will need to get to the central tower. To do this, having passed in the indicated direction, we will find ourselves near the valve, turning which we unfold the stairs with a Roman numeral I, then going down the stairs to the tower and going a little forward we go up the stairs marked with a Roman numeral III thus reaching the landmarks of the next tower. Having entered inside the tower, we go down where at the exit there will be a staircase with the number II and a valve by turning which we will deploy and once again see a strange creature. Next, you need to climb to the top of the tower and return to the stairs III going down which to go to the valve that controls this ladder and deploy it. going up the stairs again III, but this time to the second tier of the central tower, and from there we jump to the stairs II on which we rise upward As a result, being at the stairs IV, along which we can get into the central tower.
In the center of the tower there will be a table with a book locked inside, which we need to steal, for this we need to re-install the medallion in the pillar in front of the table, having previously placed the necessary symbols on it. After picking up the book before leaving the room, you can pick up three ancient bracelets lying on the statues, to unfold the statues, activate the books next to them, in order to pick up the bracelet from the statue that will not unfold, you need to exit the tower outside. And so, taking the ritual book and seeing another vision, we begin to get out of the ancient ruins. To begin with, we climb the rope to the upper tier of the tower, from where we go outside to the next tower, entering inside which we go down the rope. Then, going outside and jumping onto the stone stairs, we go up it, where turning left we get to a shelf with a book that opens the entrance to the library. Having bypassed or neutralized the guards in the library, we pass to the tower, climbing to which we move in the direction indicated by the marker, neutralizing the guards along the road. Having reached the wall with illuminated beams, we climb along them until the next secret passage, climbing into which we watch a video clip.
Work Order: Silence is Gold
You can take this task from Hector in his shop, this time you will have to return the metal man's voice device. First of all, let's get to the previous thief whom Ector hired, he was caught and already hanged, in order to bring down the hanged man, we use a bow and arrows. Having taken the consignment note from the fallen troupe, we go to the shop of the famous pawnbroker Oxhart Perry, which is located in the Southern Quarter. Moving along the streets of the southern quarter, we will rest against the locked gate, to get around them, climb the rope to the building on the right, into which you will need to climb through the window. Once in the room, we pass into the next room, there will be a rope along which you can go down to the street.
To climb into the building marked with a marker, go a little forward along the street, at the top you will see a beam wrapped with a rope, shoot at it with a rope arrow and climb to the upper tier. Further, having climbed into the building through the window, we examine the first room, and then the second, taking everything of value, including the painting “Living a lie”. We get out into the street through the window of the second room, and from there we will get along the wooden beams to the building marked with a marker. Once in the courtyard in this way, we first deal with the guard and the dog, after which we penetrate the usurer's shop, this can be done through the door on the first floor, the second floor window or the basement.
To go down to the basement, you need to knock down the boxes hanging on a rope, going down and taking everything of value except for the chest that is connected to the trap, we go up to the first floor and neutralize the guards, and possibly the owner of the shop. On the ground floor in one of the rooms there will be a safe in which the voice device is located, you can open the lock of the safe immediately, but you should not open it first, you need to turn off the trap. To do this, we go up to the second floor, there is a device by turning off which we will neutralize the traps both on the first floor and in the basement. Returning to the safe, we take away the voice device from it, you can also find the painting “The Gift of Uncertainty” on the first floor. Now it remains to return the apparatus to Ector.
Chapter 4
friend in need
Having visited our lair and found a dead bird named Jeniver there, we go to the “Chrome Burrick” in search of Basso. Arriving at the tavern and talking with Orion there, we go to the Graystun Square, having previously read the newspaper with the note “Treason” in the tavern. You can get to the entrance to the Greystone location by turning right from Ector's store and going up the stairs. As a result, once in Greystone, we go in search of Jacob, and after going a little ahead, a change in plan follows, our new task is to get to the mansion of the architect Eastwick and find out from him how to get into the fortress.
Architect's Mansion
Moving along the roofs and upper tiers of houses in the indicated direction, we will reach the window into which we climb with the help of the “claw”, then, squeezing between the boxes, we will again find ourselves on the street right in front of the Eastwick house. You can get inside in several ways, according to your taste. For example, you can climb through the roof into a small greenhouse on the left side. In the greenhouse itself there will be a valve by closing which you will block the stream of steam, behind which there will be a button that opens the entrance to the basement of the mansion. Having descended into the basement, first of all we turn off the traps by biting the cable in the panel on the wall on the right, then after passing along the corridor we will hear a voice behind the wall. To get into that room, find the button on the wall that opens the secret door. Once in a room similar to a pantry or a cellar, we turn off another trap by opening a panel on a pillar in the center of the room. We stun a man who looks like a cook who has gone down to the cellar with a blow of a baton, and then we go up to the first floor.
Inspecting all the premises on the first floor and collecting everything of value, we get rid of the guards patrolling there in any way convenient for you. In the safe of one of the rooms you can find the "Morendrum" medal. Having finished on the first floor, we will go up to the second, in the room to the left of the stairs you can find the wife of the architect and the maid, in the same room there will be a safe with a couple of valuable trinkets inside. In the end, we will need to go to the right of the stairs and, going into another small room, go up to the third floor, where one of the guards will beat on the locked door, behind him on the wall you can find the painting “Void Excess”. Then we return to the second floor and go into the room marked with a marker, there we will find another maid and a guard. Having neutralized them and the bird in the cage, we collect everything of value, after which we approach the marked bookshelf and, having found the right book, open the secret passage.
Having gone forward along the corridor, we will come across an elevator with which you can go down to the basement or go up to the third floor, choose the latter. Leaving the lift and going along the corridor, press the button in the center of the door, thus getting into a small hall, where we find the hanged Eastwick. Our next task will be to search for a plan of the fortress, for this we climb to the upper tier of the room. Having knocked down the body of the hanged architect with an arrow, we pass to the plan hanging on the wall and look for hidden switches along its edges. After that, a model of the fortress in miniature will appear on the floor of the room, and in order to find the plan of the fortress, you need to solve the diorama puzzle. Having gone down, we approach the model of the fortress and rotate its individual parts in the same way as the fortress building looks in the window. After you correctly assemble the fortress model, a bookshelf will unfold to your left, behind which there will be the desired plan, all that remains is to pick it up and run away from the guards. After jumping out the window and running through the pipe, we find ourselves on a neighboring building, we run on acceleration from the dogs, jumping over the table and further along the roof until we fall into a room full of guards. Having run away from these opponents, we watch how Garrett jumps from the tower.
Fortress
After a successful landing, before continuing the journey, you can go to a merchant standing nearby and buy from him or sell him something you do not need. Then, having climbed the building along the rope, we climb into the room, where we move along the pipes in the indicated direction. Once on the embankment, we pass to the gate bypassing the rubble and fires. After passing through the gate, we go down the stairs to the left, bypassing the jets of steam escaping from the pipes. Having passed along the corridor to the end, we turn right into the doorway, finding ourselves in a huge dilapidated room. We jump to the platform below, from which we jump onto the metal bridge, moving along which Garrett will eventually fall even lower. then we go through the pipe to the stairs along which we climb to the platform from above, from this platform we turn onto the pipe along which we will need to go in the direction indicated by the marker, while trying not to fall under the jets of fire escaping from the pipe at certain intervals. After the pipe starts to break, we quickly run to its edge sticking out of the wall and climb inside.
Having gone forward along the pipe, we will find ourselves near the valve moving back and forth, we quickly run past it at the moment when it starts to move back. Further, once in a small room, we climb into the ventilation shaft through which we get to the engine room. To turn off the flame that roasted the guard, turn the valve on the device from the opposite side. After going a little further forward, we will stumble upon another fiery stream, it can be bypassed on the left. Having reached the locked damper, we open it by rotating the valve on the left side. We try to get through this section as quickly as possible, as health will decrease over time. Having opened the damper and turning right, we jump to the platform below, where we can find a locked door. Having opened the lock, we will get into the boiler room where we need to find Basso, for this we need to go into the elevator by opening its doors by pressing the button, but before that we should remove the “Fortress” memorial plaque from one of the walls and pick up the ring “In memory of a soldier” from the guard’s corpse In order to start the ascent on the elevator, we go inside and press the “up” button.
After leaving the elevator, we get into the prison of the fortress, passing in the indicated direction, we pull the lever to open the cell door in which Basso sings songs. After watching the video, we go in search of the Big Safe, and after the elevator stops, we get out onto its roof through the open hatch, then we move to the neighboring elevator from which we climb into the ventilation shaft. Through the ventilation, we get to the room with the safe in which we activate the lever in the center of the room, thus lowering the safe. Our next action will be to turn off the lock mechanism, for this you need to press two buttons (although Garrett says four) on the left and right walls of the safe for a certain time. After that, it remains to enter the desired combination, or rather two combinations, since there are two combination locks. The clue can be found in Eastwick's note "Big Safe Cipher", the left combination will be 319
, right 018
. After entering one of the combinations, a general will appear, after watching a short video you will need to get to the safe and enter the second combination, the guard can both bypass and neutralize. Having opened the safe and going inside, you need to steal a fragment of the Primal stone, which we do. Next, we go to the luminous flowers, collecting them until we find ourselves near the door, opening which we will get into a labyrinth of beds and roots. Having reached the statue, we take the same Primal stone from her hand, after which we will return to reality.
Work Order: Gourmet
This order is taken from Vittori in Siren's Rest, who will ask you to return another item to him, namely a bug of nature called Octokot. The entrance to the desired location is located in the northern part of Baron Avenue, in order to get close to it you need to climb to the upper tier from the neighboring building. Having entered the room marked with a marker, we get out of it by going down the stairs to the second floor or through one of the windows on the second floor. Having neutralized the guard standing in the courtyard, we penetrate through the door into the next building. Once in the collector's house, the first thing we do is get rid of the servant who descended from the second floor into one of the rooms, on the table to which the servant will approach, you can find the document “Last Will and Testament”, it is needed to find out the combination for the vault. In the next room, after getting rid of the guard, you can find the painting “What you can’t see here”. Next, we go up to the second floor, where in one of the rooms you can find a “servant's diary” from which it will finally become clear what combination is needed for the storage. As a result, having climbed out through the window of the second floor to the street, we will get into the Collector's Garden, having dealt with two guards there, we go down to the basement, where we will find a picture behind which there will be a device for entering a combination for storage, judging by the records found earlier, the combination is the day (or rather the year) of birth house owner - 812 . Inside the vault, in addition to all sorts of valuable trinkets, you can find a jar of Oktokot standing in the closet, and by pressing the button on the wall to the left of the stuffed bear, you will find another secret room, going down into which you can find another trophy, the brooch “Chasty Lady” . Next, it remains to get out of the collector's house and return the jar with Vittori's Octocat in Siren's Rest.
Chapter 5
Outcasts
Having reached Serena's Rest and having talked with Basso there, we go out into the street and, going to the pier, we sit on the boat. Having landed on the shore, we climb up the stairs to Moira's shelter, and when we reach the building we collect everything valuable that we can find in its courtyard, including a memorial plaque, after which we enter the building through the main entrance. Next, we look into the hole in the clogged door and after a short vision we go into the opened door. Once in the reception room, we look around on the first floor, collecting all the valuables and documents, after which we climb one of the stairs to the second floor. At the top, having examined the contents of the table and the locked cabinet, we go in search of the place where Erin was kept, presumably it is somewhere in the women's department, the marker will indicate the direction, one should first look into the men's department, the entrance to the right of the stairs.
The entrance to the men's section will be closed with a grate, you can open it by rotating the valve installed nearby. In the men's section itself, we carefully inspect all the chambers, collecting documents, valuables, and the like. The doors to some rooms will be blocked, so that you can only get there through the neighboring rooms, in one of these chambers you will find the key to the women's section. also in one of the corridors of the men's department you can find the painting "Aversion to courtesies". In the end, having climbed the entire male department, we continue our tour of the local madhouse, now we need to get to the women's department, this can be done, for example, through the covered passage between the departments, or by returning back to the stairs on the second floor.
Before entering the women's section, you can jump into the barred elevator shaft, thus getting to the lower floor, where you can find another document. You can get upstairs along the stairs littered with all sorts of rubbish, and going up one floor you can find a locked door that opens with the same key found in the men's department. Through it we will get into a small room from which, after removing the bolts from the ventilation grill, you can get into the shower room. Next, having opened the door lock, we will get into the corridor, through which, turning left, we will get into the women's dining room, and after examining this room (collecting everything of value and turning the valve on the pipe), we pass to the door leading to the stairs along which we will get to the women's department (this is only one of the ways to get there).
In the department itself, we will need to find the archive of the Shelter, here everything is the same as in the men's department, only in some chambers you can get through the ventilation in the upper part of the wall by climbing onto the ledge. Having searched all the premises, we penetrate into the marked room, you can also do this through the ventilation from above, or by opening the door (for this you will need to bite the cable in the panel on the wall to the left of the door). As a result, having reached the desired room and found the archive there, we go further through the passage that was previously blocked by wheelchairs, through which we go to the treatment center. Having reached the blockage of cabinets and other furniture, press E to squeeze further. Then we pass to the shaft of the bodice, along which we go down several floors, where we crawl under the bars, thus getting into the treatment center.
Next, our task will be to find room “3F”, passing along the corridor, you can look into the eyes of the doors, but you will not be able to open any of them. As a result, we get the task to find and start the energy generator. To do this, we pass to the end of the corridor and go down the stairs to get into a room with a generator. Turning on the generator with the lever, we return to the corridor with locked doors, in order to open them all, we press the button in the room with a table and a locked cabinet. After all the doors are open, we go into the only available room through which we will get to the office we need through ventilation. after examining the room and collecting everything of value, including the syringe lying on the chair, we see another hallucination.
After watching the next video, you will need to go down to the “prison” (to the lower floor of the madhouse), bypassing or neutralizing on the way everyone who left the chambers we opened. Once in the corridor, look into the first room on the right, there will be a safe in the wall that can be opened using the code 731 (in the safe, among other things, there will be an “Ivory Ring”). As a result, having reached the mine, by pressing the button we call the elevator on which you will need to go down, after breaking the desired button. Having reached the elevator to the lower floor, we pass along the corridor to the grate which we open with the lever. Further, before going to the right in the indicated direction, look into the room ahead, there you will find +1 point to abilities.
Ultimately, after going to the indicated room, we will get to the correctional department, here we will need to find Erin's cell. In general, nothing complicated, apart from strange creatures roaming the corridors of the prison, if you don’t want to fight with them, and they are very strong in battle, you will have to try to bypass them or just run past them as quickly as possible. In addition, in one of the suspended cages you can find the Mechanical Eye trophy. In general, one way or another, we get to the indicated place, where we will again need to squeeze between all the boxes and trees by pressing E. Having thus entered the closed territory, we quickly pass along the corridor, opening the locked bars with the help of levers until we reach the necessary door, after which we move along the corridor in the indicated direction until we slide down.
In the next vision, we walk through the ruins collecting poppies, which, in fact, will indicate the path, opening one of the doors, we will find ourselves in the room where Erin once was. Leaving the room, we go down to the next door, passing through which we climb up the backs of the beds, getting into a room on the wall of which there are many Garrett's drawings. In the eye of one of the drawings there will be a lock that we need to open. Once at the door, open it and go right to the next door behind which the room will be Erin standing facing the wall. Going up to her and pressing E, we get a not weak blow from Erin, after which we watch a short video at the end, being at the exit from Moira's Shelter.
Basso's orders
board move
We visit Basso again to take several orders from him, the next one to complete will be “Move the board”. Having reached the specified building, we climb the boxes to the upper tier from where we climb into the buildings through the window of the second floor. Having thus entered the house of Archie Maxwell, we inspect the first room and take everything of value, also after reading the diary of the owner of the house in which there will be two options for the code from the safe, the correct one 776 . To find the safe itself, we go down to the first floor and neutralize the person standing there, after which we open the locked door leading to the basement. Going down the stairs we will see a door on the right, and a ventilation grate on the left, after going through the door we will get into a room with a safe in which Basso's horse is stored, but before opening it we turn off the trap. If we climb through the ventilation we get into a small room, there you can find four buttons on the walls under the ceiling, shoot them with arrows, open the hatches from above and below to go down, shoot at the beam from above with a rope arrow. Lots of valuables can be found in the room below, including the Motley Bracelet trophy.
hangman's pen
Now let's go to the executioner's house to find Basso's pen there. Having reached the place, we climb onto the building opposite the executioner's house, from here you can shoot with a rope arrow at the marked beam on the executioner's house, then, after crossing the beam to the executioner's house, you need to lower part of the upper tier on the left side, for this, turning to the right, look for a panel on the wall of the house ( same as for disabling traps). Having thus reached the previously stretched rope, jumping on it, we will get to the window we need. Having climbed through the window into the “gallows room”, we examine the room by activating one of the books on the bookshelf, opening a small cache, where, among other things, we will find Basso’s pen.
A matter of life and death
To fulfill this order, you need to get to Market Street through the southern part of Baron Avenue. Once at the desired building, we pass under the arch on the left. There, on top, you will see an open hatch into which you can shoot a rope arrow. Having risen upstairs, we will get into the “Customs of the Guard” room, moving towards the locked door we go around the traps on the floor. Having cracked the lock and entered the next room in which we examine all the drawers and cabinets in one of which we will find an urn with ashes. The remaining orders are sent to the Southern Quarter.
look both ways
To complete this order, you will need to steal a telescope, everything is simple here, having reached the desired building, we climb inside through the window marked with a marker. Inside, to open the door, you need to put the corpse on the illuminated panel (on the floor next to the door), then we go into the opened cache and open the panel on the wall, thus unlocking the door we need. Having opened the lock, we pass into the room where we go down the rope, there in the drawer of the bedside table we will find a telescope, more like a spyglass.
Covered cargo
This time you will need to steal the guards' registration documents, having reached the place we will get to the small area “Fish Market”, which should be cleared from the guards (although not necessarily), while beingware of dogs. Before climbing into the desired building, break open the panel on its wall, then returning to the alley from which you came, with the help of a rope arrow, climb onto the opposite building, its upper tier, you can enter the “guard station”. After searching the room, among other things, we will find a picture outside of which there will be a switch, after the picture leaves, a button will appear by clicking on which you will find a cache with the trade declaration of the “White Sail” in the floor of the room.
Way to Wealth
This order will be a continuation of the previous one, we cross the “Fish Market” and climb the rope to the upper tier of the building, along which we will reach the marked window. Climbing inside, we will get into the cantor of the “White Sail”, here, after examining the room, we will find the desired document “trade routes of the White Sail”, it will be on a small platform at the far end of the room, you can get to it by a rope, having previously fired a rope arrow in the beam under the ceiling.
Royal luxury
To fulfill this order, we go to the Skinmarket, the first thing you will need to do is climb into the window of the upper floor by a rope, but you can’t jump to it from the street. So you need to enter the building through the door (if you stand opposite the windows, then the entrance is on the left side). There will be an open window in the room through which we can jump to the rope along which we will get to the room we need. Having found the corpse of Baby Lucy inside, we take the note lying next to her, after which we get out of the building in the same way that we got inside. Going out into the street, we climb to the upper tier, along which we will get to the marked window, climbing into which we will get into a room with a crying woman and a man’s corpse, our task is to pick up the “Comfort Necklace” from the table.
shark bait
The desired building will be in the “Eel's Dead End”, having reached the marked window by the rope and entering the room, crouching, we go forward so that we are not hooked by the trap. There will be a safe in the wall on the right, but first you need to turn off the trap, for this we go to the end of the corridor and open the closet, inside there will be a vase that we need to break. In the wall behind the vase, we find a button that opens the door to the right of the cabinet. In the room behind the door, it will be possible to neutralize the trap. We return to the safe and, having opened it, we take away the pocket watch lying inside, on this the order will be completed.
Chapter 6
loner
And so, having reached the Norcrest estate, we will find ourselves in the courtyard, from here we need to penetrate the estate. Having reached the front entrance, we will find out that in addition to the guards, a barricaded door will interfere with us, so we will have to go around. We start bypassing the mansion on the left side until we come across the entrance to the basement (except for the basement, you can get into the mansion through the attic). Having gone down, we open the locked door and then we pass along the corridor to the blockage of boxes and barrels through which we will need to squeeze through. Next, we climb the stairs and go through the door on falling into the corridor with traps that we first turn off. Having passed along the corridor to the wine cellar, we climb up the stairs, thus hitting the first floor of the mansion.
When viewing Thief 2014 walkthrough video to switch between videos, use the "Playlist" tab, and if the video helped or liked it, do not forget to put "likes")) ...
Trying not to catch the eye of the guards, if you want to get a bonus to the reward for the task, we inspect all the rooms on the first floor. In one of the rooms there will be a safe, the code for it 889 can be learned from a note that is in one of the guards in the library, on the same floor. In addition, in one of the rooms you can find a letter that talks about a secret vault on the second floor of the mansion. The plan of the mansion showing the secret vault can be found in the library room on the second floor. Having finished inspecting the first floor, we move along one of the stairs to the second where we also check all the rooms. The traps in the corridor can be turned off using panels on the wall with healthy horns, one of them can be reached by climbing the ledge along the closet, the second one can be reached through the ventilation from the next room.
The main goal on the second floor will be the search for a secret vault, the entrance to it is located behind a picture with lions, which can be found in one of the corridors. In front of the picture there will be a trap that is also turned off using the panel under the ceiling. Turning off the trap, we examine the picture by activating a couple of hidden switches, after which we get into the vault. Inside we are waiting for a device like a safe with two locks, in order to open it you need to rotate the rings, set the pattern on one side (the coat of arms should be red, as in the screenshot), there will be no pattern on the second side, so you have to look into the crack in the lock looking to the load was lowered through the recesses in the rings. The cache will open when both lion heads turn towards the exit. Garrett's reward will be a healthy Lion's Heart gem. We get out of the vault in the same way as we got inside.
After examining the second floor, before going to the baron, you can look into the attic, unless of course you started from there. As a result, having reached the marked door and passing through it we will get into the research tower, climbing into the ventilation on the right side we will get into the mine in which we climb up through the pipes. Once in a room with an elevator, we climb up the iron structures, since the stairs will be destroyed. As a result, having reached the shelter of Norcrest, we watch a video after which we find ourselves in an elevator, leaving which we go to the Ceremonial Hall. Moving in the indicated direction, we will find ourselves in a room with another safe, the code for it will be 017 , you can learn about it from the note “List of Works” lying in the ventilation shaft leading from this room. As a result, having reached the Ceremonial Hall, or rather what was left of it, we are looking for a secret passage to the laboratory.
To get into the secret passage, you will need to press a button on one of the walls of the Ceremonial Hall, after passing along the corridor we will reach the door that opens with a lever. Going down the stairs we find ourselves in the Baron's laboratory, we continue to go down the spiral staircase until we find ourselves in a room with a fragment of the Primal stone thrust into some device, our task is to get it from there. But before that, climb to the very top, from there, along the rope, you can get into the cache where you will find the trophy “In memory of the braggart”. To start the device with a stone, you need to activate the lever to the left of it, after which, having risen to the platform on the right, rotate the two valves. With the left we set the position of the metal rings (opposite the crack, so that they begin to shake), and with the right valve we set the pressure until the glass cracks. We repeat the procedure two more times, shifting the rings to new cracks. As a result, breaking the glass, we pass to the stone and then watch a short video.
At the end of the cut-scene, we will find ourselves in the sewers from which we need to get out, once on the pier we get a new task “Cross the bridge”. To get across the river, we shoot at the winch holding the overturned boat. Having crossed to the other side, we run in the indicated direction, climbing onto the bridge and at the same time trying not to fall down or fall somewhere, and also not to burn out. As a result, having overcome all the obstacles on the way, we will get out of the collapsing bridge, thus completing the passage of this chapter.
Order: Additional attraction
Another task from Vittori, who hangs out at Serena's Rest, this time we will need to go to the guard station and free the "woman" named Isabella. Having penetrated into the area, in which all the guards were killed by the Lightforged, we go up through the boxes, having penetrated into the first room, we neutralize the enemy standing in it, we collect everything of value, including the contents of the safe. Leaving the room, we will find ourselves on the second floor of the site, here, first of all, we need to neutralize the three Illuminated, and then inspect all the offices, especially the door into which one of the opponents is trying to open, in it we will find the key to the cells. Having finished on the second floor, we go down to the first, where we also neutralize the illuminated ones and inspect all the rooms, in one of which we can find the “Snow White Lady” trophy (in the storage chest). Also on the first floor you can find a memorial plaque “Guard Section”.
Then we go down the stairs to the basement and go into the room with the cameras, the door to which opens with the same key from the cells found on the second floor. Most of the cells will be open, criminals will sit in a couple of locked ones, but Isabella is in the one marked with a marker (either a man in a dress, or a bearded aunt). In general, after Isabella loses consciousness, drag her or him to the marked exit. On the way, we will come across a couple of thieves who have climbed into the site, you can deal with them, for example, by shooting a burning arrow into a barrel of gunpowder, next to which they will stand. In general, having cleared the path, we get out of the site.
Basso's orders
stonemarket witch
Another batch of orders from Basso at the Lame Burrique, three out of four orders are carried out in the Grandmauden area. Having gone forward along the burning street, we turn right into the alley, where we climb onto the roof along the wall on the right. Moving along the roofs in the indicated direction, we will get to Podkamenshchikov Street, in order to get to the desired building we will have to go down from the roof to the street. Our goal is to get into the basement of the pharmacy building, this can be done through the ventilation grate, at a dead end nearby. The ceremonial blade will lie on the nightstand next to the book of pagan rites.
point of no return
Having got out of the basement of the pharmacy, we just go to the end along Podkamenshchikov Street. To open the door to the building you need, use the panel on the left on the threshold. Having gone inside, first of all we turn off the trap in the picture, after which we look for a switch behind the picture that opens the safe. In the safe there will be a button by pressing which we will find a cache in the floor, taking everything valuable, we leave the building.
General's trinket
Returning to the burning street, we turn left from it, it will be easiest to go along the upper tier, although in the end you still have to go down. Having reached the desired turn, we go down the stairs to the basement of the Shemenov Blades building. In the room, first of all, we deal with two Illuminated, and then we open the next door. Behind the door in a small room there will be a chest from which we need to pick up a new general's medal.
Rule of thumb
To fulfill this order, we need to go to the Southern Quarter, having reached the right place, we penetrate into the marked house through the hatch from above, launching a rope arrow into the beam under the ceiling. Having risen upstairs, we climb into the building through the window, and after getting inside we neutralize Jeb Chox, after which it remains to pick up silver scissors from his body.
Work Order: Broken Heart
We continue to collect spare parts for the mechanical man that Hector collects. Having taken the order, we go to the Grandmaud area on Podkamenshchikov street to the Watchmaker's house. Having penetrated inside, the first thing to do is to go to the second floor and inspect all the rooms there, taking everything valuable from them (in the closet of one of the rooms you can find the “Brilliant Lady” trophy). having examined the second floor, we return to the first, and we pass from the corridor into the room with the bust installed in its center. On the reverse side, under the bust, there will be a button that you need to press, after which the wall in front of you will move. Next, we pass into the room with a fireplace on the right side, to the left of the fireplace there will now be a door after passing through which we will find ourselves in another room, there will be another button on one of the walls, press it. Now we return to the room with the fireplace and go from there to the room to the right of the fireplace. Here, too, in one of the walls there will be a door behind which in the next room we again press the button in the wall, thus moving the wall in the next room.
After going into the room with a chess table, we turn right into a room with a bookshelf on which you need to find another switch, this time in the form of a book that will move the entire shelf, behind which there will be another button. Now we return to the previous room, and from there we pass to the kitchen. From the kitchen you can now get into the pantry, where to the left of the picture hanging on the wall there will be a button that opens the door to the elevator. We go up the elevator, go down the corridor and open the locked door. In the room near the candles there will be another button that opens the puzzle by solving which we can get to the second elevator. In order for the door to open, you need to press certain parts of the pentagram, as a result, it will all be recessed into the wall, which in turn will open the door (see which parts to click on in the video walkthrough or in the screenshot.
Having reached the elevator, we go down on it to the Watchmaker's underground workshop, there in a small room on the floor there will be sixteen plates with symbols that are activated by the plate when entering the room. To get to the end of the room, you need to walk on certain slabs (you can understand which ones from the “Project Pendulum” notes lying around the house or look at the screenshot). If you step on the wrong slabs, the grate in front of the “heart” will close and you will need to return to the entrance to activate the puzzle again. Well, when you get to the “heart” and take it, return to the Watchmaker's house through the basement and go outside, this order will be completed.
Chapter 7
secret city
To start the chapter, we go to the Grandmauden area, where we pass to the old cathedral. Once on the territory of the Old Quarter, the first thing we do is make our way to the cathedral building, this can be done in several ways, for example, through a locked door in the wall in front of the cathedral. There will be a lot of guards at the entrance to the cathedral itself, so the first thing we do is get rid of the illuminated ones. And so, having cleared the area in front of the main entrance, we climb onto the scaffolding from which you can enter the building in the same way in several ways, for example, bypassing it on the left side. In my case, we managed to get into the cathedral through the bell tower, where, having risen to the very top, we make our way through a narrow passage into the building of the cathedral itself.
Next, our task will be to go down into the failure, for this, bypassing the edge of the failure counterclockwise, we will eventually get to the supply elevator on which we will go down, on the way to the elevator it will be full of illuminated ones, so if you go through the game covertly, you will have to be careful. Having called the elevator with the help of the lever, we go down on it, and after stopping we jump onto the pipe on the opposite wall. Next, we climb the pipes and grates on the wall, from the last grate you will need to go down on a hook (holding E). Now we will need to go upstairs, to the entrance to the city of the Lightforged, we climb through the labyrinth of tunnels, stairs and boxes, neutralizing the guards along the way, eventually finding ourselves at the next narrow passage, squeezing through which we continue to move in the indicated direction.
Now on the way we will come across creatures from the shelter (people changed by primal), it is especially hard to fight with them, but light can kill them, so turn on the light, set fire to torches, puddles of fuel and the like. On the way, we will also come across a pair of healthy gates, in order to open them you need to rotate the valve next to them. Having reached the lair of the illuminated, you can replenish the supply of arrows and food in a small store, after which we go to the Rotunda, where Orion is engaged in healing. The entrance to the Rotunda will be a small window to which we need to get by dealing with all the illuminated ones along the way, well, or bypassing them, since there is an opportunity.
Having entered the Rotunda, we open another gate with the help of a valve and climb the stairs, after which we watch another video, during which we will need to walk through the labyrinth of statues, collecting fragments of primal, as well as taking the medallion from Orion. At the end of the video, we will find ourselves in a room for a couple with the Catcher of Thieves. Our task is to get to the exit from the premises, fight with the general or leave him alone, decide for yourself. To get out of the room you need to open the gate, again with the help of valves located in this hall in a circle. In addition, when passing the seventh chapter, you can find a safe, the code from which 673 .
Chapter 8
morning light
We begin to pursue Orion, who dragged Erin somewhere, moving along the corridor in the indicated direction, we will again stumble upon the changed ones, burn them with light and pass on with fire. Having got out to the surface, we will see a huge ship on which we need to get through. Having cleared the first room after the tunnels from the illuminated ones, we climb up the stairs, eventually getting out into the street, we jump down to the rails, where it will be possible to replenish ammunition from the merchant. Next, we climb along the rails to the platform from above, there, having neutralized a couple of illuminated ones, we climb onto the ledge from which we shoot with a rope arrow at the beam at the very top of the ship. As a result, having climbed the rope, we will get on the ship (one of the ways).
Next, we go down the rope hanging in the mine to its very bottom, and from there we will get into a room with a pipe along the wall along which we will need to climb into the next room, climbing through pipes and grates. As a result, having jumped from the pipe, we pass in the indicated direction, having neutralized several illuminated ones in a room with two healthy wheels. Next, we climb the stairs to the platform above from where, climbing the wall, we get to the roof of the elevator. Having got out on the “middle deck”, passing through which we neutralize the guard standing at the door. Having opened the door lock, we pass along the corridor to the room in which we watch the next video.
At the end of the video, we follow the trail of Erin from luminous poppies, having found her on the loading deck, we will need to get close to the girl without falling into her eyes, in general, we carefully approach Erin sitting in poppies and quickly press E until she notices us. After that, we hunt down Erin again, in the process, lighting up all the lights along the way to get rid of the changed primals. Once in the sanctuary, we approach Erin, and after she throws Garrett back, you will need to collect three fragments scattered around the hall, and do it quickly, as flashes of light will take away health (so you should hide from them in the shadows). Having collected all the fragments, we again approach Erin and watch the final video. On this Walkthrough Thief 2014 will be finished.
As we said before Thief (2014) reveals its maximum potential not at an easy or medium level of difficulty, and not even at the “master”. It is much more interesting to customize Thief for yourself and play on the Custom difficulty level. Concentration, special arrows, food, and poppy flowers are all for the weak. Whether it's when you can not inflict damage on your opponents, kill or stun someone. Particularly sophisticated users can turn on the Iron Man mode, where it is worth dying at least once, and the passage of the level will have to start over. In general, how to complicate your life, you choose - our walkthrough will help you complete the game to the end.
Prologue
Garret, along with Erin, must get to the mansion of Baron Nordcrest, where there is a primal stone, for which someone is willing to pay a lot.
Tips: even the prologue in the game must be played with the utmost care. Pay attention to the situations that the main character will get into, and remember all the meanings of the buttons. This affects the speed of the game.
Basic Rules: it is advisable to move only in a squat position so as not to make noise. Watch your step and slow down when you walk over broken glass, behind a guard, or past birds. Never make sudden movements if a dog or a crow is nearby - they will reveal your location. Always close the doors behind you - the guards pay attention to such a seemingly trifle. Never neglect the opportunity to turn off the light or snuff out the candle. This will help you hide even in the most unusual places. Keep track of the number of arrows in your arsenal so that at the most critical moment you do not have to reinvent the wheel. And finally, after going through the prologue, focus on accumulating money with which you can buy boring tools: at least wire cutters, a wrench and a razor.
Chapter 1 "Blockade"
A year has passed since the accident. Garrett has gained strength and is now ready to return home to the tower.
Chapter 2 "Ashes to Ashes"
Garrett receives a message from Bass, who has a task for our hero. All he had to do was remove the ring from the dead aristocrat's corpse.
Chapter 3 "Dirty Secrets"
The customer wished to personally meet Garrett. This time, a servant of the people named Orion instructs a thief to steal an ancient book from the library, which is located deep underground.
Tips: In the third chapter, the main difficulty lies in the last segment of the level, when you run along the roof and suddenly fall into the barn. As soon as you are in the room, head to the locker. After a few seconds, a soldier with a torch will enter and begin to inspect the room. After making a couple of circles, he will calm down and take a standard position. The problem is that it will be right in front of the exit. Therefore, you need to divert his attention. For example, try to put out his torch. Then he, along with his partner, will begin to rush around the yard, trying to find out who dared to put out his torch. At this point, you should sneak into the small opening on the right. Next, you need to divert the attention of a soldier who looms in the distance. To do this, put out the torch behind him, and then quickly move along the wall, go around the cart and jump into the window. All you have to do is go to the roof.
Chapter 4 "A Friend in Need"
While Garret was jumping across rooftops and exploring the underworld, Bass was caught by Thief Catcher and imprisoned. You have to save a friend and deliver him to a safe place.
After you get to the territory of the mansion, move on the right side. If you raise your head, you will see a ladder, which will be fixed by a certain mechanism. One bow shot at the mechanism will solve all your problems.
Having made your way upstairs, passing the architect's wife and her maid, head to the other end of the building, where there is a room with a secret passage. The territory is patrolled by a soldier, a servant acts as an assistant. You first need to quietly enter the room and climb onto the closet. Then move to the other end of the room and throw the bottle at the place where you came from. As soon as the guard goes to the sound, you jump to the floor and quickly look for the right book, which will open the passage to the secret room.
Chapter 5 "The Outcasts"
Garrett and Baas travel to the island where Moira's orphanage is located to find information about Erin. Something tells Garret that she is not dead.
Don't forget to purchase wire cutters before Chapter 5, otherwise you won't be able to complete the mission at Moira's Asylum. The only difficulty that may arise during the passage of this chapter is when you have to slip through the dungeon past two monsters. There is only one option - run, run and run again.
Chapter 6 "Single"
Garret suspects that Baron Nordcrest has Erin hidden away. He goes to his mansion to find out.
Breaking into the mansion is a special adventure. There is only one way: at the very beginning, follow the guard. Wait for him to start going down the stairs and jump up. Ahead you will see two guards who, after a nice friendly conversation, will run to take up defensive positions. The difficulty lies in the fact that you need to choose the moment when both guards will look not in your direction. Only then can you start climbing the stairs. It is very important to move slowly at first, as soon as the dog notices you, legs in hands - and forward. In the garden you will be met by 3 more guards. One bottle can distract their attention. Then jump over the railing and calmly pick the lock.
You should only have trouble at the end of Chapter 6, when you will need to get past a group of aggressively-minded guards. It is necessary to act here slowly and very carefully. So, wait until the first guard goes around the corner, and only then open the door. Move to the left, stop at the turn. A second guard will appear in front of you. Take your time to reach the stairs, and then jump over the railing to the ledge. Wait for the guards to go to their corners and jump down. Seconds will decide here. Move silently - there are a lot of fragments. If you don't find anyone around the corner, run as fast as you can, first straight ahead and then to the left. In the next room, only one guard will be waiting for you. It is very important to slip past him and sneak into a small opening, which will also be on the left. After that, head to the far right corner. There you will find a brick that will open a secret door. After that, you'll be on your own.
Chapter 7 "Secret City"
It turned out that the baron was out of business. Orion is the one who is going to destroy the City and its inhabitants. It was he who managed to capture Erin and hide her in a secret city.
The most difficult thing in the seventh chapter is getting into the territory of the secret city. The difficulty lies in the fact that it will be quite difficult for you to get past a large group of guards who control almost all the moves and exits. However, not everything is so hopeless.
So, as soon as you get to the starting location of chapter 7, move straight all the time until you see a door in front of you. Hack it and move on. You will appear in the courtyard on the right side of the gate. Enter the house and silently move to the second exit. Carefully take the bottle from the table near the sleeping guard and move straight to the wall. As soon as the guard who makes the round is far from you, throw the bottle. Then the guard who is blocking your path will go to check what happened there. At this moment, climb up rather, dodge the arrows, and then jump into the opening. After that, ring the bell and run behind the boxes. As soon as the guards go to see who it was there who asked to open the gate, sneak past them and move to the right. There you will see a sleeping guard who is actually pretending. You have exactly one second to hide behind the next column. Nobody will find you there. When the second guard that makes the round moves to the other end of the corridor, do two quick dashes to the left, and then jump down. Wait for the civilian to move away from the torch and put it out. The guard who tried to find you will go to the elevator and look down for a long time. You need to move quickly and very quietly. There is nothing difficult in this. Then call the elevator. As soon as he arrives, jump into him and press the button.
Only the Thief Catcher will cause more difficulties, as it will shoot explosive arrows. As soon as the battle starts, head to the left side of the tower, where one of the two valves is located. As soon as you open one part of the mechanism, move to another valve. However, your path to it depends on which direction the Thief Catcher starts shooting. As soon as you turn the second valve, get ready for the boss to head towards you. Run away from him so that he does not notice you. As soon as you find yourself behind him, put out the light and calmly pick the lock. You have no right to make a mistake, otherwise you will have to jump all over the space again and hide from the Thief Catcher. When the door opens, go ahead. Your opponent will die under a pile of stones.
However, you can kill him. Then just shoot him in the head. How many arrows it will take is unknown. But the more you have, the better.
Chapter 8 "Morning Light"
Orion and Erin managed to escape to the ship, which is due to go to sea very soon. Garrett must catch the ship and save the girl.
In the eighth chapter, you can describe each step, in principle. Here, opponents are much smarter than their predecessors - you can expect anything from them. I personally saw how one level was passed in two or even three different ways just because in one case one guard was standing, in the other he walked along a certain route, and in the third he simply froze. Why this depends is unclear. So there is one option - watch our walkthrough carefully and save yourself a lot of time.


